Tambour Embroidery is an embroidery technique that uses a hook to create a chain stitch instead of the traditional needle and thread. Tambour has been around since the 18th century, when it was considered a pastime that could be done while socializing. It is believed that Tambour came from the Indian embroidery technique Aari beading, the main differences being which side of the fabric the beadwork is applied to and the size and shape of the hook. During the 18th century, Tambour was used to make lace that was fashionable for the era. Today, we use Tambour embroidery in couture fashion, costumes for theater and film, and even in cosplay.
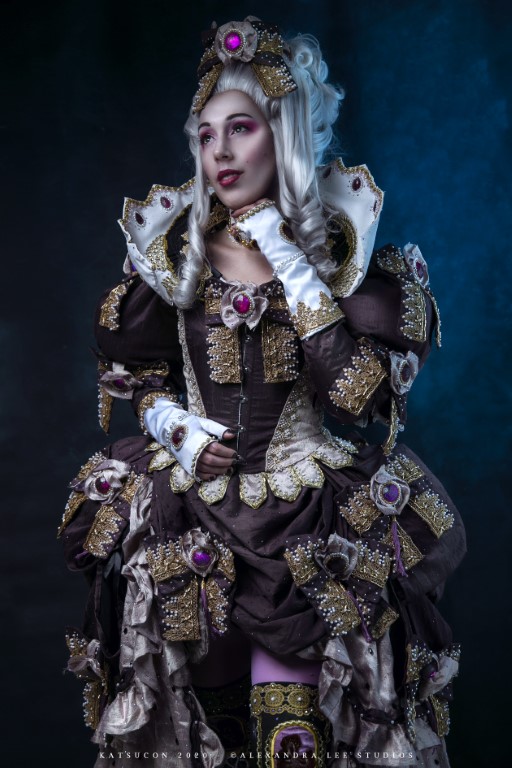
Tambour embroidery is a great choice for costume making and cosplay because once the embroiderer becomes comfortable with the technique, bead application becomes a speedy endeavor. Speed is the biggest benefit to Tambour embroidery, but the chain stitch allows for a higher quality embroidery piece overall.
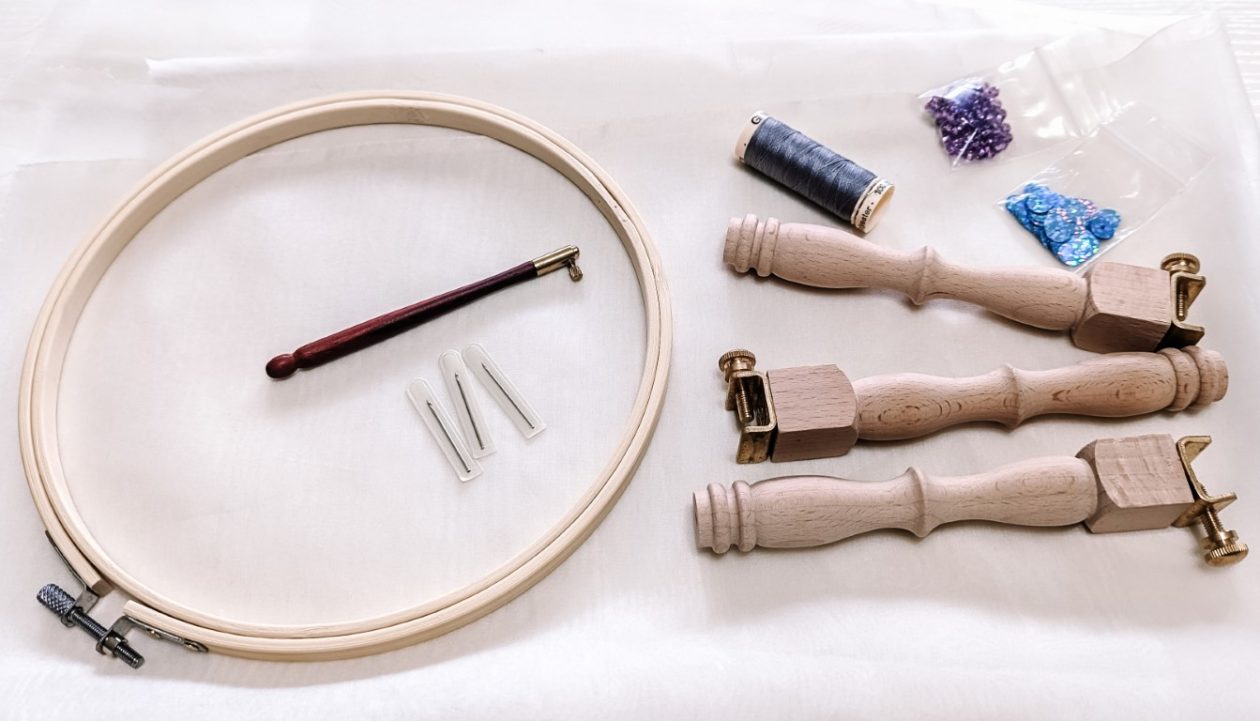
Here’s what you’ll need to get started.

The Tambour hook generally comes in 3 sizes: 70, 100, and 120. The 70 is most commonly used with beads, while the 120 can be used with embroidery thread to make lace or intricate embroidery pieces. Tambour embroidery requires both hands, so a hoop on a stand or an embroidery loom is recommended. Translucent fabrics like silk organza or embroidery tulle are recommended for starting; however, once you are comfortable with the technique, materials like silk taffeta, linen, or cotton can easily be used. High quality thread is key to easily creating a chain stitch with the hook. I prefer Gutermann All-Purpose Thread or Sulky Cotton Hand Embroidery Thread for my work. For beadwork, size 10 beads are a great size to fit over the hook and are easy to work with.
Planning your piece

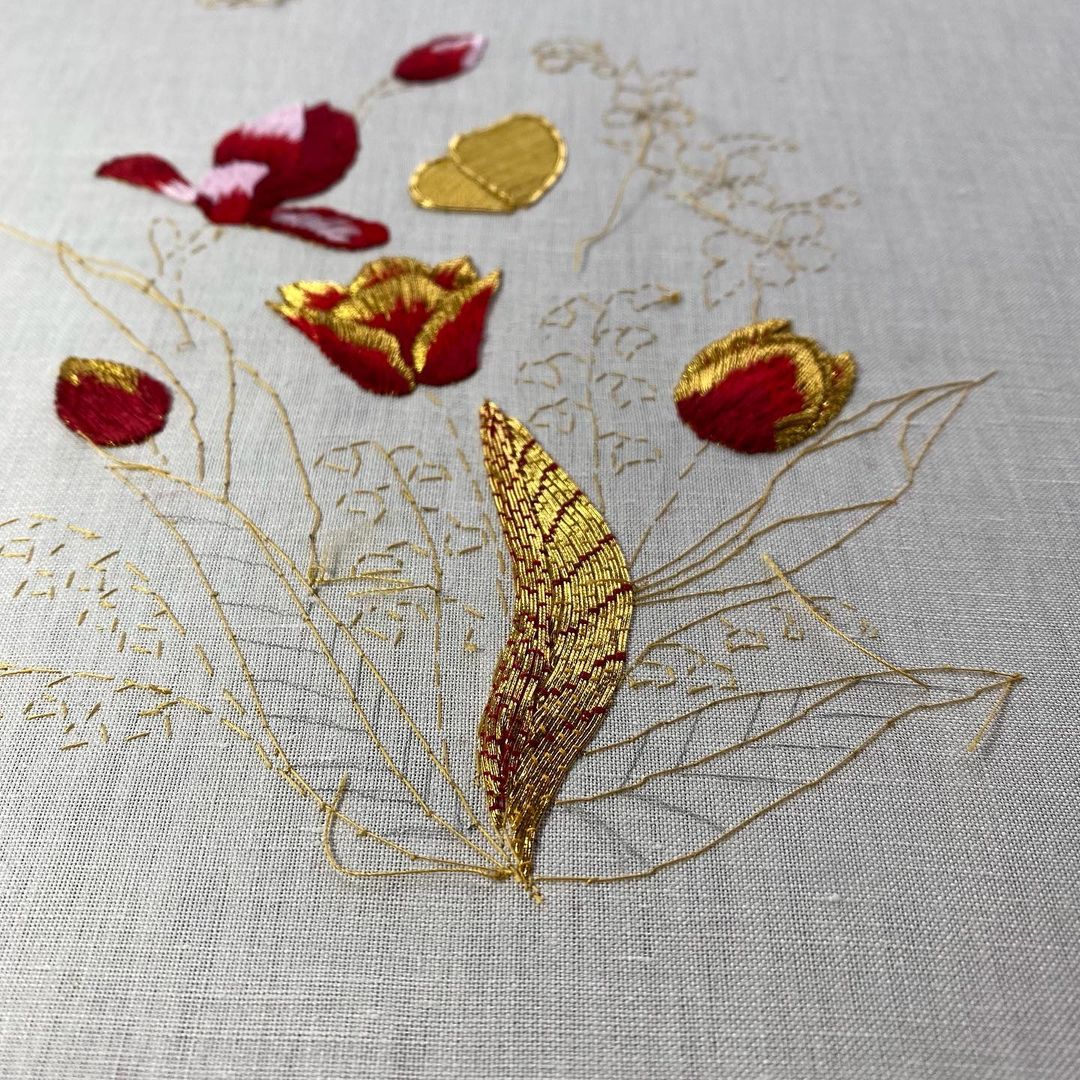
I’m currently working on Glinda’s Bubble Dress from the musical Wicked. The costume has over a hundred thousand sequins applied to it using tambour embroidery, and I’ll be using that as an example for preparing to create a piece for cosplay. My first steps for this process are to draft a pattern, make a mock-up, and perfect the pattern piece before I even think about the embroidery.
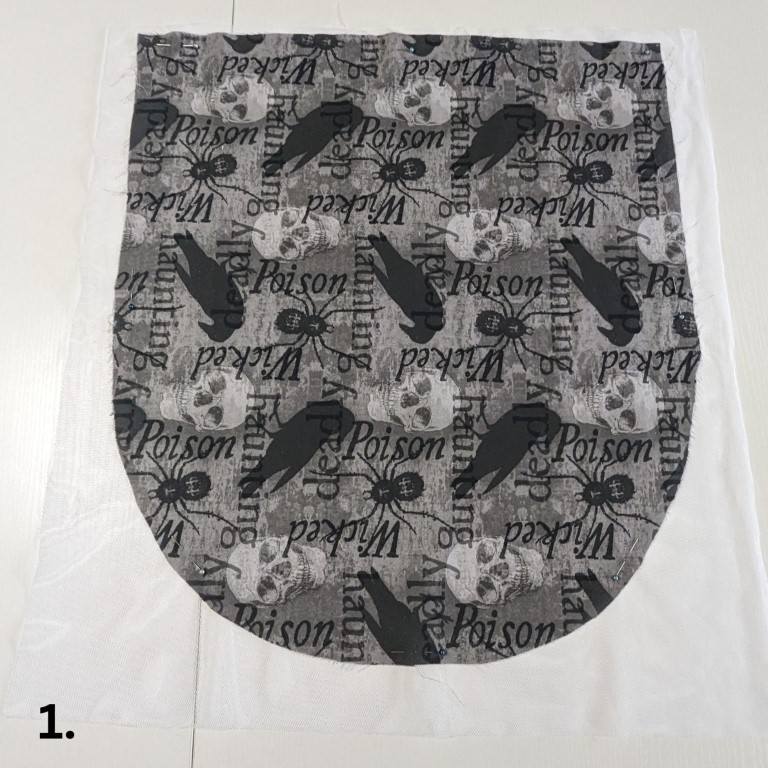
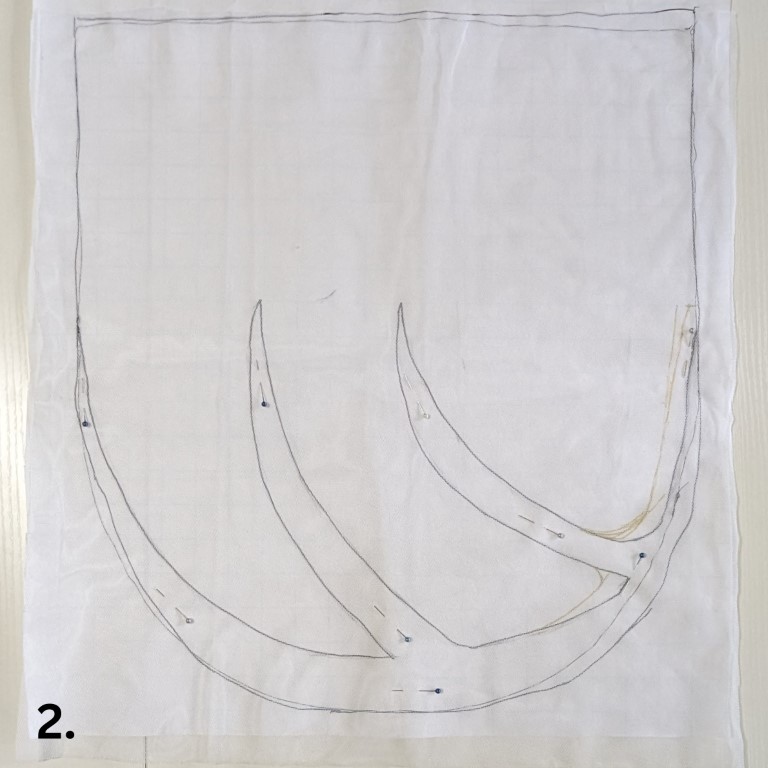
1. Now that I have my pattern, it’s time to figure out embroidery placement. To do this I pattern piece onto my fabric and cut a rectangular piece around the pattern, leaving at least an inch in every direction. The fabric I am using is called bobbinet, but silk organza and embroidery tulle are more commonly used for this.
2. Once my fabric is cut, I will baste around the piece so that I know my limitations once the piece is hooped. Now I can remove my pattern piece and, using my reference, I baste the outline of my embroidery. For Glinda, I decided to make a paper template so that I can ensure consistency with my petals. Pro Tip: if you use silk organza, you can just draw the piece on with a heat disappearing pen.
3. Now to hoop the fabric. Tambour is the French word for “drum” and that references how tight the material needs to be on the hoop in order to be successful at the technique. If the fabric is too loose then it will be difficult to bring the hook through the fabric and you can snag your thread or snag the fabric, so make this tight.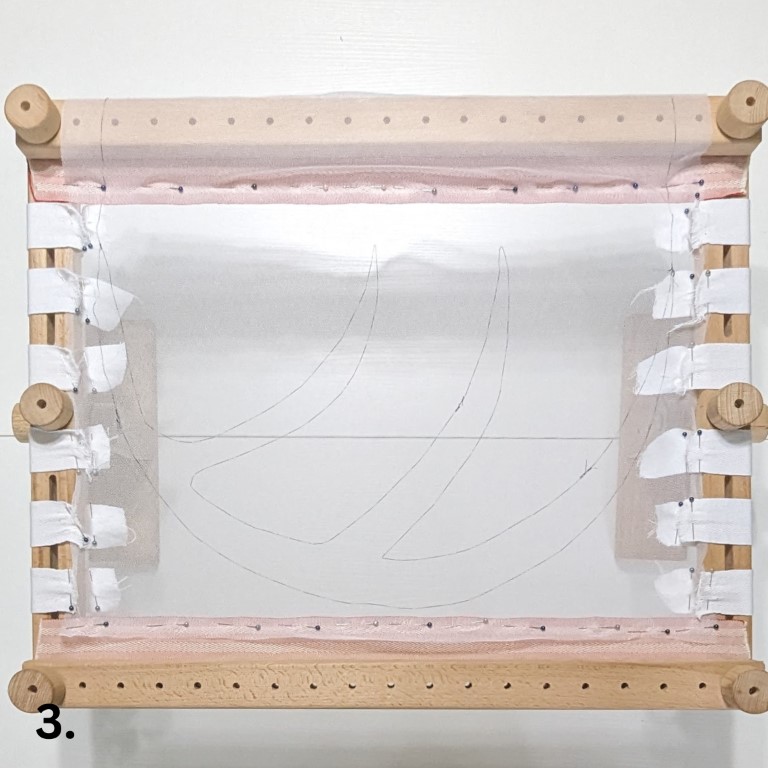
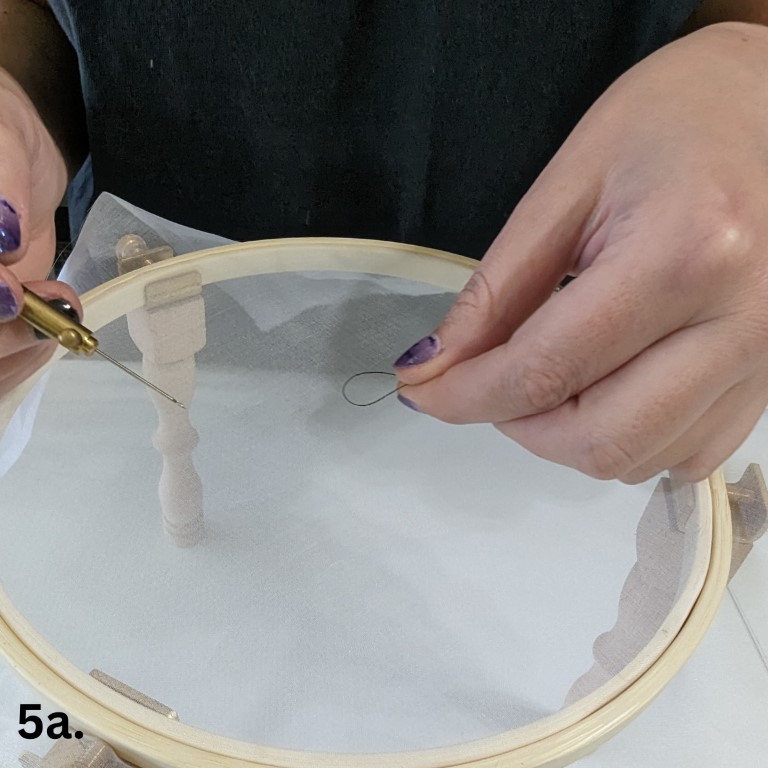
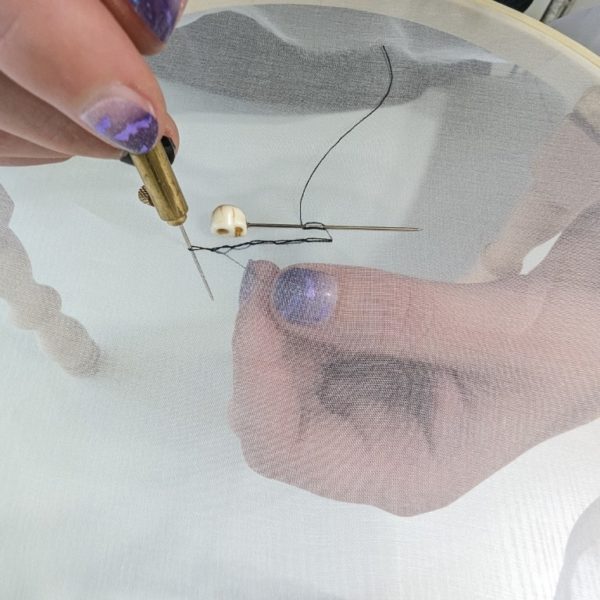
4. To put the hook and handle together, place the size 70 hook into the handle lining the eye of the hook up with the screw. This will help when you’re stitching so that you can see where your hook is.
5. In order to anchor the thread in the fabric, you have to learn the chain stitch. Make a loop with the thread in your left hand and bring it under your fabric.
With your hook in your right hand, bring your hook down through your fabric and hook your loop. Bring the thread through to the top of the fabric.
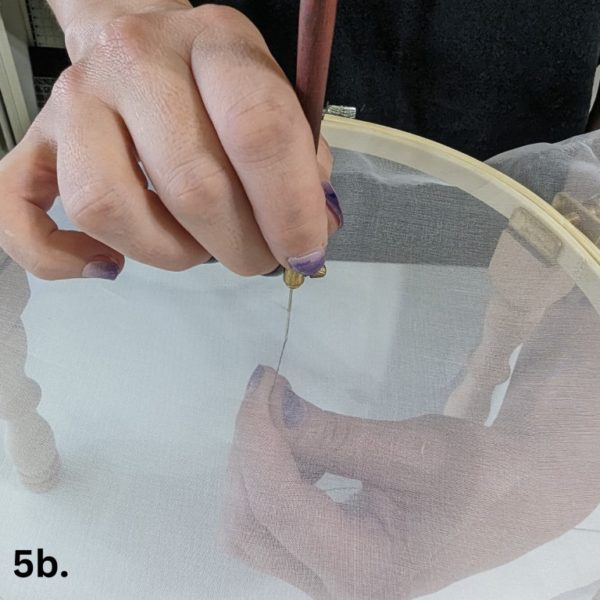
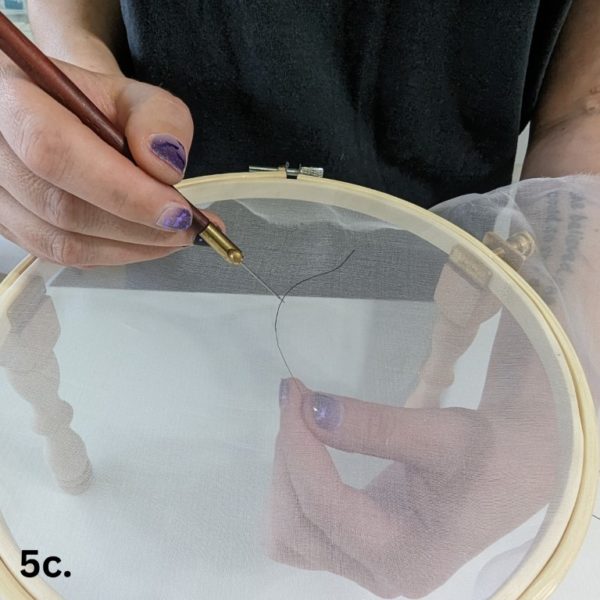
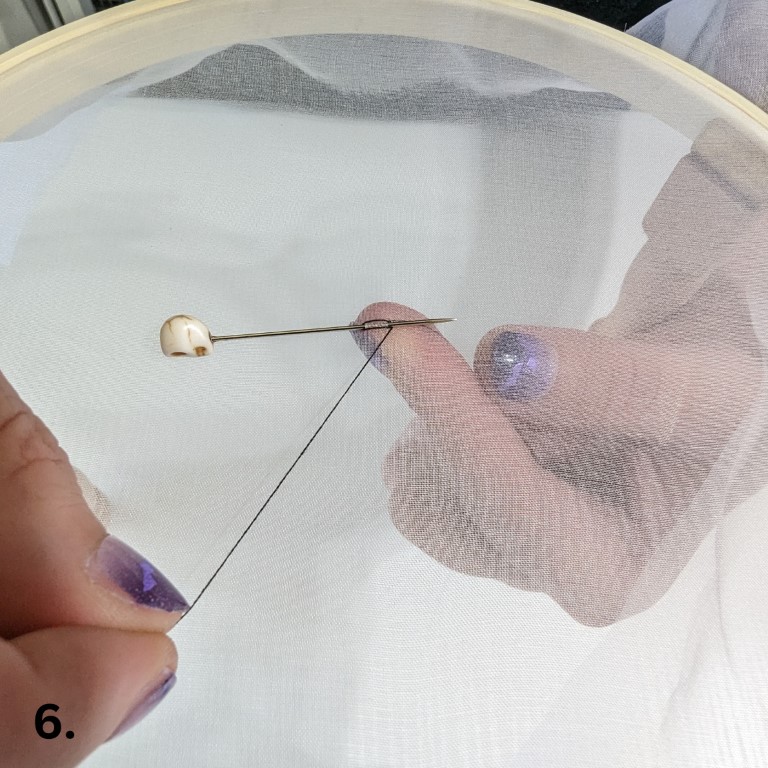
6. Now place a pin near the thread and wrap the thread around the pin. This will be a placeholder until you learn how to anchor your thread.
7. Using the screw on the handle as your guide, place the hook into your fabric facing 9 o’clock.
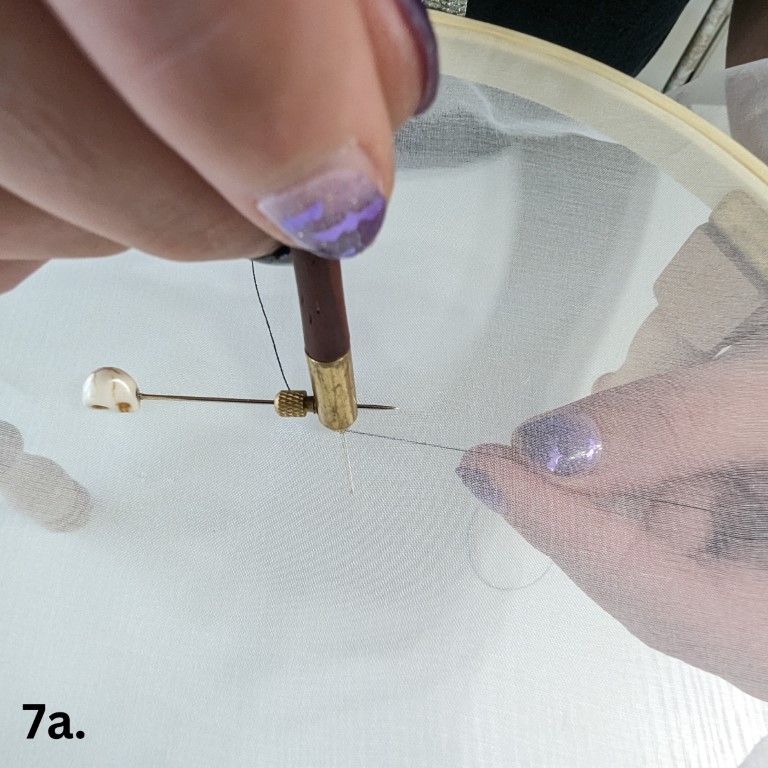
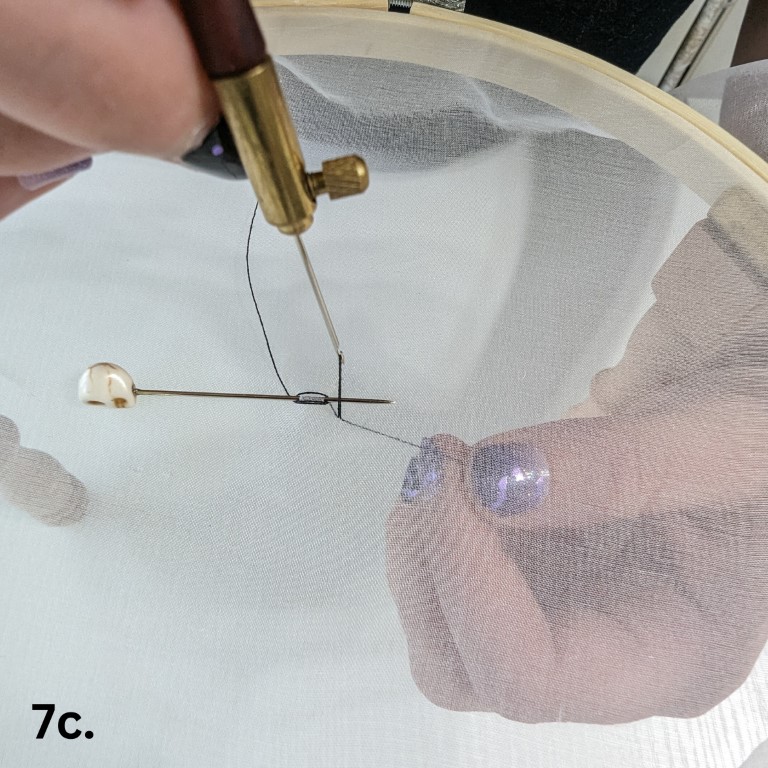
Wrap the thread around the hook counter clockwise. Turn the hook clockwise until you get to 3 o’clock.

With the hook perpendicular to the fabric, slightly loosen your grip on the thread from the bottom and pull the thread to the top of the fabric.
8. Come back to 9 o’clock a few millimeters away to the left and put your hook through the fabric. Repeat.
Now that you have learned the basic chain stitch you can build upon this skill to cast on/off, add beads from the top or the bottom, and ultimately create beautifully intricate embroidery pieces.
My full course on Tambour Embroidery is available at CaseyReneeCosplay and includes go-at-your-own-pace video tutorials on the chain stitch, casting on/off, transition stitches, beadwork, and more. The course is a one-time fee for perpetual access, and includes additions to the curriculum added each year. Participants will be emailed when the new lessons are added.
I’m always excited to see what you’re working on so feel free to tag me on Instagram or Facebook @caseyreneecosplay and as always, “Happy Embroidering!”
— Casey Renee | Cosplay and Sewing Educator
Like this post? Pin it!