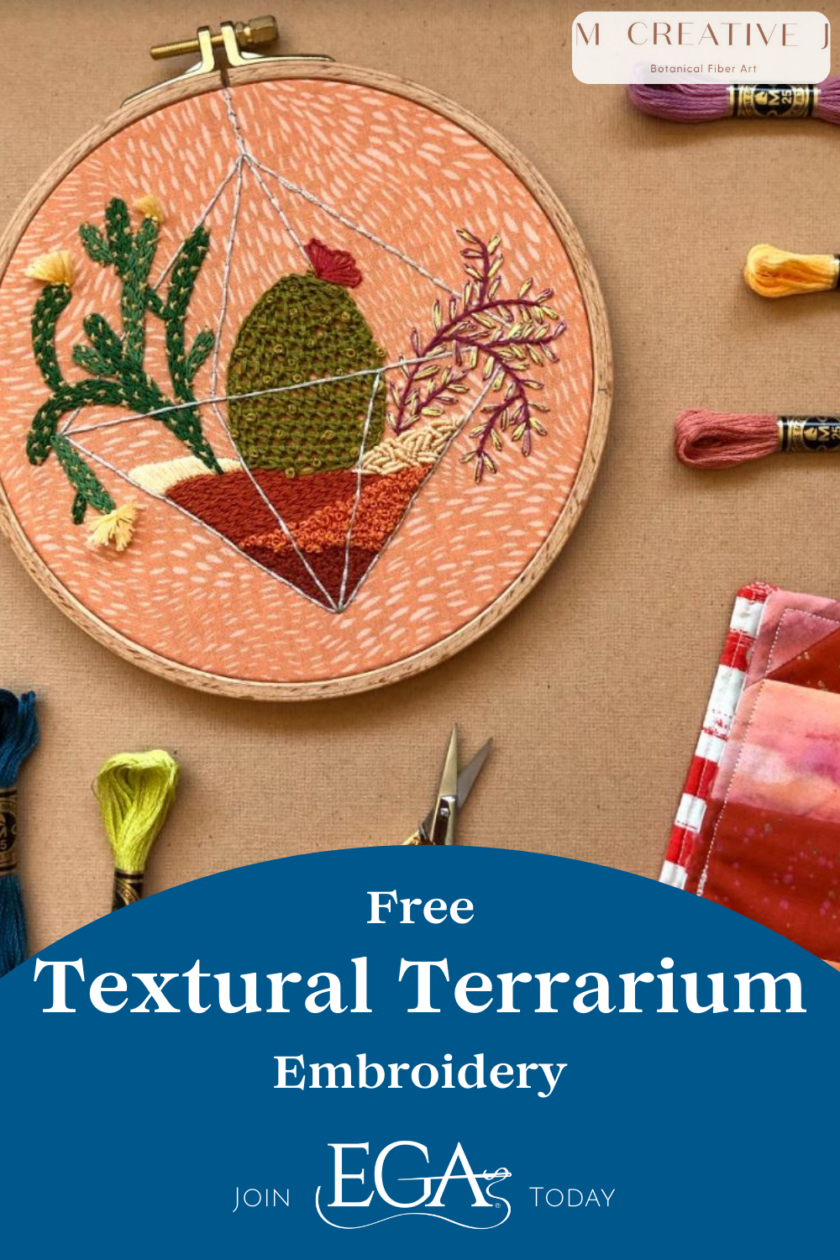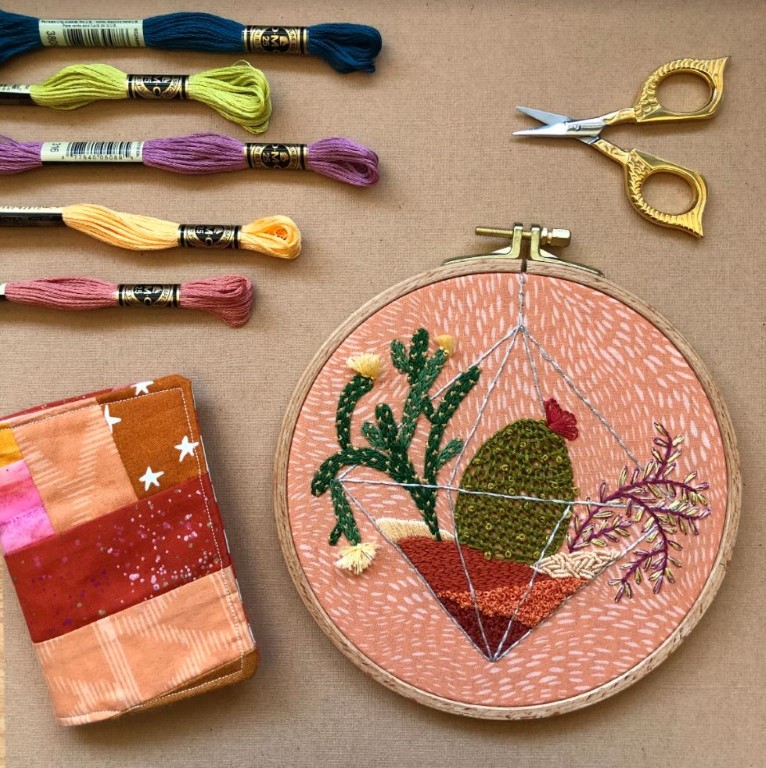
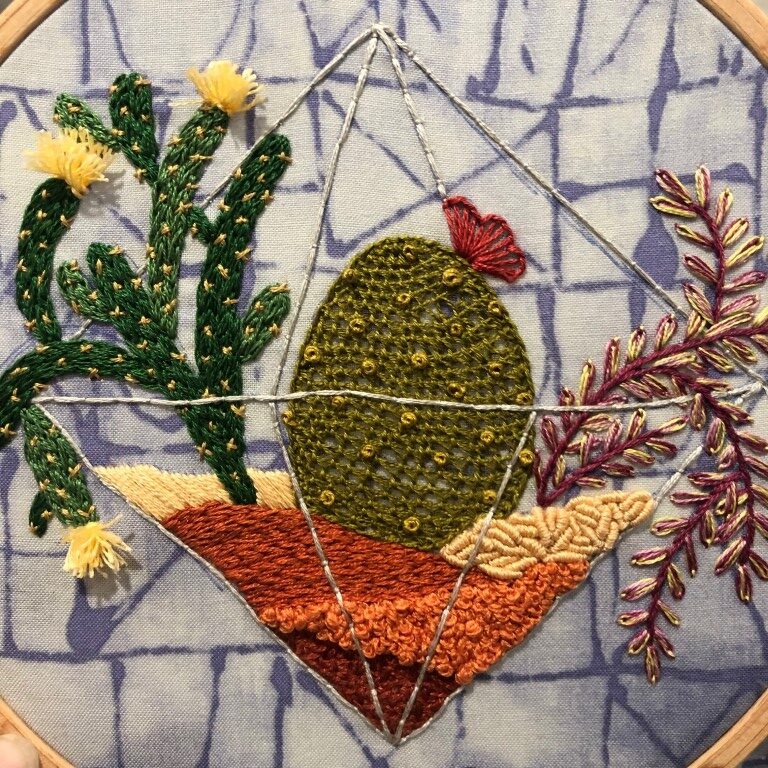
Stitch a textural terrarium with Melissa Galbraith of MCreativeJ. This textural terrarium project is a delightful hand embroidery sampler that covers 14 stitches. It’ll walk you through the basics as well as help you advance your stitching skills while creating delightful textures.
Embroidery Level
Intermediate
Materials and Instruments
• Textural Terrarium pattern – Register for EGA’s Needlework Network Newsletter to download!
• Cotton or linen fabric of your choice
• Scissors for needlework
• DMC #5 hand embroidery needle
• DMC embroidery thread – 22, 316, 648, 731, 832, 918, 920, 922, 986, 987, 3803, 3819, 3828, 3855, and 3856
• 6-inch embroidery hoop
• Instruments for transferring your design (the pattern details using a lightbox/well-lit window or a water soluble stabilizer as transfer methods.)
• Finishing materials: felt, sewing pins, pen, and a sawtooth hook
Stitches You Will Use
• Bullion Knot (video)
• Buttonhole Stitch (video)
• Chain Stitch (video)
• Couching Stitch (video)
• Cross Stitch (video)
• Detached Buttonhole Fill Stitch (video)
• French Knot (video)
• Lazy Daisy/Detached Chain Stitch (video)
• Reverse Chain Stitch (video)
• Satin Stitch (video)
• Seed Stitch (video)
• Stem Stitch (video)
• Turkey Work (video)
• Twisted Chain Stitch (video)
• Finishing in the hoop: running stitch and whip stitch (video)
Instructions
After placing the fabric in the hoop and transferring the design, it’s time to start stitching.
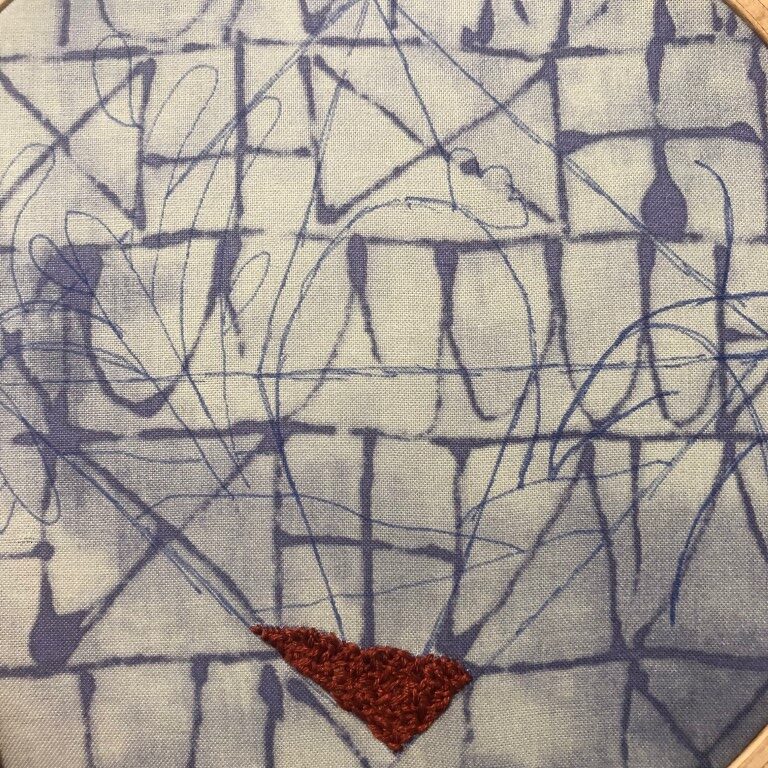
Begin by using 3 strands of DMC 918 and seed stitch to fill in the bottom layer of the terrarium. I love to overlap these stitches to create dense layers of texture.
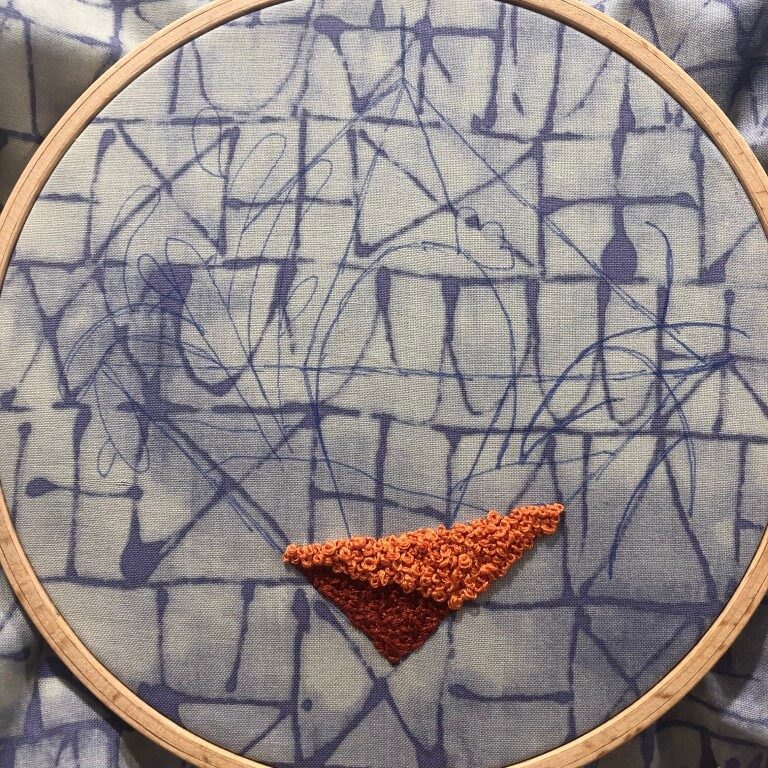
For the next layer of the terrarium, use 3 strands of DMC 922 and French knot. This is also a densely filled section of stitching. I like to vary the number of times I wrap my thread around my needle when making French knots. This varies the size of the knots and gives the section a popcorn-like texture.
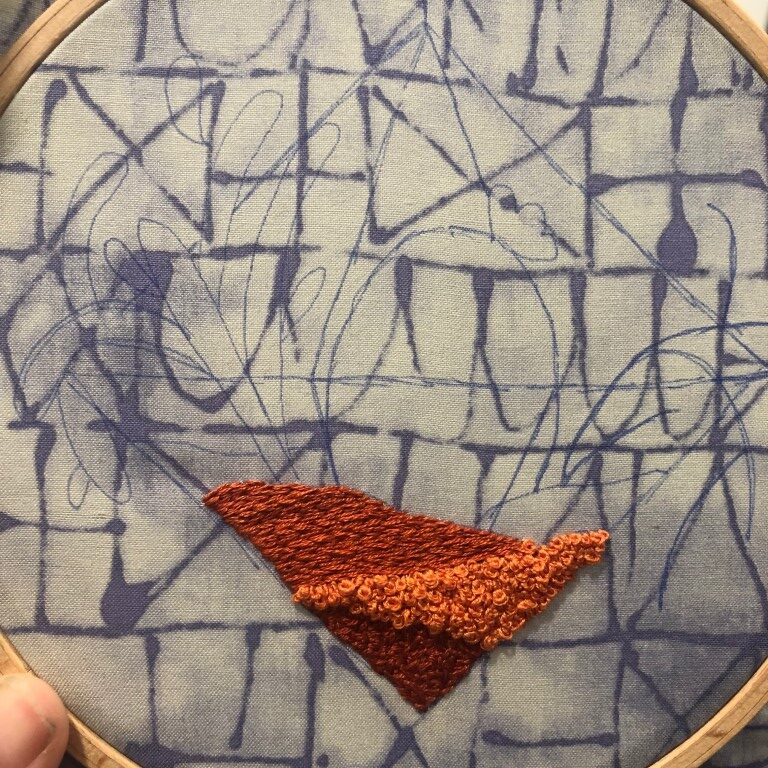
For the third terrarium layer, use 3 strands of DMC 920 and reverse chain stitch. These stitches will be made in horizontal rows across the section.
In the fourth terrarium layer, use 3 strands of DMC 3856 and the bullion knot stitch. For this section, change the length and direction of the bullion knots to give the feel of rocky sediment.
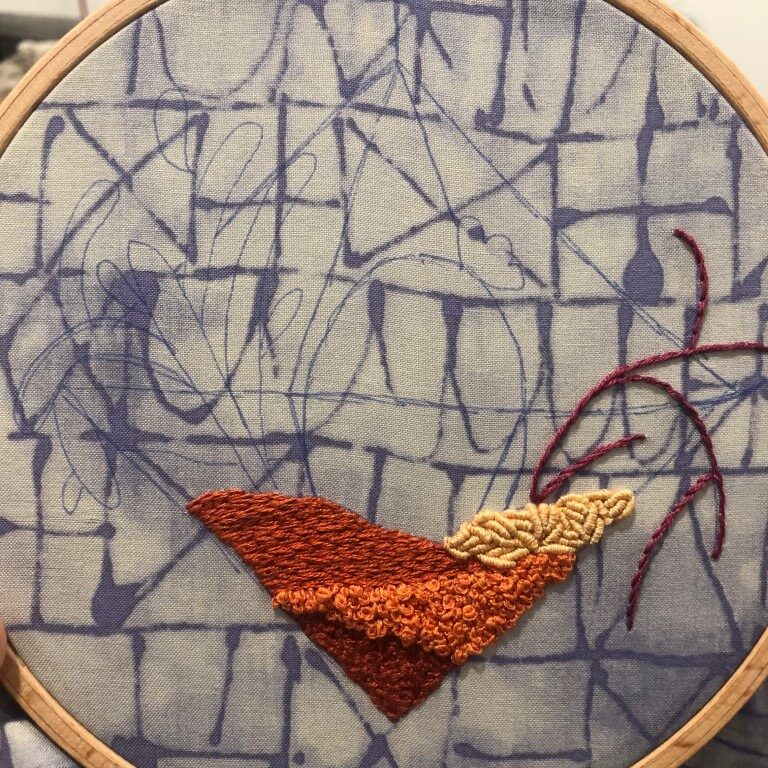
Now, let’s add the first plant! Use 3 strands of DMC 3803 and stem stitch to create the stem lines of the purple and green plant.
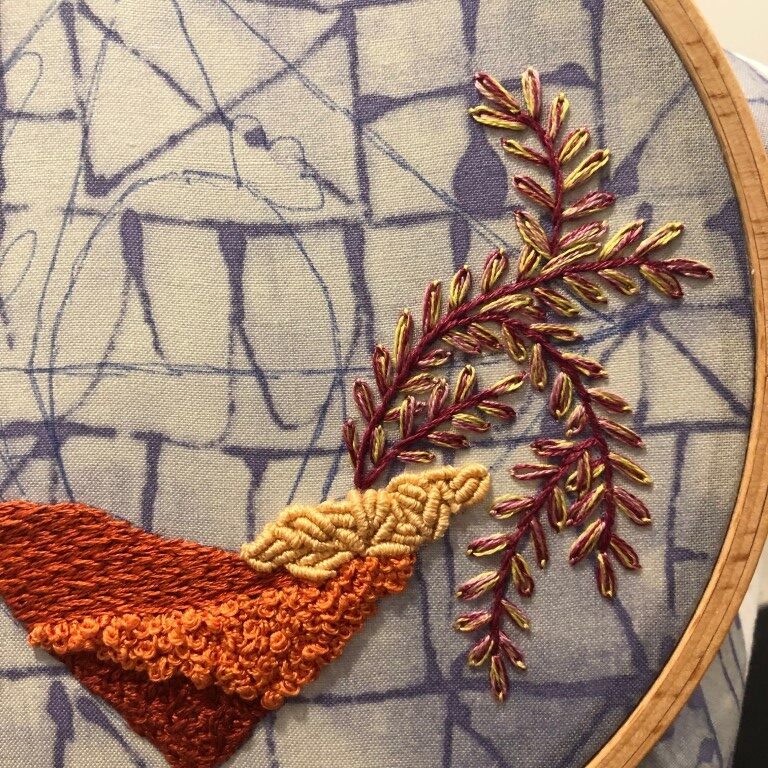
Next, add the plant leaves. Use 1 strand each of DMC 316, 3803, and 3819 and the lazy daisy stitch. Fill in each lazy daisy with a satin stitch. By combining the different thread colors you can create a variegated thread. This is also an inexpensive way to create your own color combinations.
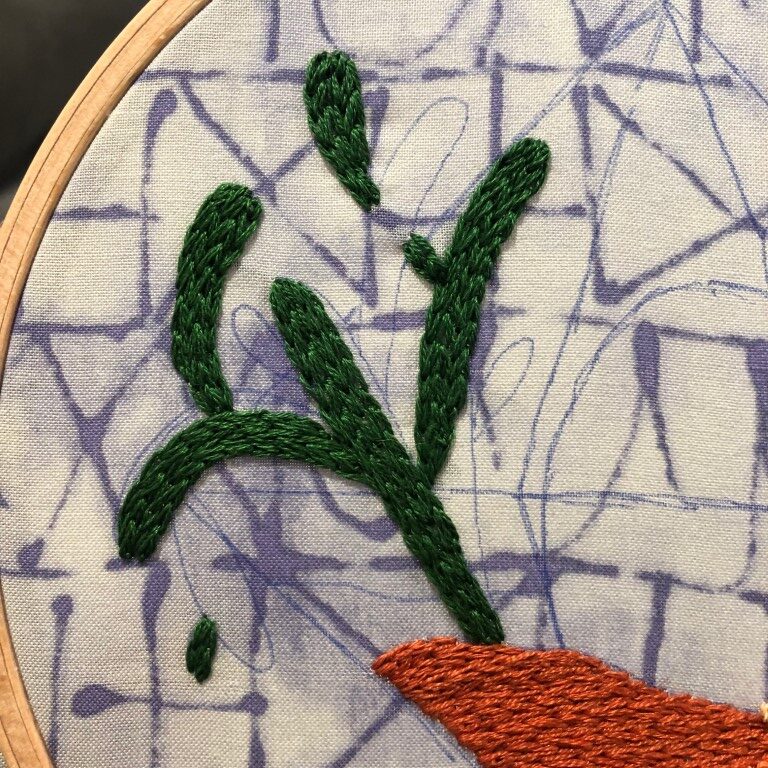
Add the cactus to the left of the terrarium. Use 4 strands of DMC 986 and chain stitch to fill in the darker portions of the cactus. These stitches will be in rows following the length of each cactus section.
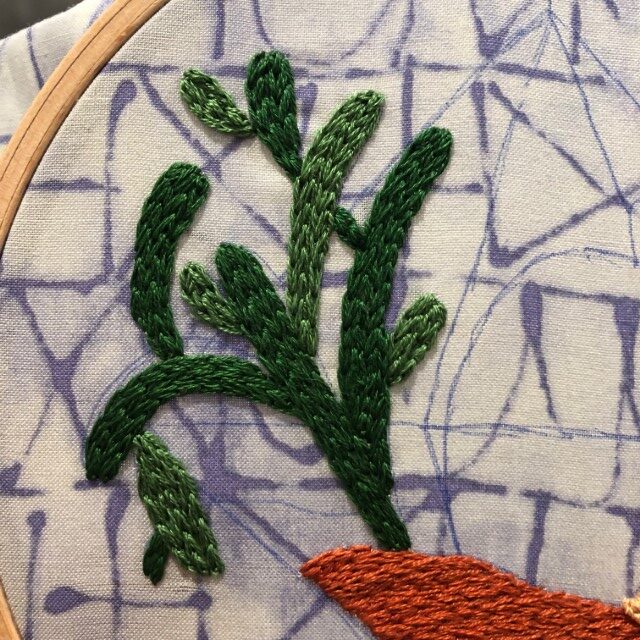
Fill in the lighter portions of the cactus with 4 strands of DMC 987 and the chain stitch. Using two different colors on sections of the cactus helps to create depth and light.
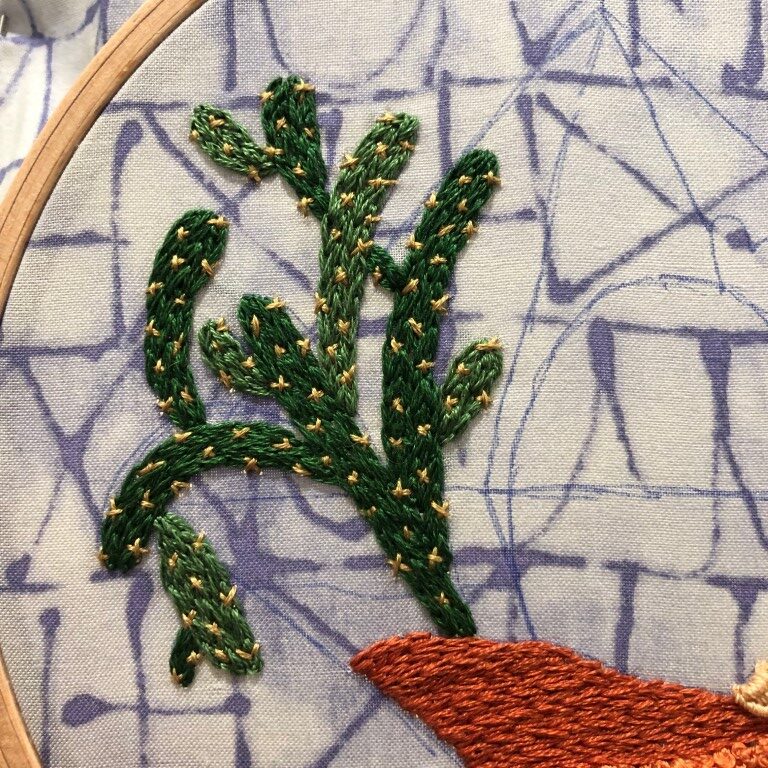
Now, give the cactus spikes. Use 2 strands of DMC 3828 and cross stitch. These prickly bits can be stitched as liberally or as sparingly as you’d like.
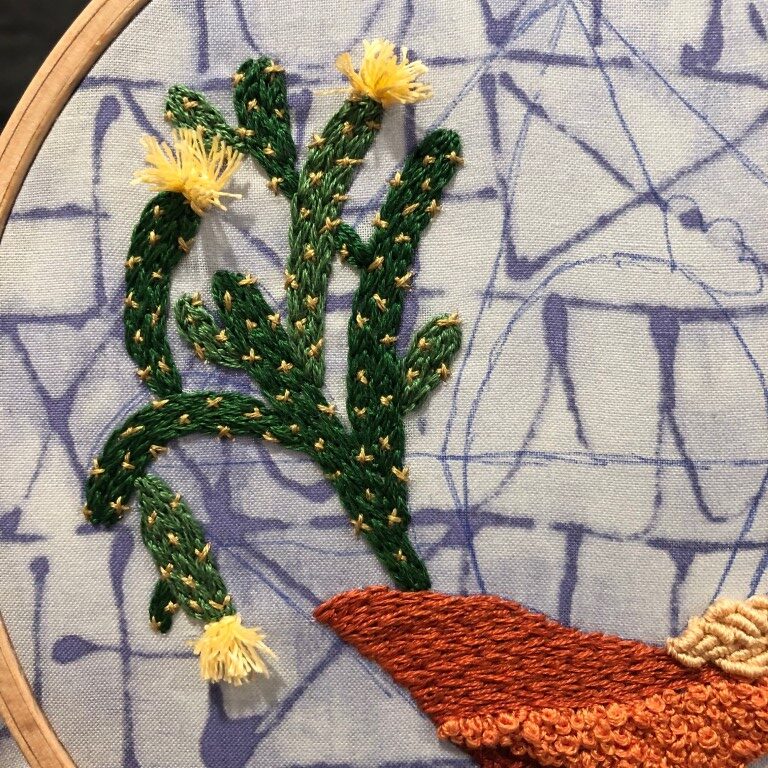
Finish the cactus with 6 strands of DMC 3855 and the turkey work stitch. This will be the fluffy flowers at the ends of some of the cactus arms. By adding multiple rows of turkey work close together, you can create even fluffier flowers.
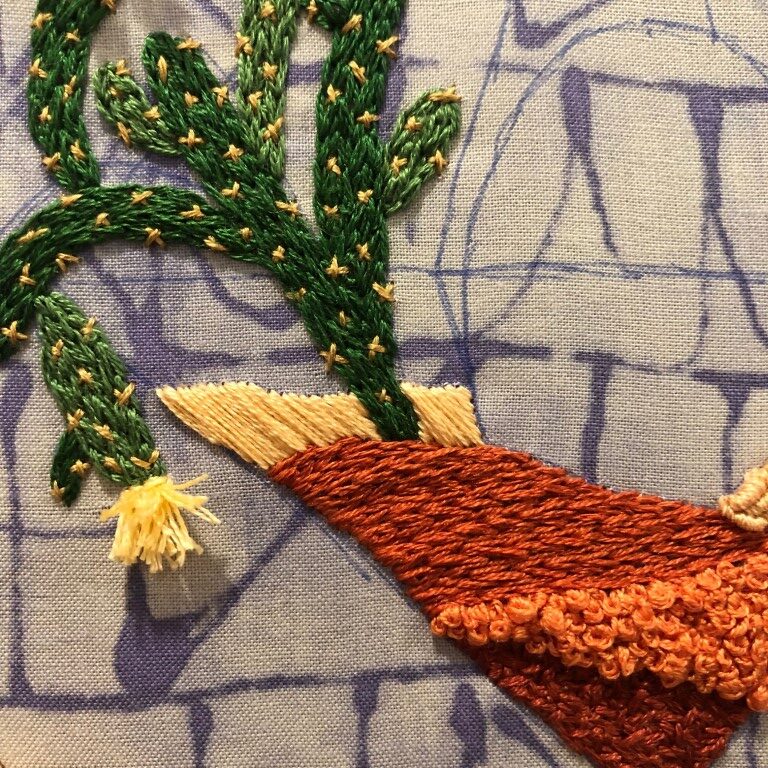
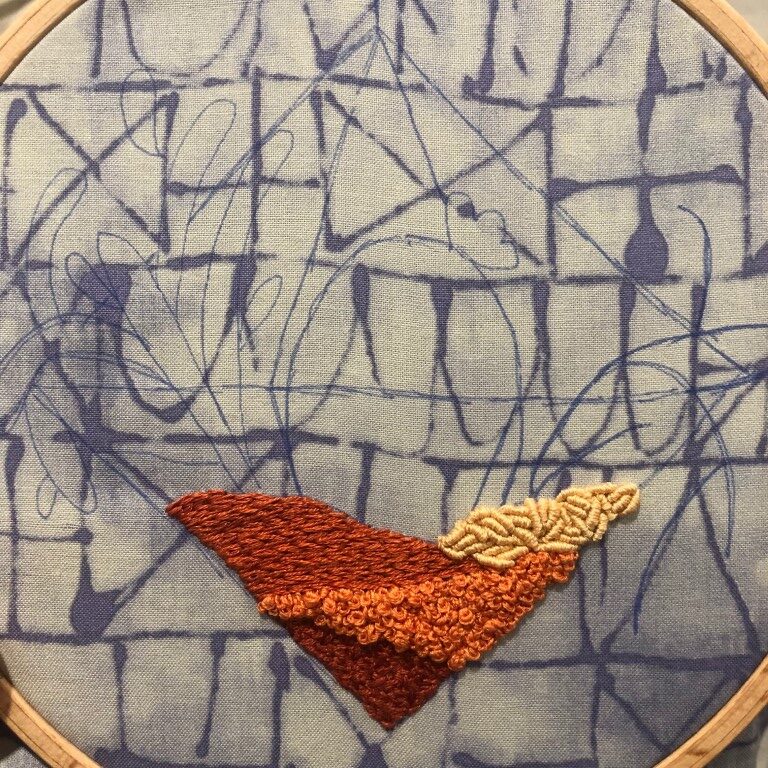
Use 3 strands of DMC 3856 and the satin stitch to add the last terrarium layer. Make these stitches at an angle, following the line of the outer edge of the terrarium.
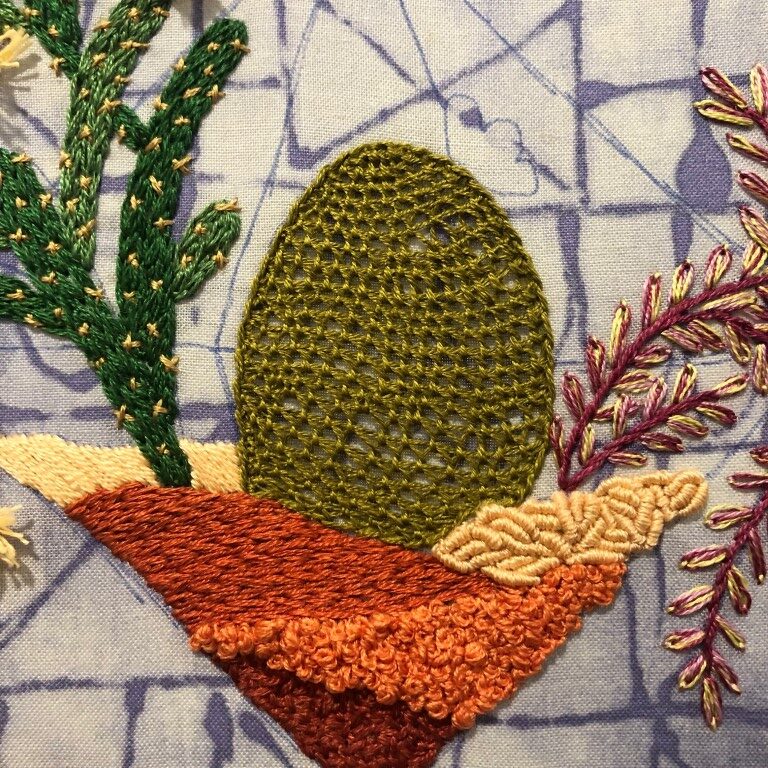
Now it’s time to add the last plant to the terrarium. Use 6 strands of DMC 731 and the detached buttonhole stitch to fill in the center cactus. Keep the stitches of the detached buttonhole short so they group closer together. The longer you make the stitches, the wider the holes of the detached buttonhole will be.

Now add prickly bits to the center cactus. Use 4 strands of DMC 832 and the French knot. I found that adding the French knots so that they overlapped the weave of the detached buttonhole stitch helped them stand out further from the fabric. If you want them less noticeable, add them in the spaces of the detached buttonhole stitches.
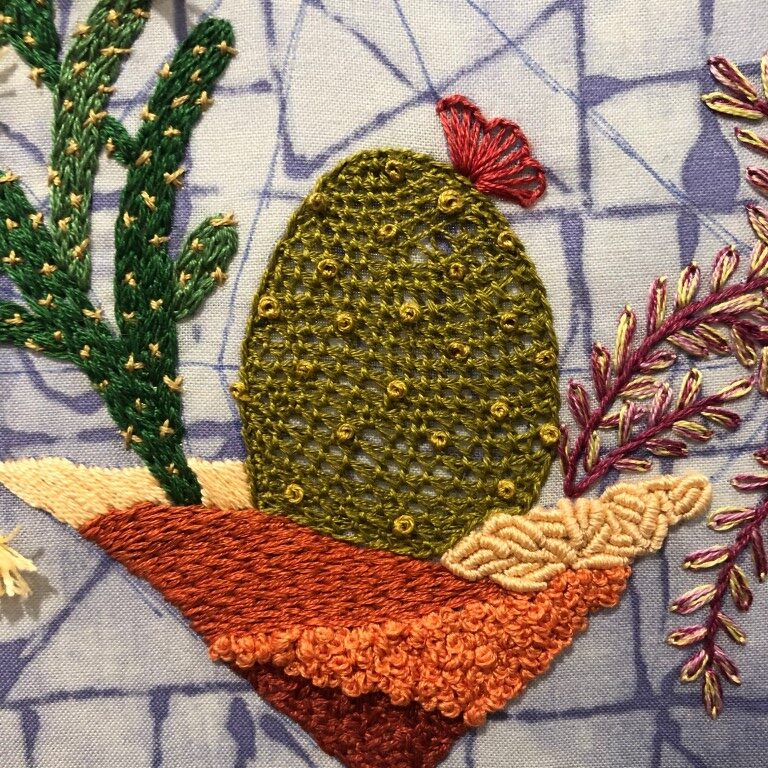
Add the flower to finish the center cactus. This is done with 3 strands of DMC 22 and the buttonhole stitch.
Now, add the terrarium. Use 6 + 2 strands of DMC 648 and the couching stitch to outline the terrarium. Lay the 6 strands of thread on the fabric, and use the 2 strands to overlap/tack the thread into place.
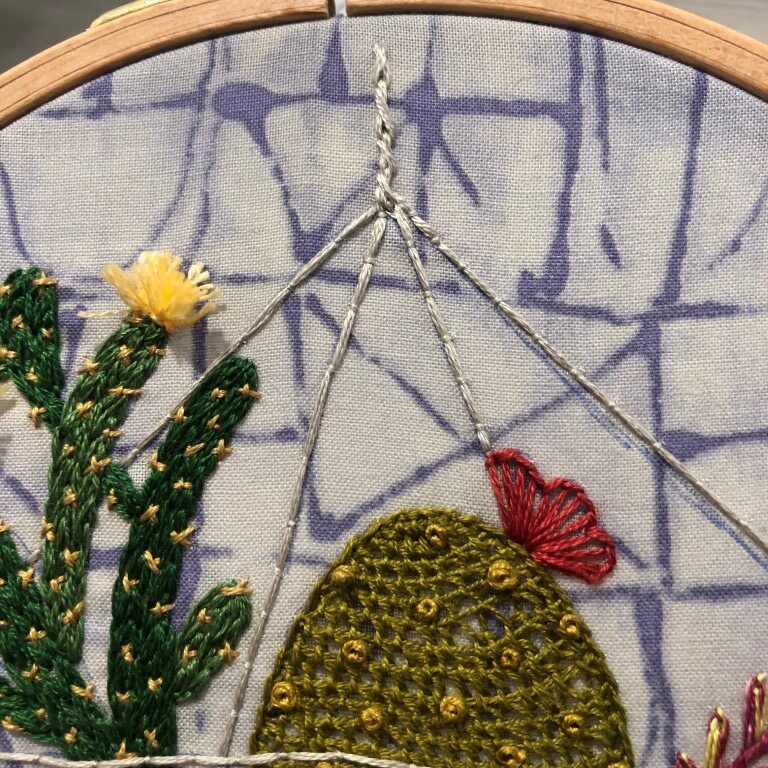
Finish the terrarium by adding the hanging hook. Use 3 strands of DMC 648 and the twisted chain stitch.
Once your terrarium is complete and any transfer pattern elements are removed, you can finish the embroidery in the hoop.
How to Finish the Embroidery in the Hoop
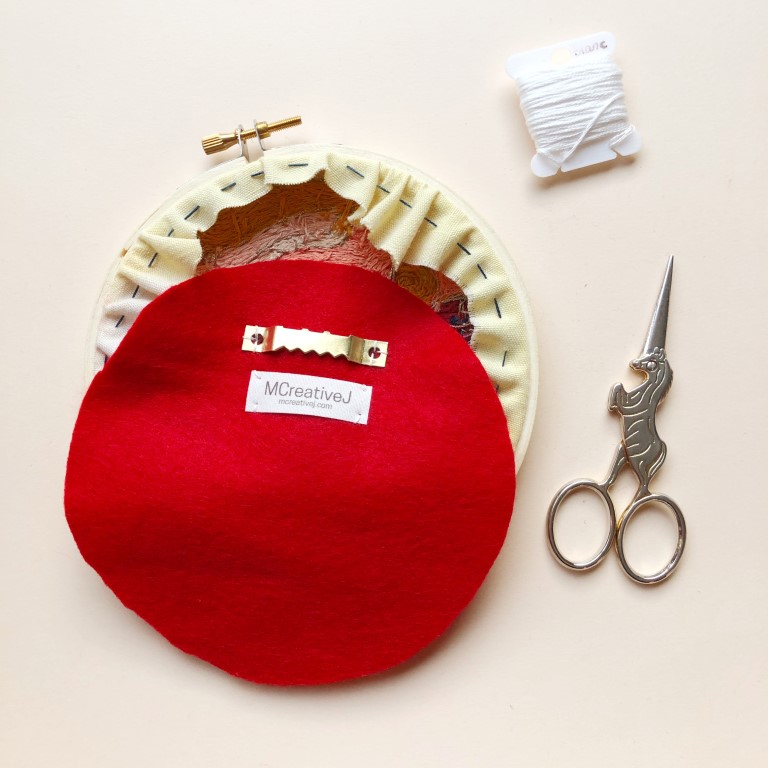
- Trim the fabric to about 1 inch from the hoop edge. Then use the running stitch to gather the fabric and secure it on the back of the embroidery.
- Next, trace the outer edge of the embroidery hoop onto a piece of felt. Cut the felt along the outline.
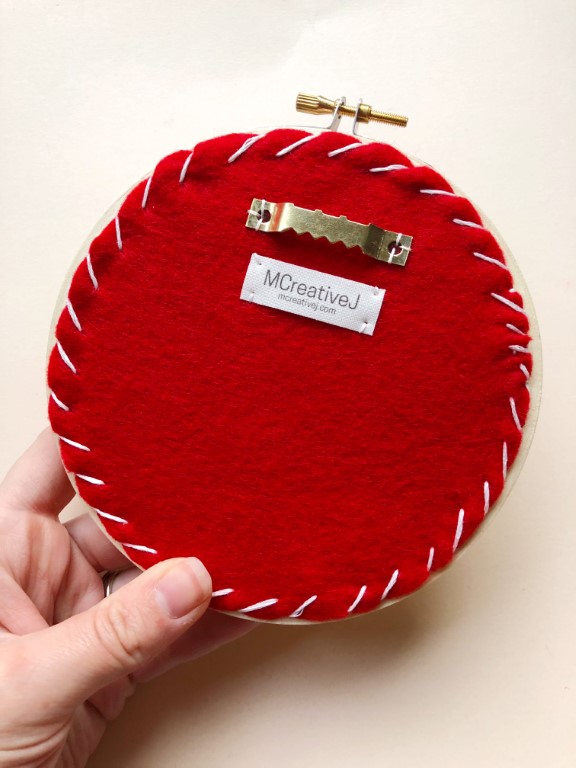
- Using 6 strands of the embroidery thread of your choice, attach the sawtooth hook to the back. This is also a great time to add a tag or embroider your initials and the date onto the felt backing.
- Pin the felt backing onto the back of the embroidery. Ensure the sawtooth hook is lined up so that the embroidery will hang straight.
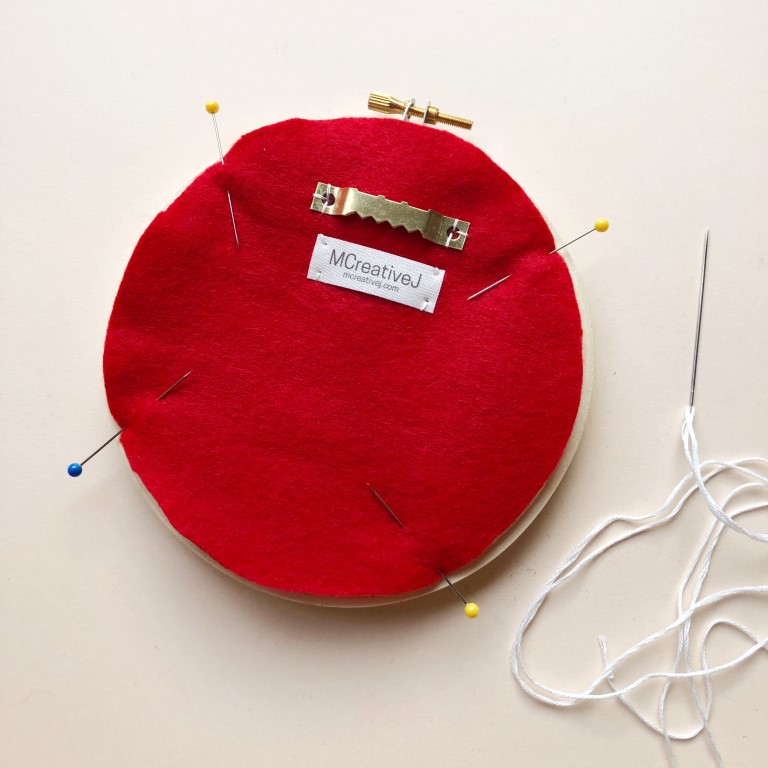
- Now, use whip stitch to secure the felt to the back of the embroidery.
- Finally, hang up your embroidery!
Melissa Galbraith is the fiber artist behind MCreativeJ. She was born and raised in the desert of Washington state where her mother instilled a love of making things by hand at an early age. Melissa shares her love of nature through whimsical and modern hand embroidery kits, patterns, workshops, and her book, How to Embroider Texture and Pattern.
Melissa was reintroduced to hand embroidery after finding her desk job monotonous and needing a creative outlet. She is now a full time fiber artist and loves that embroidery is like coloring with a needle and thread. Melissa found that many craft enthusiasts also wanted to learn how to embroider but were daunted by where to start. Thanks to this and a love of teaching, Melissa began to share her hand embroidery knowledge.
Melissa makes it easy to learn a new craft for makers of all skill levels. She enjoys seeing makers fall in love with the needle arts, especially that magical ah-ha moment of learning something new. Learn more about MCreativeJ at mcreativej.com
Like it? Pin It!