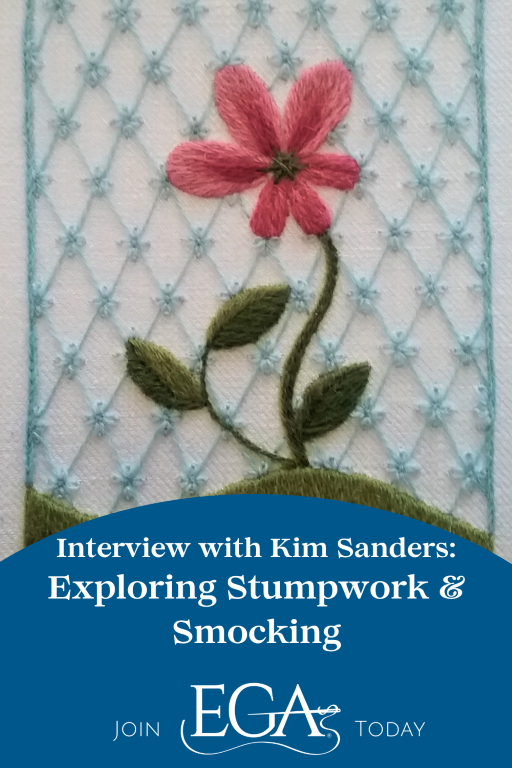
Kim Sanders is an EGA-certified teacher in Crewel and Surface Embroidery, and a Master Craftsman in Surface Embroidery and Smocking. Kim is a frequent and popular teacher at regional and national seminars, guilds, and shops, and a constant feature in EGA’s selection of Group Correspondence Courses and Individual Correspondence Courses. She has also been featured in multiple video interviews with Creative Living outlining the history and features of pulled and drawn thread embroidery, smocking, stumpwork, and silk ribbon embroidery. We were thrilled at the chance to sit down with Kim and learn more about her history with embroidery, her design process, and her recommendations for both new and practiced needleworkers.
You have a long history of teaching embroidery techniques and designing embroidery patterns. Where did your love of embroidery begin?
I was a great reader as a child. I was fascinated by stories like Hitty: Her First Hundred Years where a girl was engaged in needlework. My paternal grandmother and great aunt supported my interest and patiently taught me basic embroidery stitches when I was eight. My maternal grandmother had a number of coffee table art books. I was fascinated with paintings that showed embroidery on historic costumes.
Then when I was eleven, my mother had a small crewel embroidery kit she intended to do herself. Bored over Christmas vacation, I asked if I could “put in a few stitches”. A week later, the embroidery was completed, albeit with some puckering as I didn’t see the necessity of a hoop. The advantage of being a child and beginning to embroider is it’s more about the process, than the product. As a child, one often enjoys the process without being overly critical of the quality of the product.
Designing came a bit later. I majored in textiles in college and had several required design courses. They weren’t specifically for embroidery, but the information on color, balance, texture, etc. applies no matter whether the medium is paint or thread. I began slowly with embroidery design. At first it was a matter of changing the colors of threads to go with the colors in my home. Later, the focus on design was because I could not find exactly what I had in mind so I would borrow bits and pieces from published designs and reassemble them.
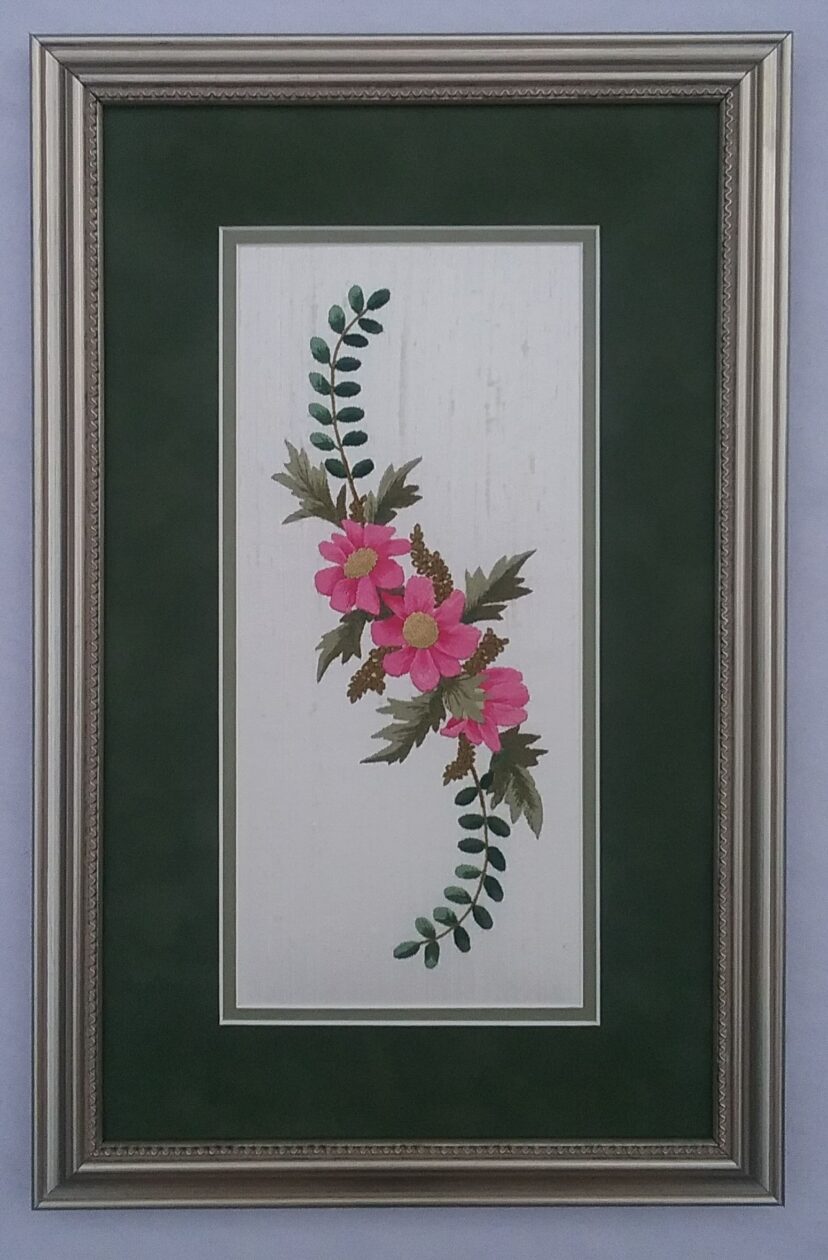
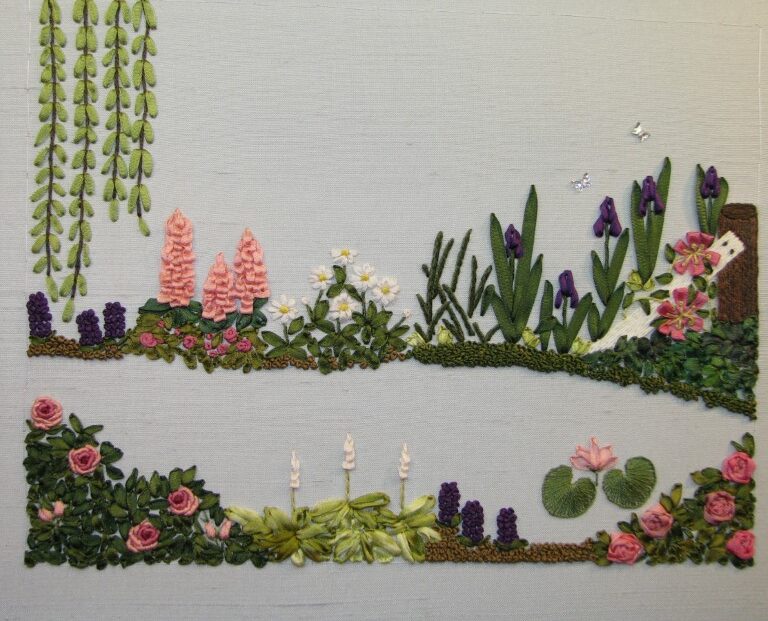
My big impetus for original design were the EGA Design ICC and the requirements for original work in Master Craftsman programs and EGA Teacher Certification. I find it difficult to wake up one day and say, “Okay, I am going to create something original.” Rather, when there is a specific purpose, I have a starting point that is concrete. I often photograph flowers, so frequently I use those as embroidery subjects.
You are an EGA-certified teacher in Crewel and Surface Embroidery, and a Master Craftsman in Surface Embroidery and Smocking. Do you have a favorite embroidery technique?
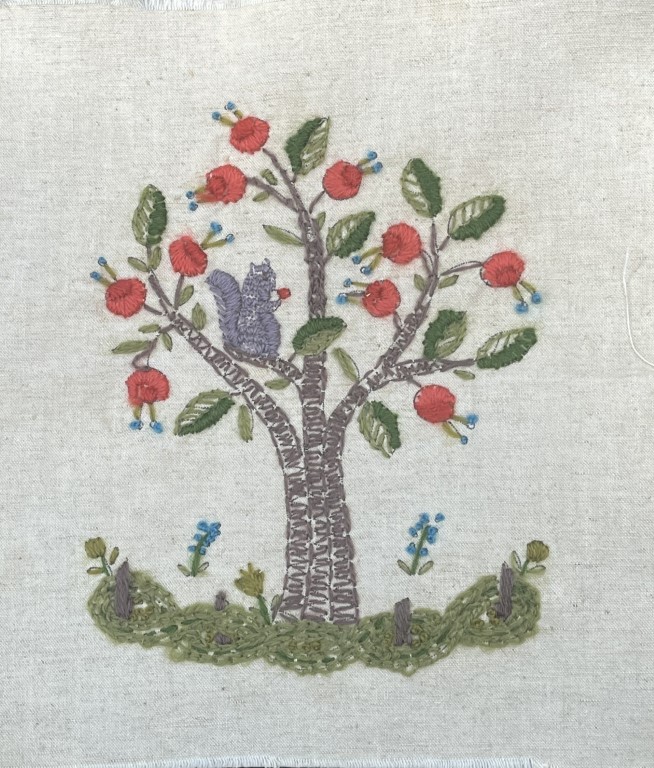
I am a magpie. How do you pick a favorite child? I love almost all embroidery techniques. However, there are so many beautiful forms of embroidery, one has to narrow one’s focus. Smocking makes me happy because it is a way for embroidery to be worn. Crewel intrigues me as it gives us a small glimpse of women’s history and their efforts to adorn their homes. Plus, I am very drawn to the rich mellow colors traditionally used.
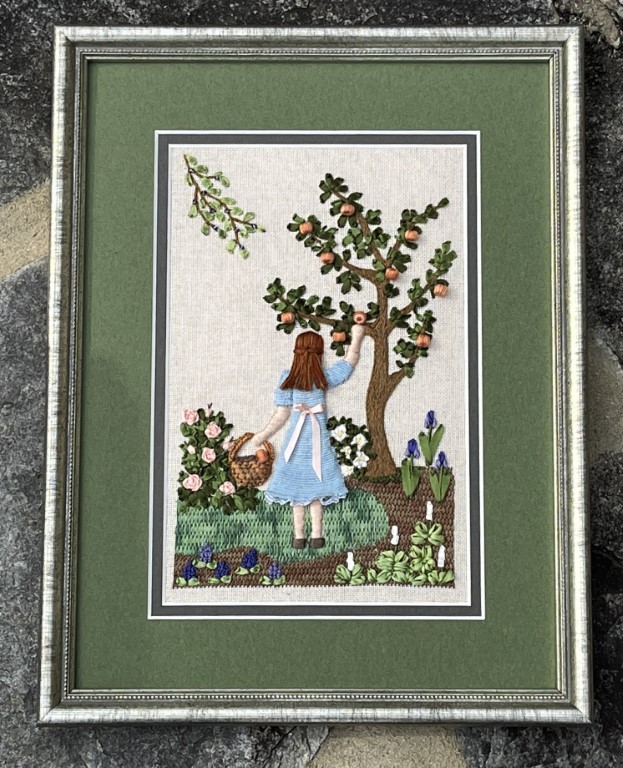
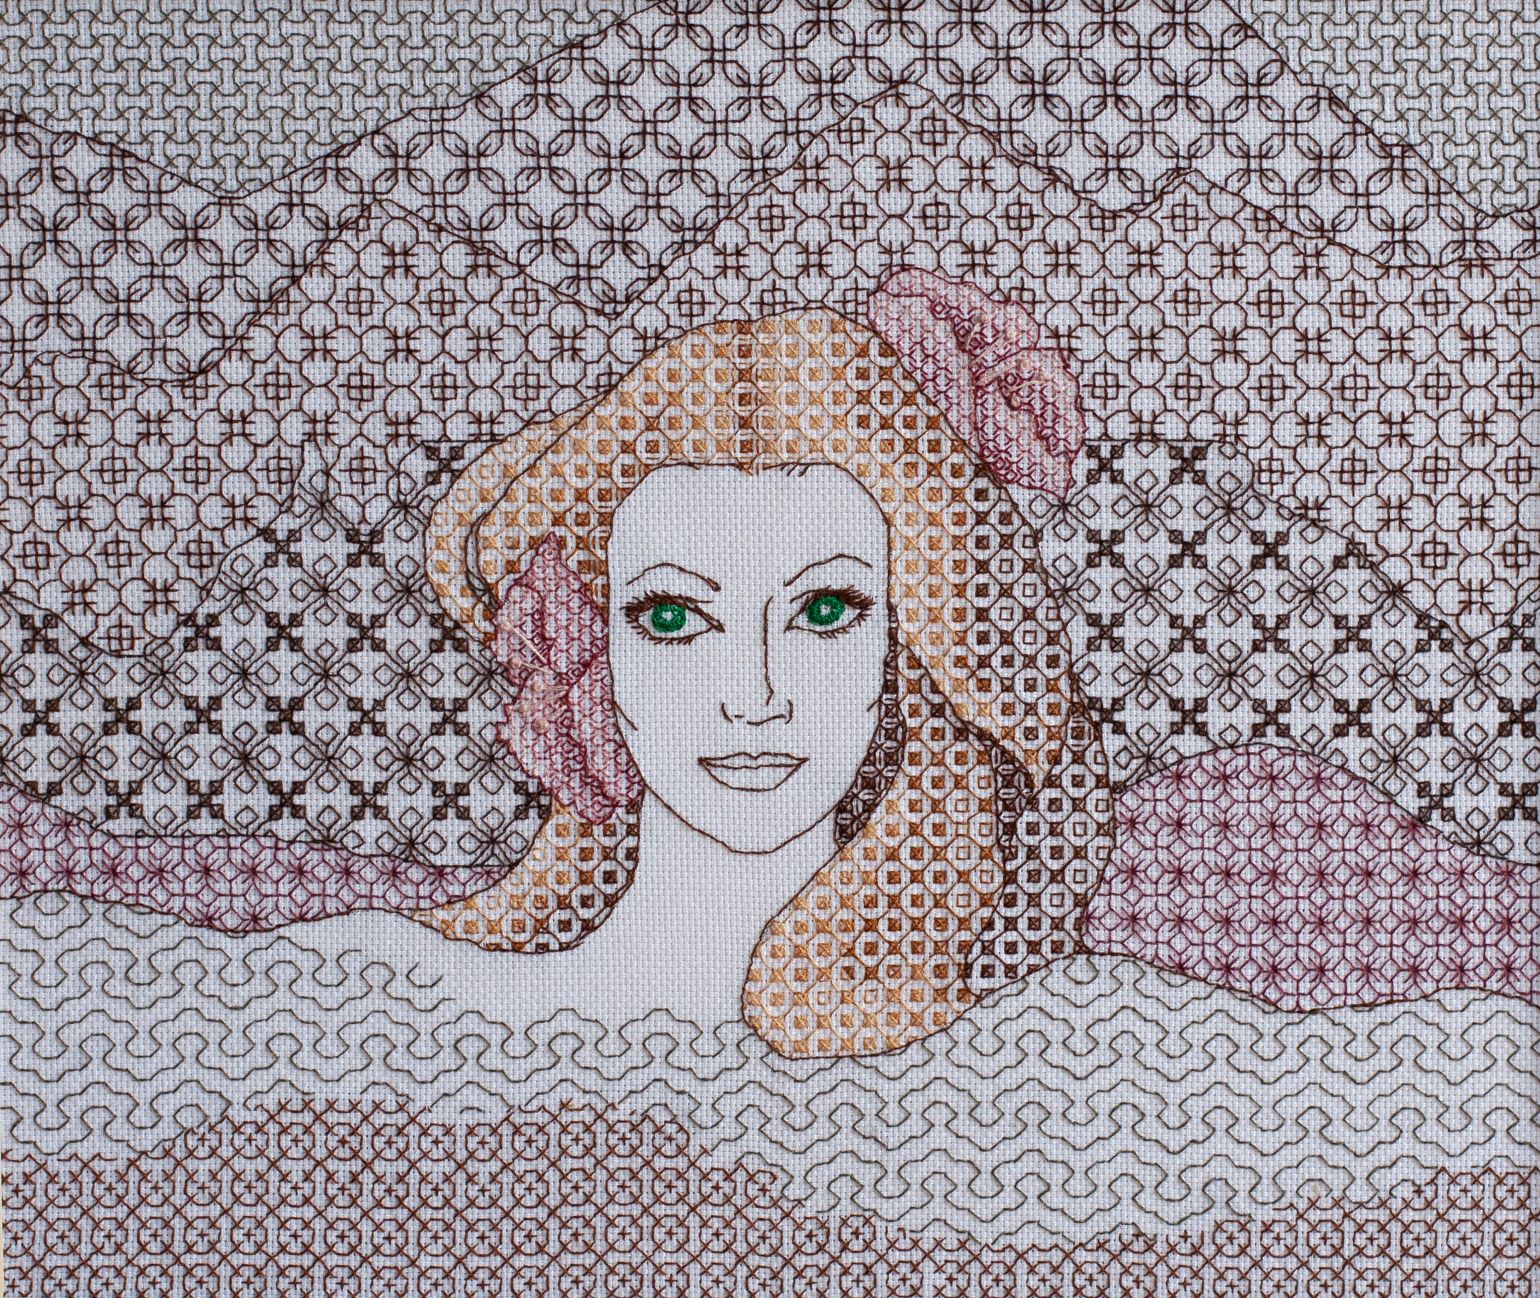
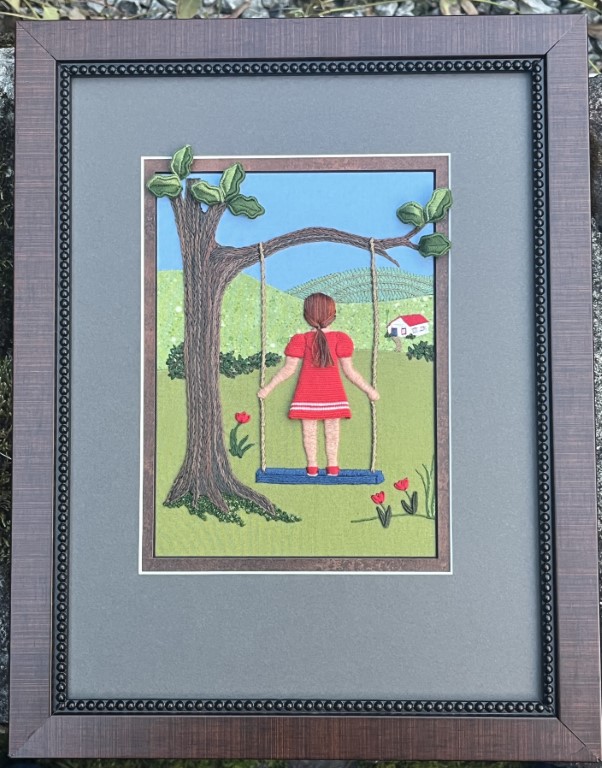
I suppose my current favorite is stumpwork for two reasons. If you incorporate human figures, it’s a great way to capture a moment in a story. The second reason is because there aren’t any limitations on the embroidery techniques, threads, or ground you use. If you wish to place your figure against a brick wall, use a counted ground so it is easier to embroider straight lines. If you find stitching enumerable leaves on a tree boring, use silk ribbon where a single stitch creates an entire leaf. If you desire a bit of shine or glitter, add beads or metal threads. Any type of embroidery that gives the result you want is acceptable to compliment the padded and wired shapes that define the technique.
What inspires your embroidery designs?
What I observe around me is often inspiring: flowers, fruits, birds and people. Occasionally it will be more abstract. With whitework and smocking, I often embroider combinations of stitches on a doodle cloth. One stitch might strike me as perfect for a basket or the center of a daisy. Sometimes I start sketching shapes or arranging cut paper shapes to develop balance and spacing. Very often the inspiration is to meet certain criteria for a class I want to teach.
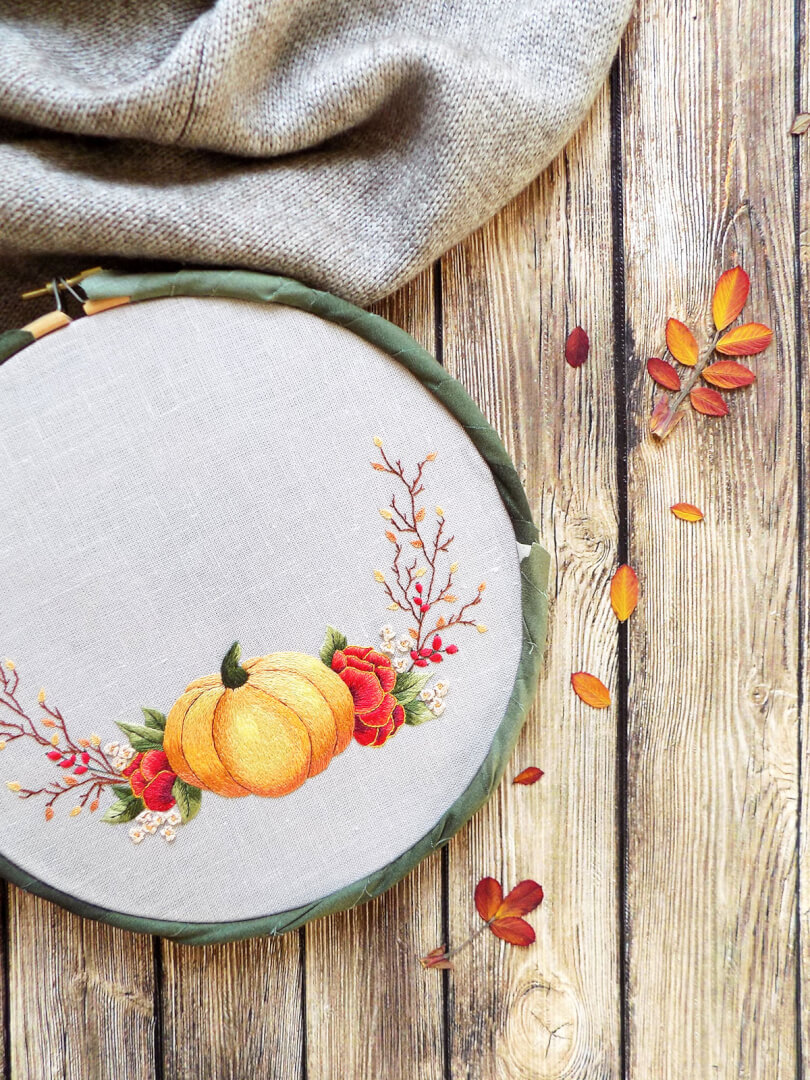
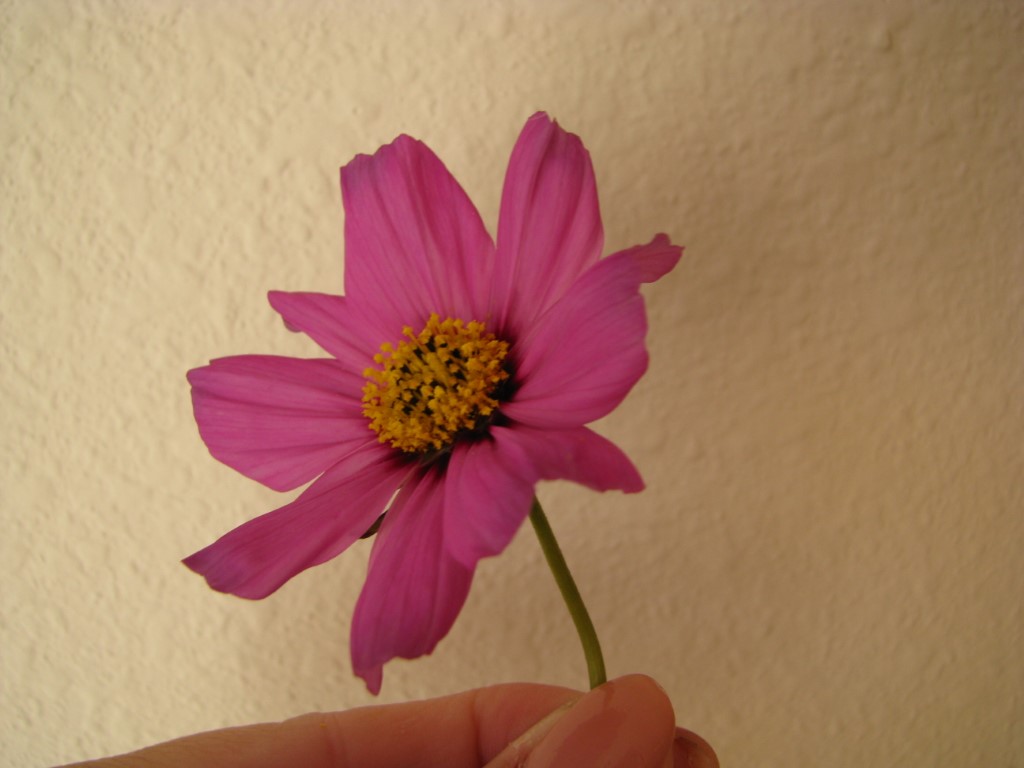
Your Group Correspondence Course Cosmos introduces students to the surface embroidery technique of needle painting. What is the most challenging aspect of needle painting that embroiderers new to the technique should anticipate?
Many stitchers are introduced to embroidery through counted cross stitch. Cross stitch patterns have diagrams that indicate exactly where each color and stitch in an embroidery are placed. With all counted thread embroidery, the stitcher counts the number of threads and inserts the needle in that specific location between threads. As long as the stitcher is accurate, the finished embroidery will be identical to the pattern photograph.
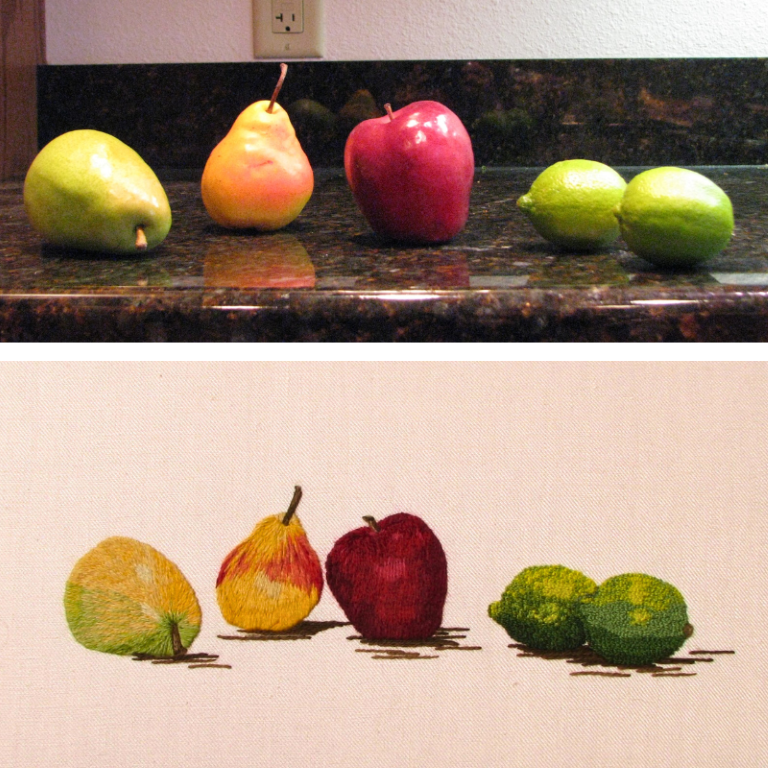
In needle painting, one has thread colors specified and the motif outline and color boundaries drawn on the fabric for placement. However, the embroiderer will need to make a decision with each stitch as to exactly where she inserts her needle. Becoming comfortable with this freedom seems to be the most challenging aspect of needle painting.
What is important to realize is that just as two daisies are not identical, each embroiderer’s needle painting will vary a bit. And back to the daisies. They may not be identical, but you still recognize them as a daisy.
Cosmos introduces embroiderers to needle painting with a series of tiny samplers worked in pearl cotton so the embroiderer can become comfortable with long and short stitch and blending thread colors before beginning Cosmos. Working in small steps makes mastering this beautiful technique much more approachable. The appeal of thread painting is it is one of the best ways to create a realistic embroidery.
Smocking originated as a means for creating garments that were more adjustable and flexible, which prolonged the life of clothing for working class people. It has since also become a method for embellishment. There have obviously been many advancements in clothing production, so why do you think it’s important to preserve this historical technique for future generations? What should students expect to take from your English Smocking Individual Correspondence Course?
Smocking is a practical form of embroidery. It solved a problem of providing elasticity to garments before stretch fabrics were commonplace. Active individuals, such as children, still want comfortable garments that do not confine. And parents often enjoy dressing their children in beautifully embellished garments. Smocking meets both desires so it continues to be a relevant form of embroidery.
In the Smocking ICC, students work on several different samplers. The first sampler introduces the student to the most commonly used smocking stitches and embroidery surface stitches used to embellish smocking. The next sampler covers picture smocking. Since smocking is worked on garments, the smocker frequently must modify a given design to the size specified on the garment pattern; the third sampler covers making such adaptations. The final sampler introduces a bit of color theory so that the smocker can change the colors within a design if she wishes to use a different fabric color than the one shown in the published smocking design.

In Thank Goodness It’s Finished, the goal is for students to finish their embroidery projects themselves (and avoid a trip to an expensive professional finisher!). Why do you think it’s important for embroiderers to develop and refine their finishing skills?
First, finishing is often almost as expensive as the materials for the embroidery itself. If you finish your embroidery yourself, more of your budget can go to your next project. Most of the skills taught in Thank Goodness It’s Finished are very straightforward. The reason professional finishing is often costly is because of the time required. Sometimes, you can save money by doing part of the preparation work yourself and delegating part to the professional. For instance, most frame shops charge a fee for mounting an embroidery prior to framing it. I have found many framers are happy for the embroiderer to stretch and mount an embroidery over mat board and then the professional does the final matting and framing. So, there is some cost savings by preparing an embroidery yourself for framing.
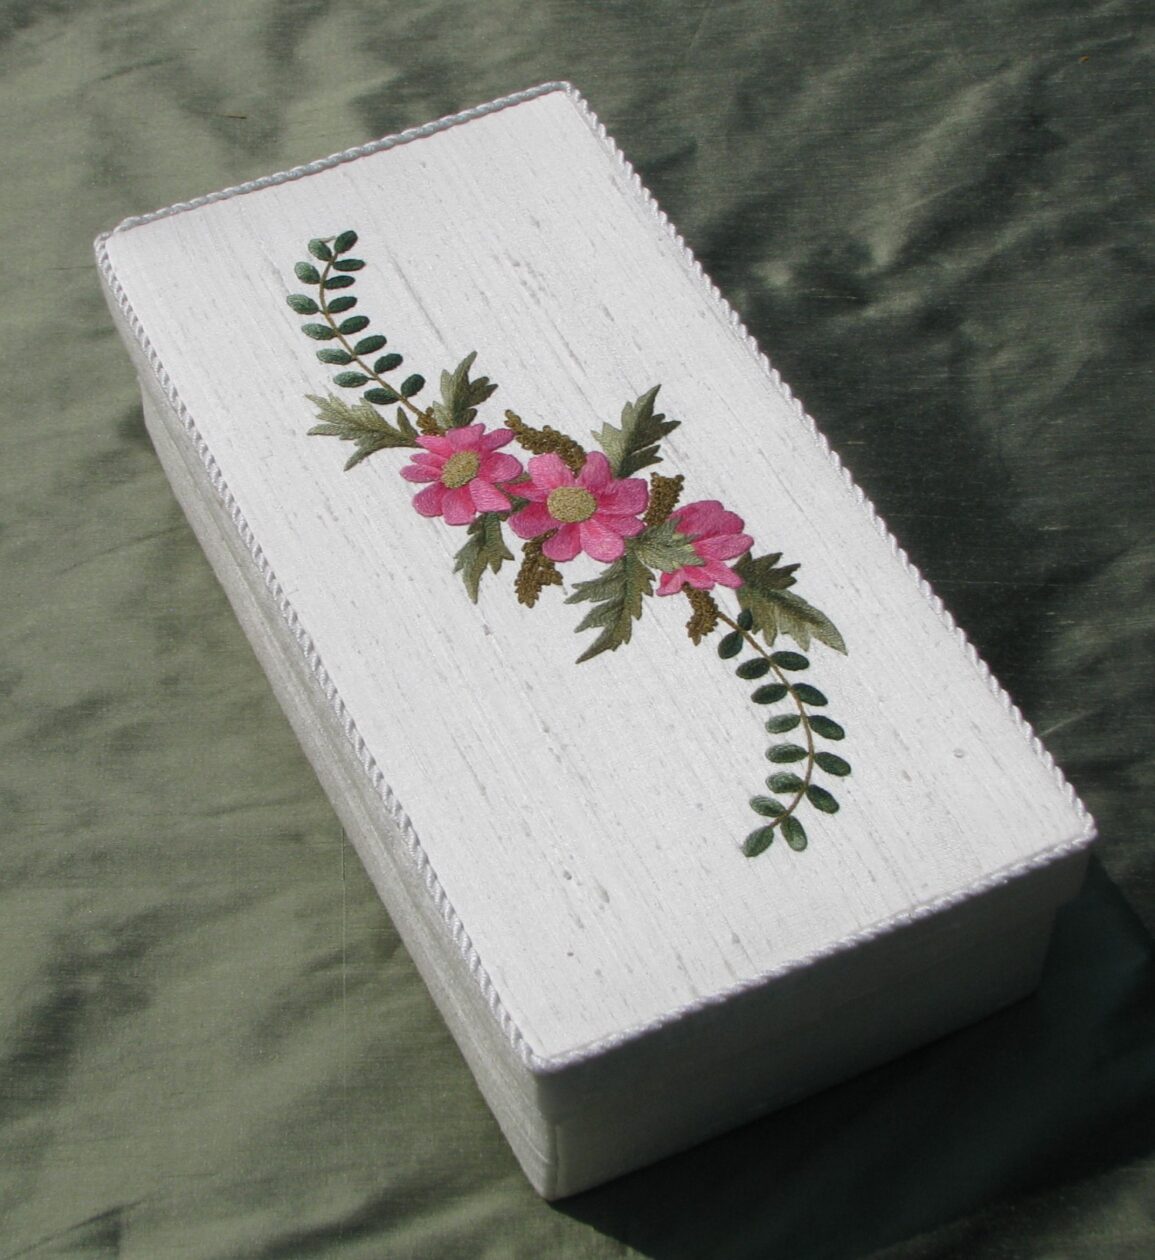
Second, if one does the finishing, they have complete control over the method used. Years ago, I worked for a textile conservator. One of the tenets for mounting an embroidery for a museum is that whatever method is used, it should be fully reversible. So, I learned to lace embroideries over mat board. (A technique covered in this GCC.) If you ever wish to change the way an embroidery was finished, if it is laced, you can. Cosmos was originally mounted on a box top, I later clipped the threads and remounted it over board before having it framed (shown earlier in this post). On another occasion, a framer beautifully mounted a counted thread whitework embroidery for me…wrong side out. I was complimented that she thought the back was so neat it was the front, but the work had to be reframed. If you mount your embroidery yourself, you can be sure it will be right side up and right side out and centered as you desire.
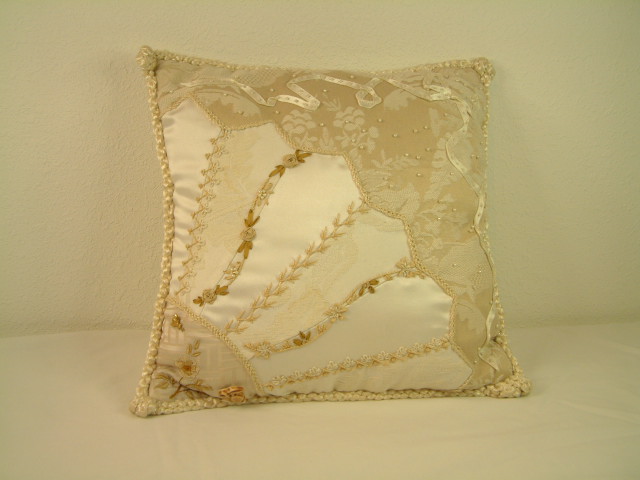
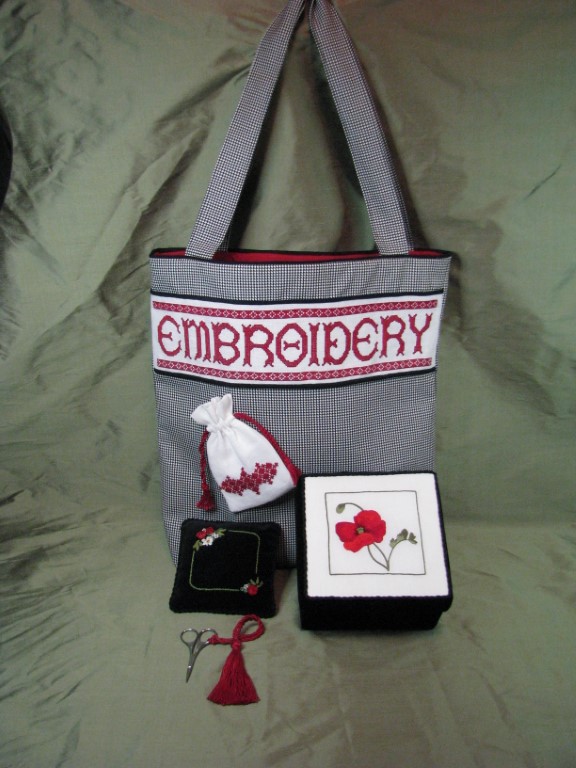
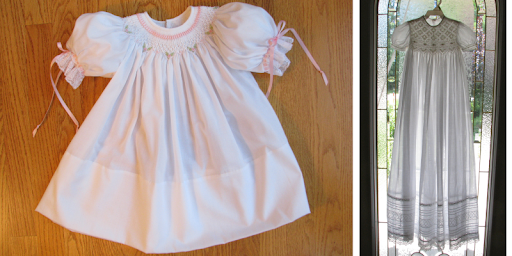
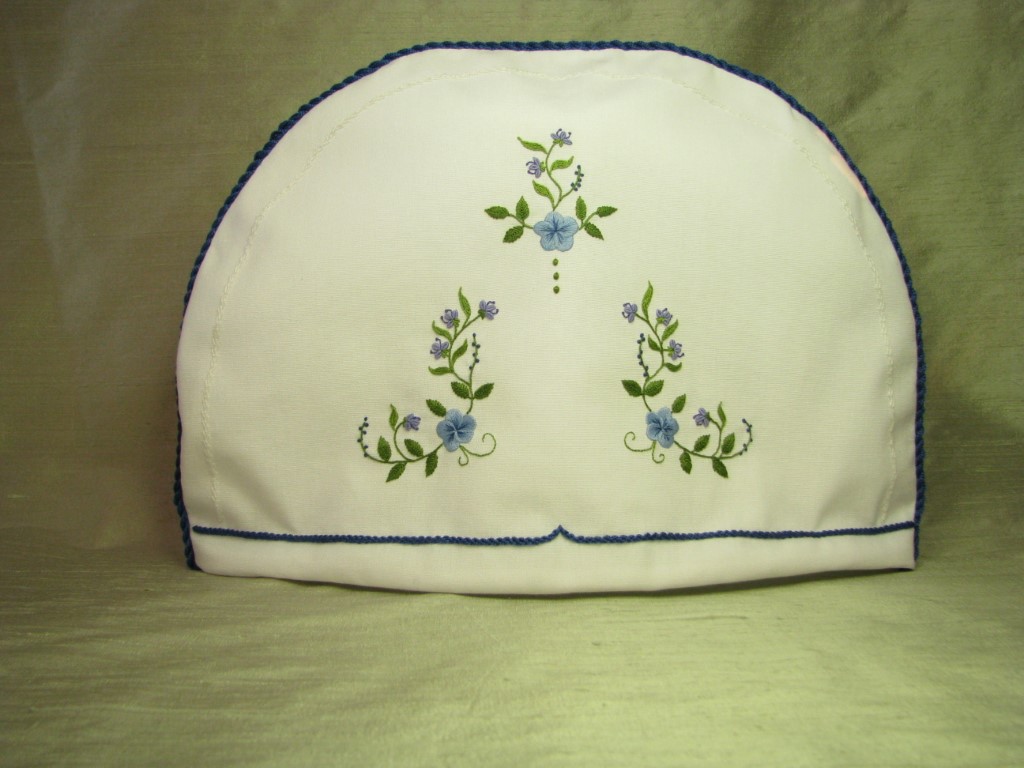
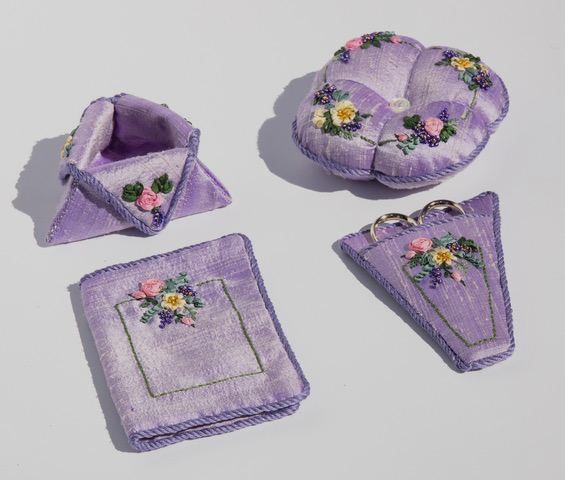
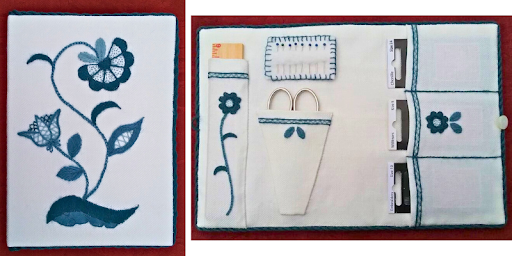
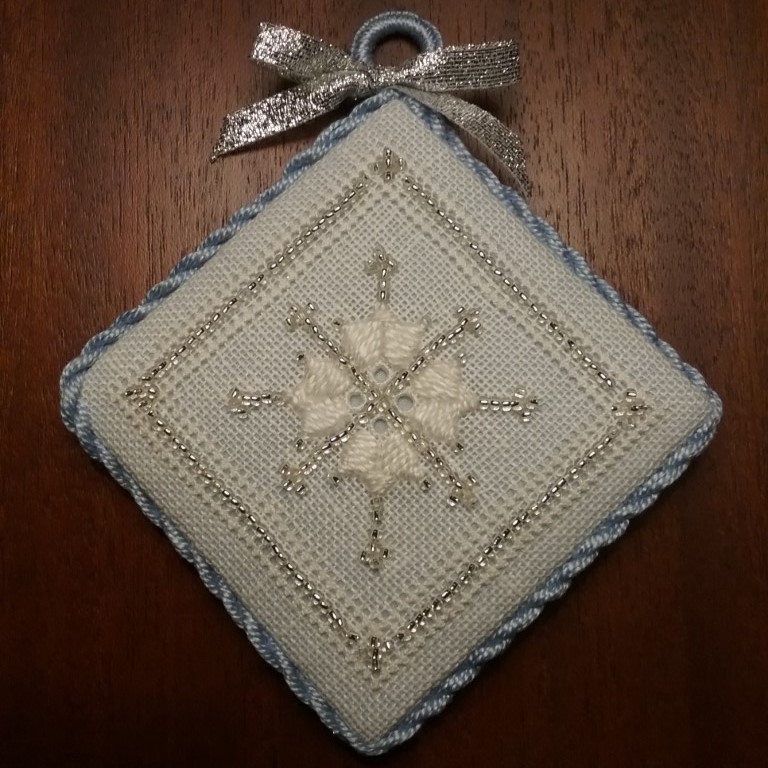
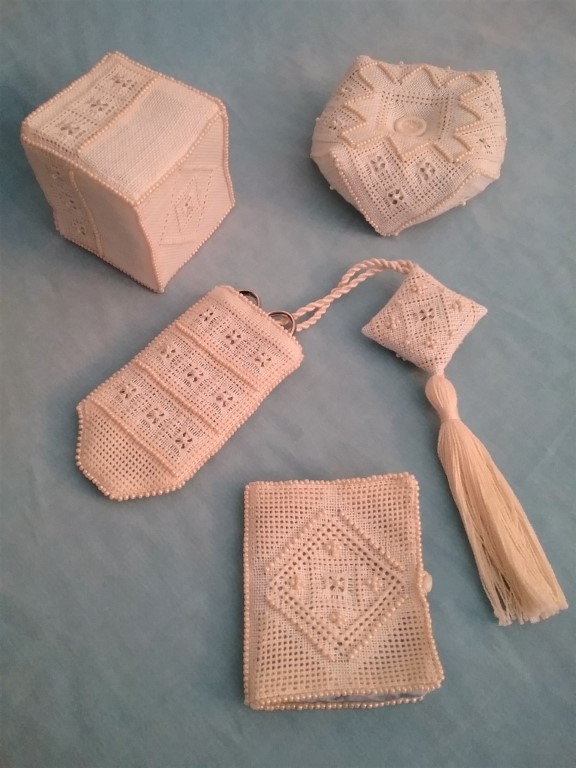
And finally, one has more options for the items that can be embellished with embroidery. I love the idea of embroidery being used on garments, in the home, or on smalls. Framed works are lovely but today’s open floor plans mean fewer places to hang framed items. Embroidery can be finished as bags, pincushions, tissue box covers, eyeglass cases, guest towels, ornaments and added to clothing – either readymade or sewn by the embroiderer.
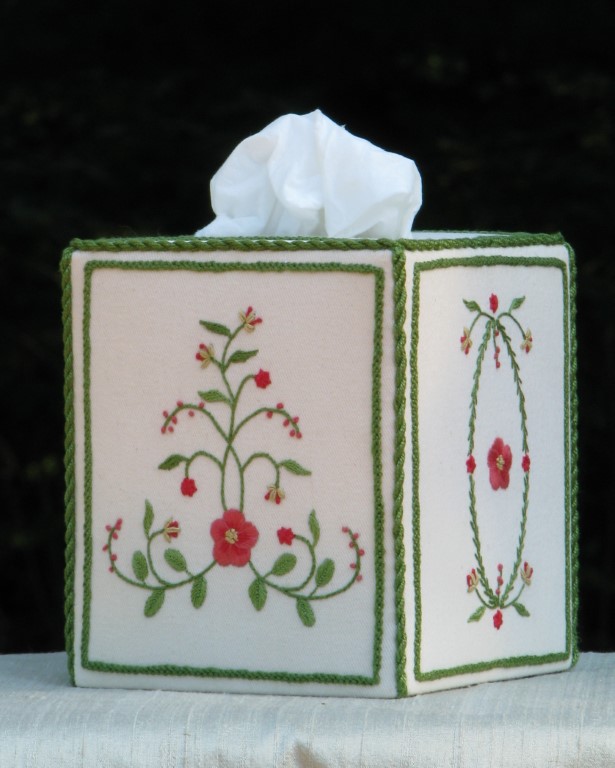
One facet of Thank Goodness It’s Finished that is unusual is that students may finish their own existing embroideries. They may stitch the provided designs or they may complete something they have already embroidered. To make this variation possible, and to facilitate future finishing, charts are provided for students to calculate sizes. For example, instead of making a small square pincushion (as shown in Thank Goodness It’s Finished photo) a student may complete a throw pillow. The steps in finishing are the same – only the size is different.
You’ve studied and designed so many different types of embroideries. Is there a particular type of embroidery that brand new embroiderers should pursue to ease them into the hobby? Smocking/Silk Embroidery/Thread Painting/Drawn Thread/etc?
When I am introducing a brand-new embroiderer to our art form, I try to find a project that has a high potential for them to be successful and that can be completed in a relatively short period of time. There is nothing so discouraging as beginning with too difficult or too large of an embroidery. It’s also very important that the beginner be guided to high quality threads and fabrics.
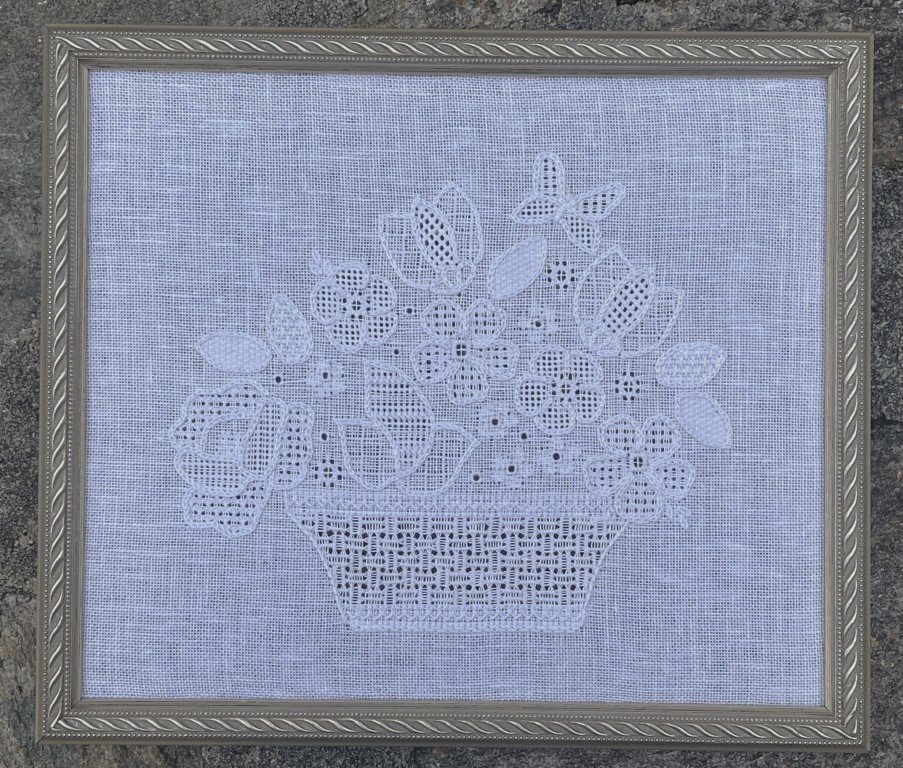
My favorite introduction to surface embroidery is silk ribbon embroidery. It creates a beautiful embroidery with a minimal number of stitches. Crewel embroidery is also a good way to begin surface embroidery as long as basic stitches are chosen. The thread used is larger than stranded cotton so it is easier to see. I particularly like crewel thread as an introduction to the long and short stitch used in needle painting as the strands blend together so well.
Many embroiderers begin with counted cross stitch or counted canvas. Both are a good introduction to a whole range of counted embroidery techniques and develop the ability to read a chart and a stitch graph. A small pulled thread project is a good next step after cross-stitch.
What are your must-have, favorite embroidery tools?
Stretcher bars plus tacks are my favorite method of securing fabric during embroidery. I prefer them over hoops because there isn’t a risk of hoop marks, I can see the entire area of the design and especially because I feel that equal and consistent tension is exerted both horizontally and vertically. For some projects like tablecloths, one must use a hoop, but otherwise whether it is crewel, stumpwork, needle painting or pulled thread, I mount the fabric on stretcher bars. As my eyes have aged, a lamp with a built-in magnifying lens has become increasingly important.
Do you have a daily/weekly/monthly practice that you’d recommend to other embroiderers interested in honing their craft?
I recommend having several projects going simultaneously so one can stitch a little most days. Some projects lend themselves to stitching in the car or at stitch-ins away from home. Those are ones that don’t require uninterrupted attention or special equipment and preferably don’t have a deadline for completion. It is amazing how much one can accomplish stitching in a waiting room or traveling.
Then have at least one project that stretches one’s abilities. Work on this when one can give it their full attention. I also try to take classes on a frequent basis. No matter how much one has stitched, there is always a new technique or a different approach to a favorite technique that is helpful.
Finally, I have a mental exercise that I often do of looking around me and thinking about how something might translate into an embroidery. It is often a flower, but sometimes it’s an architectural detail, or a texture or a combination of colors. I may never actually stitch that idea, but it does cultivate one’s creativity.
What embroidery or color trends (if any) are you drawn to this year?
I have been taking classes on various whitework techniques where some fabric threads are removed such as lacis, reticella, and punto antico. I am intrigued that our foremothers came up with so many ways to create beautiful embroidery with only white fabric and a white thread. Whitework is such an interesting exploration of texture. But…then I long for color and it’s back to crewel and silk shading. So much embroidery, so little time.
Your beautiful designs and love of teaching various embroidery techniques have made you a beloved member of the EGA community. What do you hope students take from all of your courses?
Most of us start an embroidery because we plan to produce a piece we find aesthetically pleasing. Embroidering to create a special item is very satisfying. But I hope, as students stitch, they will find they enjoy the process of embroidery.
I also hope, whatever class I have taught, that a student will become comfortable enough with the technique to make changes to colors or stitches as best suit them. I view my class designs as starting points. And finally, I very much hope that students will enjoy the time we spend embroidering together in class.
Thank you to Kim Sanders for giving us an in-depth, insider’s view into her design and embroidery process! Thank Goodness It’s Finished is available as a GCC Lightning Round through May 31, and Kim has several other classes currently available at EGA. Browse them all here!
Like this post? Pin it!