There has never been a better time to be a beginner embroiderer. New stitchers have a wealth of information at their fingertips when researching embroidery stitches. The Royal School of Needlework alone lists 200 stitches in their RSN Stitch Bank. That includes 50 new stitches added in January 2022! The ongoing project strives to identify all possible embroidery stitches for inclusion in the bank. This includes techniques from all around the world and from all different traditions.
But where should new embroiderers start? Which stitches should they master first? The list of embroidery stitches one will consistently use could run a mile long. However, certain embroidery stitches are the building blocks of more complex stitchwork. Those are the stitches we would like to highlight. You’ll notice as you move through your journey as an embroiderer that the following stitches form the basis for many other stitches. Consider them like the Rosetta Stones of embroidery!
Running Stitch
The running stitch is a good place for beginner embroiderers to start. It is one of the most basic embroidery stitches. As the name suggests, running stitch produces a line of stitches that ‘run’ in a direction across your canvas. The needle comes up from the back of your fabric, makes a straight line, then comes down through the fabric from the top. The needle is then brought up again, with a gap between the first stitch and the stitch now being created.
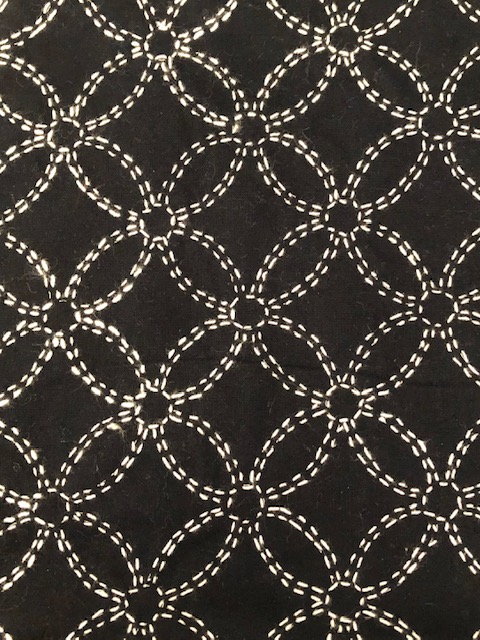
As shown in the photo above, running stitch is very popular in embroidery like Sashiko. In Sahisko, each stitch and the gaps between stitches should be about the same length. In other embroidery, the length of stitches and gaps may vary. You can create very long stitches with small gaps between them, and vice versa. As a simple stitched line, you’ll notice running stitch used in almost all forms of embroidery.
Learn how to make the Running Stitch here.
Straight Stitch
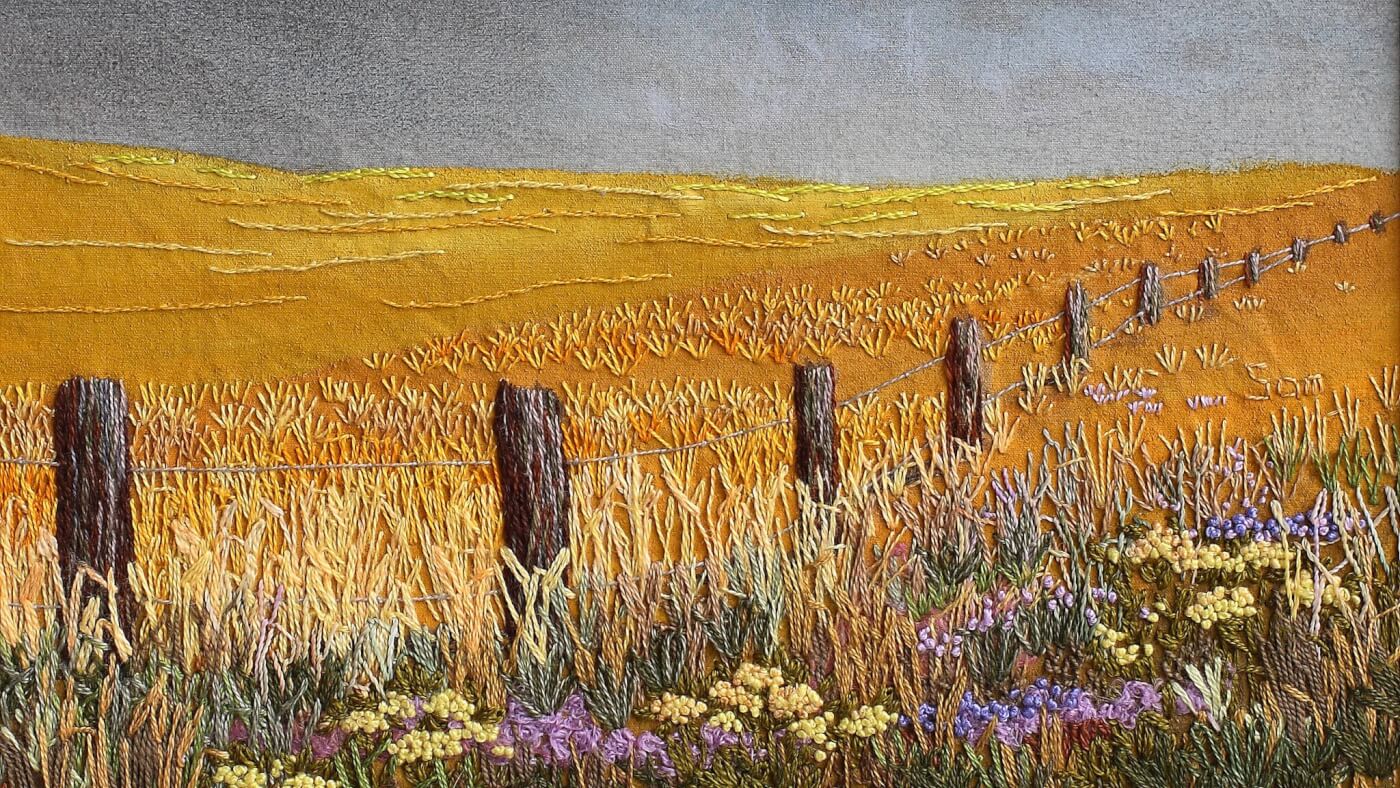
The straight stitch is very similar to the running stitch. The straight stitch is slightly different in that it doesn’t need to move across the canvas in a line, leaving gaps as it goes. Straight stitches can be worked side by side and in bunches. For that reason, it’s a popular stitch for creating clumps of grass and accenting greenery. You’ll notice it in the grass work above. Straight stitch forms the sparse bits of grass fanning out above the fence line.
Learn how to make Straight Stitch here.
Back Stitch
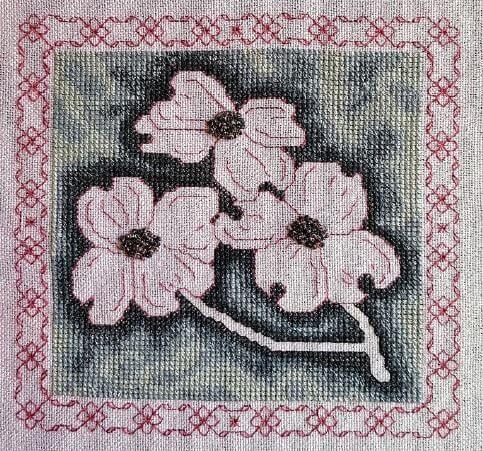
Back stitch is another stitch you’ll use again and again in your embroidery. It creates a continuous, unbroken line, as seen above in the Dogwood Assisi Petite Project. Back stitch is used to outline the dogwood flowers and their stems.
Like running and straight stitch, the needle comes up from behind the canvas, then moves down through the fabric some distance ahead. The difference occurs with the second stitch onward. Instead of bringing the needle up through the fabric and moving forward, the thread moves backward, bringing the needle down through the canvas at the end of the previous stitch.
Learn how to make Back Stitch here.
Stem Stitch
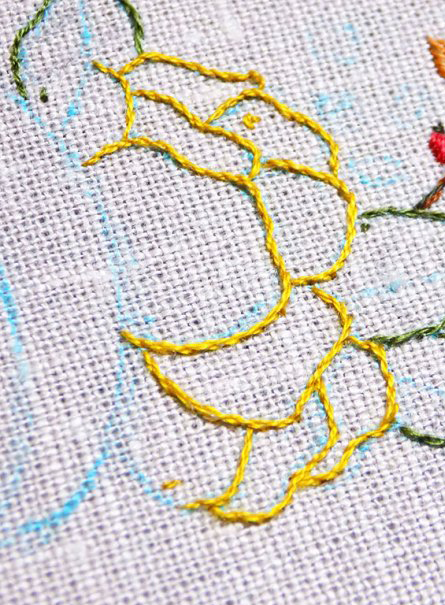
Stem stitch is similar in effect to back stitch, but many embroiderers find it a bit less fiddly to perform. It is another incredibly popular and versatile stitch. Like other stitches here, it is one of the oldest used in embroidery. You can find it featured prominently in the Bayeux Tapestry.
Stem stitch involves making a straight stitch without pulling the thread all the way through. A small loop is left at the surface. At the halfway point of the stitch, the needle is brought up through the canvas, with the loop held to the right, out of the way of the needle (if the loop is held to the left, then it is called Outline stitch). The loop is then tightened, and the process repeated. This creates a trail of stitches stacked snugly one against the next, as seen in the yellow outline of the marigold flower petals seen above.
Learn how to make Stem Stitch here.
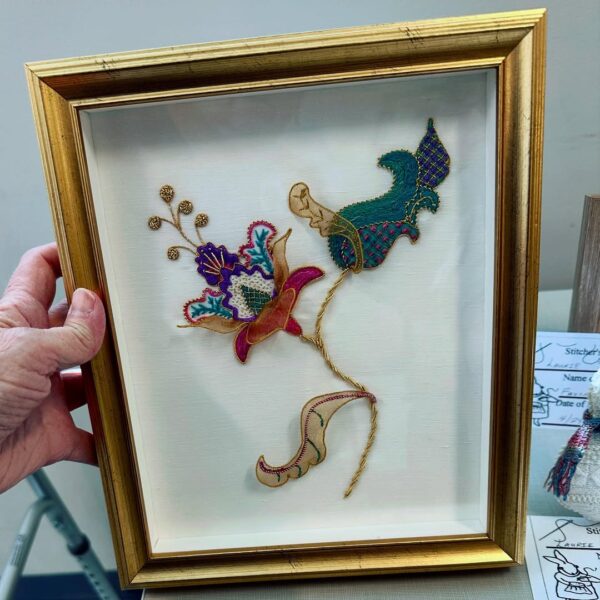
Satin Stitch
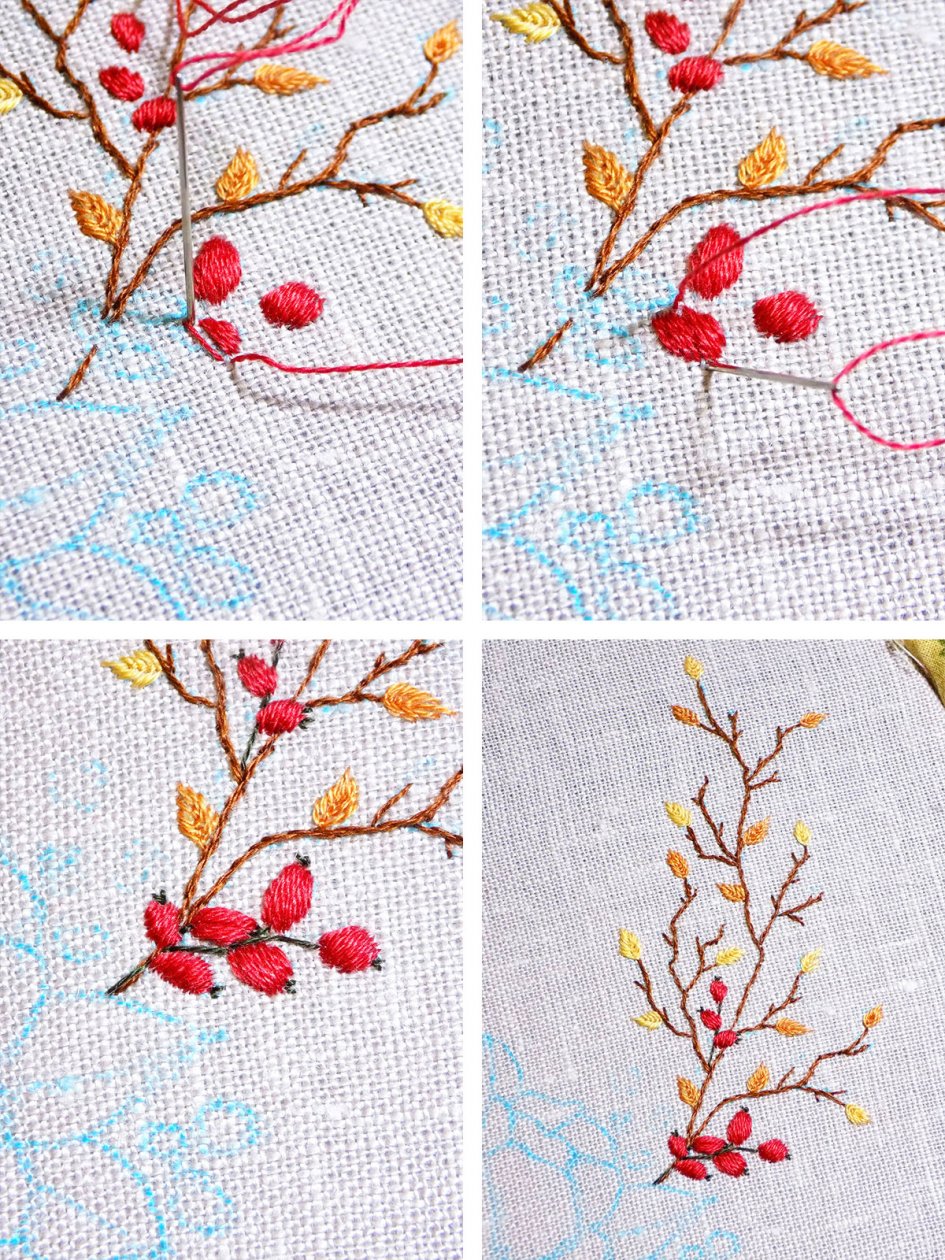
Satin stitch involves working straight stitches parallel to one another to fill in areas of the canvas. Satin stitch forms the basis for many different kinds of filling and shading stitches: Padded satin stitch, Slanted satin stitch, Long and short stitch (seen below), Block shading, and others. You can see Satin stitch in the red Hawthorne berries above.
Find instructions for making Satin Stitch here.
Long and Short Stitch
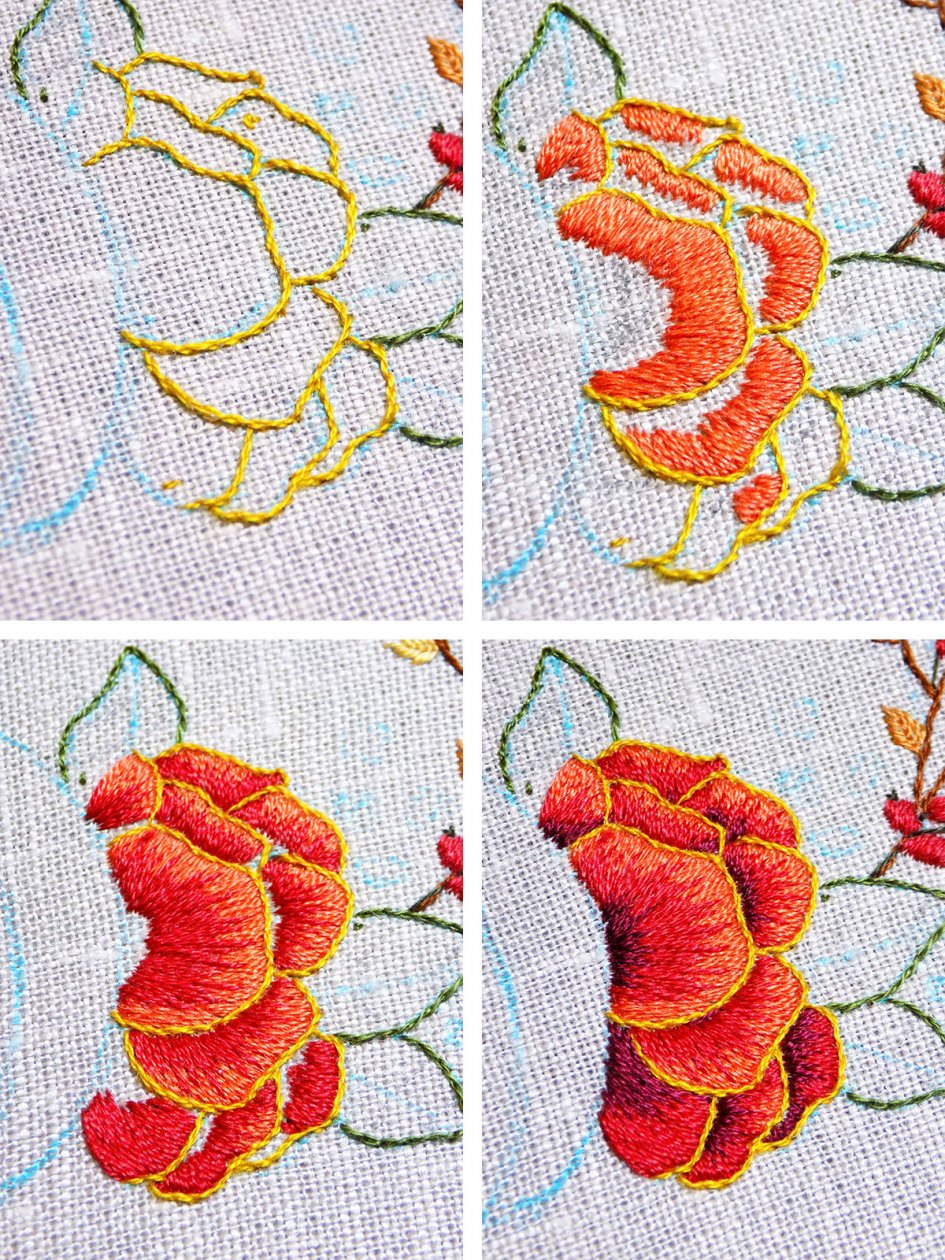
As the name suggests, Long and short stitch is used to fill areas of your embroidery with long and short stitches. It’s closely related to satin stitch. You’ll see Long and short stitch used in a lot of “needle painting” embroidery as it’s an excellent way to blend colors and add shading for realistic work.
There are two ways to work Long and short stitch. In Natural shading, the line of stitches move with the shape of the design being shaded. In Tapestry shading, stitches are worked alongside one another in the same direction. The marigold petals above use Long and short stitches to fill in the red, orange, and deep purple areas of the flower.
Learn how to work Long and short stitch here.
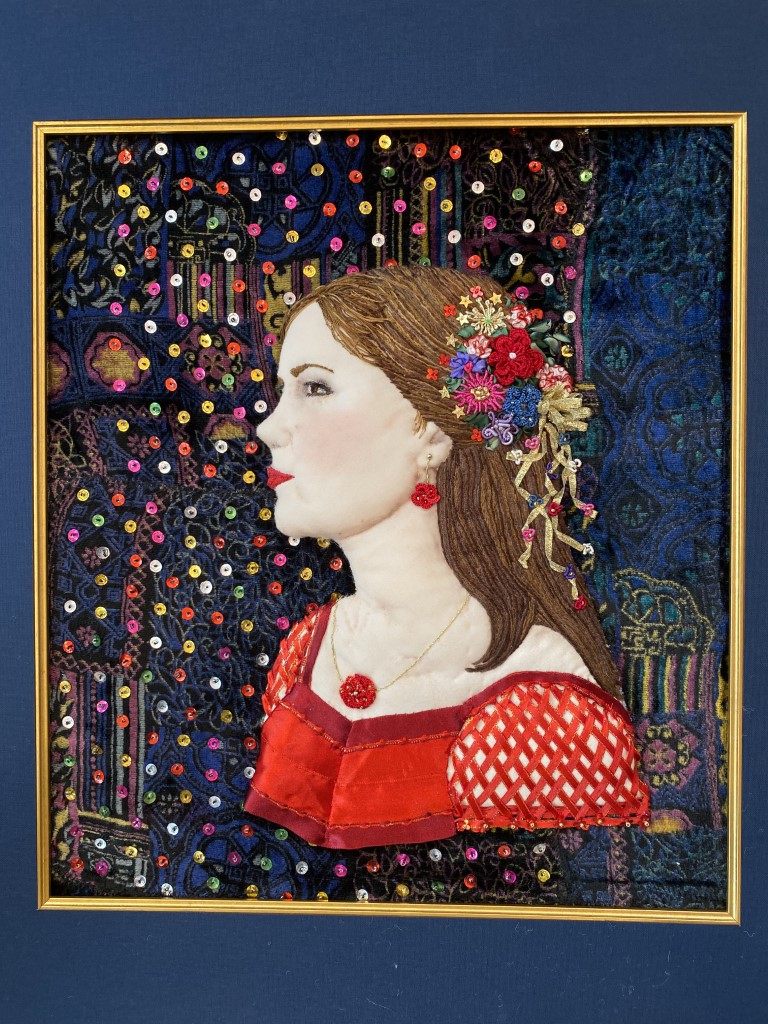
French Knot
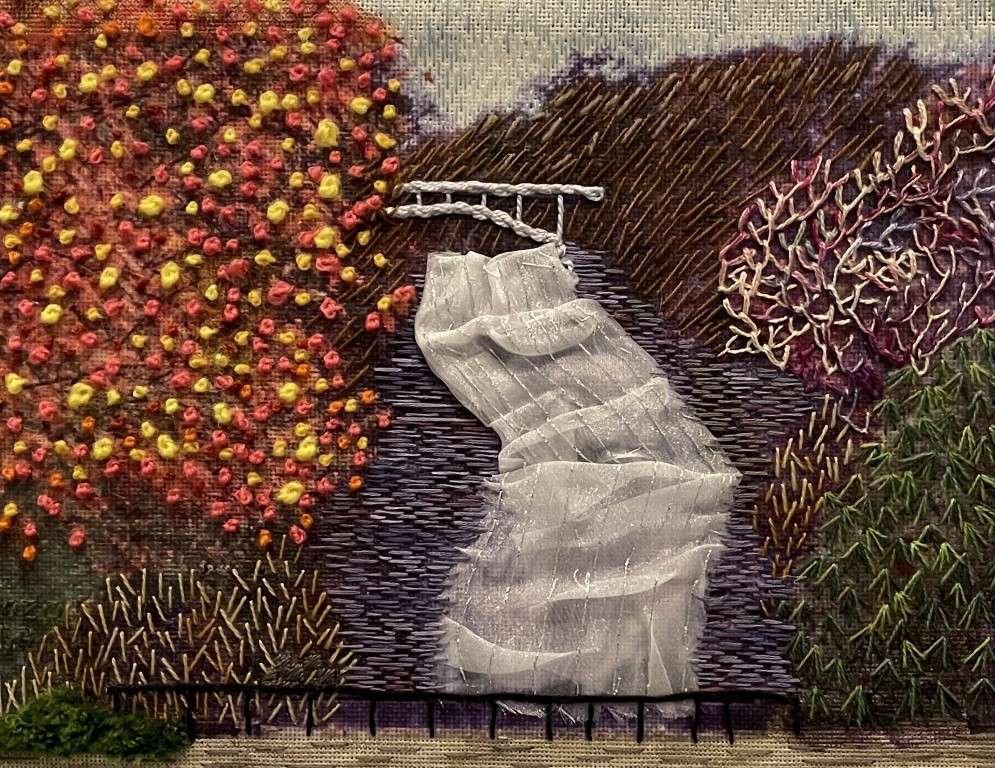
French knots bestow a 3D quality to embroidery. The small knots (seen above in the fiery orange and yellow bush on the left) are quite popular in surface embroidery, lending texture to finished pieces.
The process of making French knots requires a little practice. The needle comes up through the canvas from the back, and then the thread is wrapped around the needle before the needle is brought back down through the fabric very close to its original point of entry. It’s important to keep the thread taut to maintain the integrity of the French knot. The size of French knots will vary depending on the heaviness of the thread.
Learn how to stitch the French knot here.
Chain Stitch

Chain stitch is another very old embroidery technique—examples of it were found in textiles in Tutankhamun’s tomb in Egypt! You can see it in the Well of Wishes project above in the swirling ivory chains.
As the name indicates, Chain stitch is worked in a series of interlocking chains. The process of making the chains involves creating a loop on the surface of your canvas and then anchoring that loop by beginning the next chain.
Learn how to make the Chain stitch here.
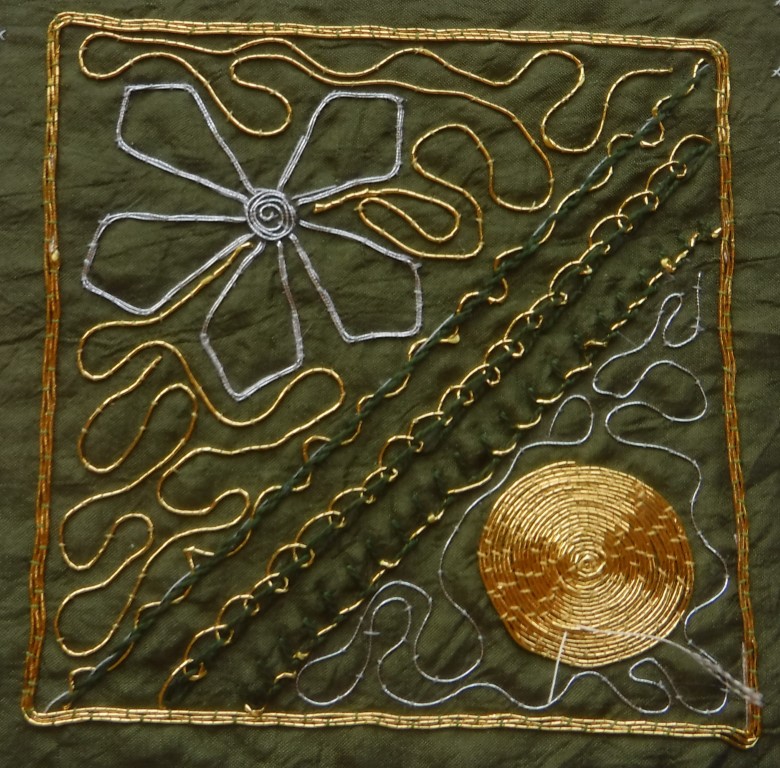
Blanket Stitch
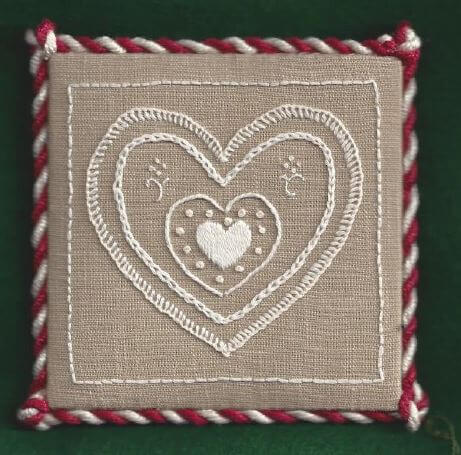
Blanket stitch is commonly used to tack down appliques and as finishing to create a nice, neat edge. It’s also used decoratively, as in the Gingerbread Heart (above), where it is used exclusively in the outermost heart. (Note that the next heart outline uses Chain stitch, the heart after that uses Outline stitch, then there are French knots around a Satin stitch heart at the center. The square enclosing all the hearts is Running stitch.)
Blanket stitch involves creating a stitched loop which is anchored to the fabric by the next loop in the series, forming an ‘L’ shape.
Learn more about making the Blanket stitch here.
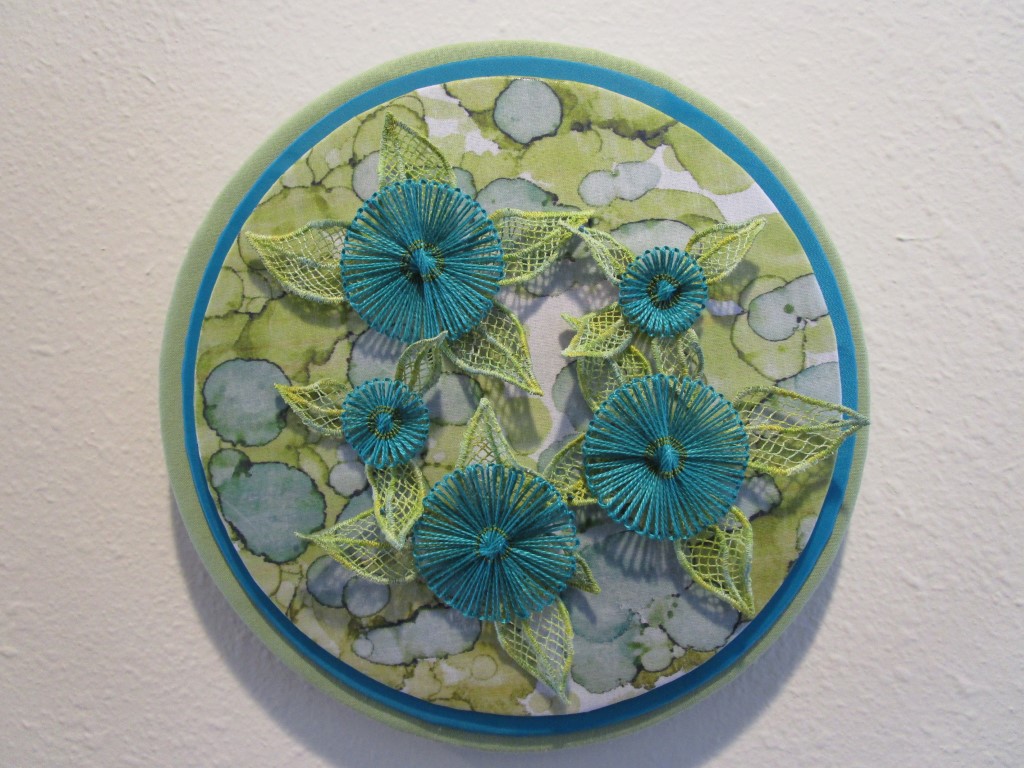
Herringbone Stitch
The Herringbone stitch is a crossed stitch, of which there are many. Cross stitch might be the most well-known.
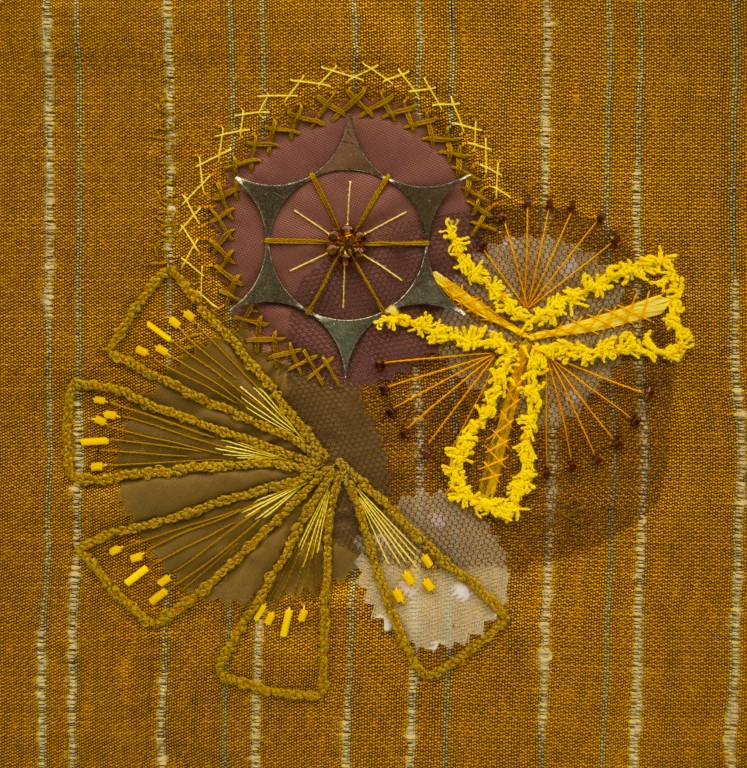
Unlike cross stitch, where uniform ‘X’ stitches line up but don’t overlap, Herringbone stitch consists of overlapping ‘X’ stitches. Herringbone is created by working a series of slanted stitches in one direction, and then again in the opposite direction, with top and bottom edges overlapping. You can see the Herringbone stitches at the very top of the above design. They are worked in yellow and olive thread in a semi-circle around the mixed media piece.
Learn how to make Herringbone stitch here.
We hope this has inspired you to learn some new embroidery stitches! EGA encourages exploration of the entire RSN Stitch Bank to expand your knowledge of embroidery techniques.