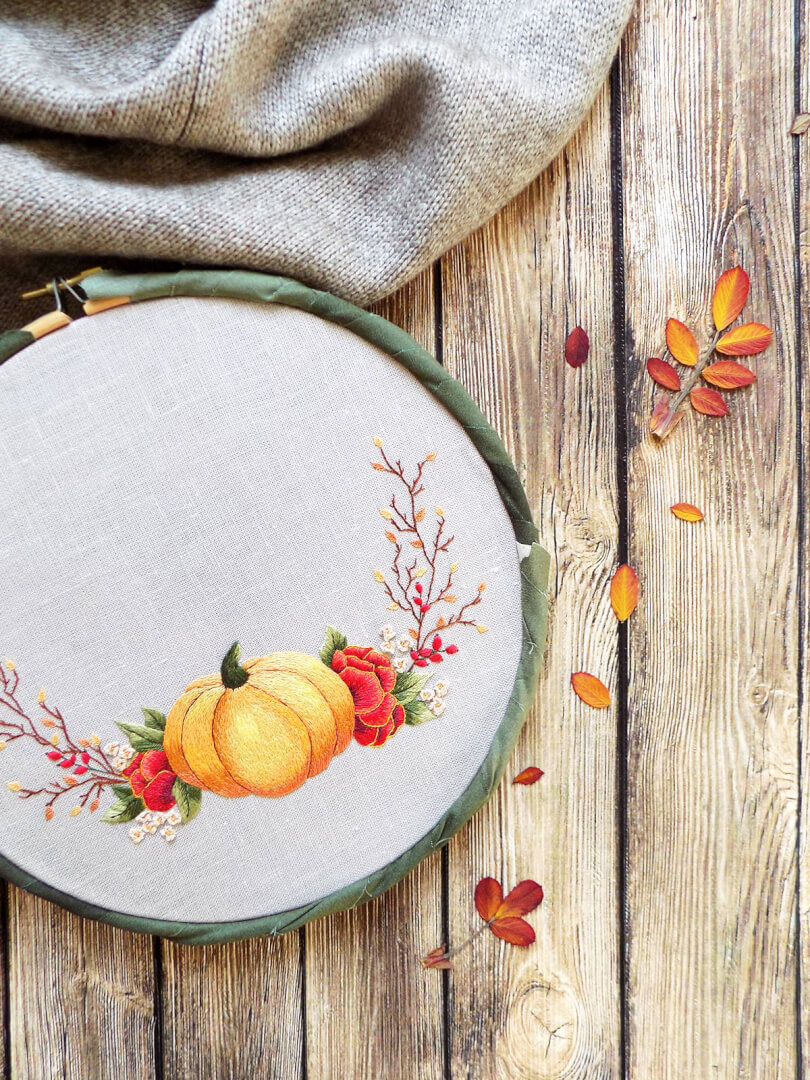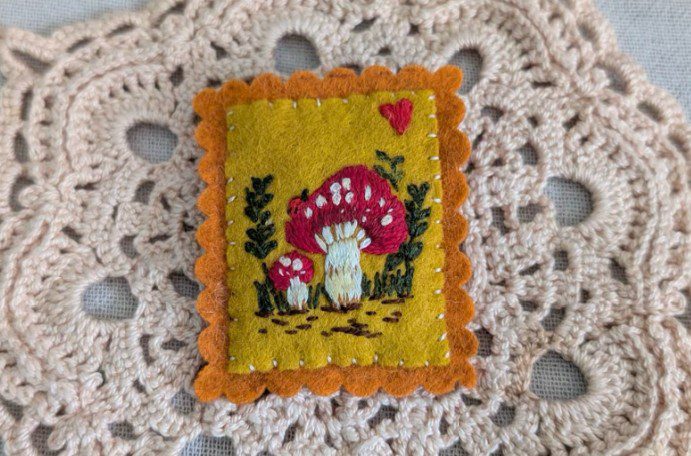
Maria Tapilouw learned embroidery and crochet from her mother when she was just six years old. She hasn’t stopped crafting and creating since then! Now working under the name Myacreates (@myacreates), Maria crafts whimsical pieces that run the gamut of the crafting world, from embroidery to sewing, painting, beading, felting, and more. Her Mushroom Stamp Brooch is a perfect project for adventurous embroiderers in search of a means for wearing their art. Interested embroiderers can follow Maria on her Instagram (linked above), YouTube channel, and Substack.
Embroidery Level
Advanced Beginner to Intermediate
Size: Approx 2 1/8 inch x 1 3/4 inch
Materials & Instruments
- Mushroom pattern for tracing – join the EGA newsletter to download! (EGA members can also download this pattern from the Publications page here.)
- 4” embroidery hoop (optional)
- Embroidery needle
- Embroidery threads : DMC cotton embroidery floss (color list according to the pattern)
- Wool blend felt for the top and the backing – 2 colors of your choice.
- Embroidery scissors / thread snips
- Fabric scissors
- Scallop pinking shears or zig zag pinking shears
- Brooch or safety pin
- Transfer tools: for this project, I used a non-sticky water soluble embroidery sheet. You can also use water soluble embroidery stabilizers such as Sulky Fabri Solvy or Sulky Stick and Stitch.
- Pen to transfer the paper, don’t use a pen with ink that smudges easily when transferring it.
- Light pad, or an iPad
- Stuffing of your choice
Thread Guide
DMC Embroidery Floss
- 712 off white – mushroom stem
- 3865 white – mushroom white spots
- 3829 yellow ochre – the underside of the mushroom
- 666 red – ladybug & heart stamp
- 321 red – mushroom
- 816 dark red – darker shades of the mushroom
- 936 green – grass
- 890 dark green – plants
- 848 dark brown – soil
- 310 black – ladybug
Stitches Used for this project
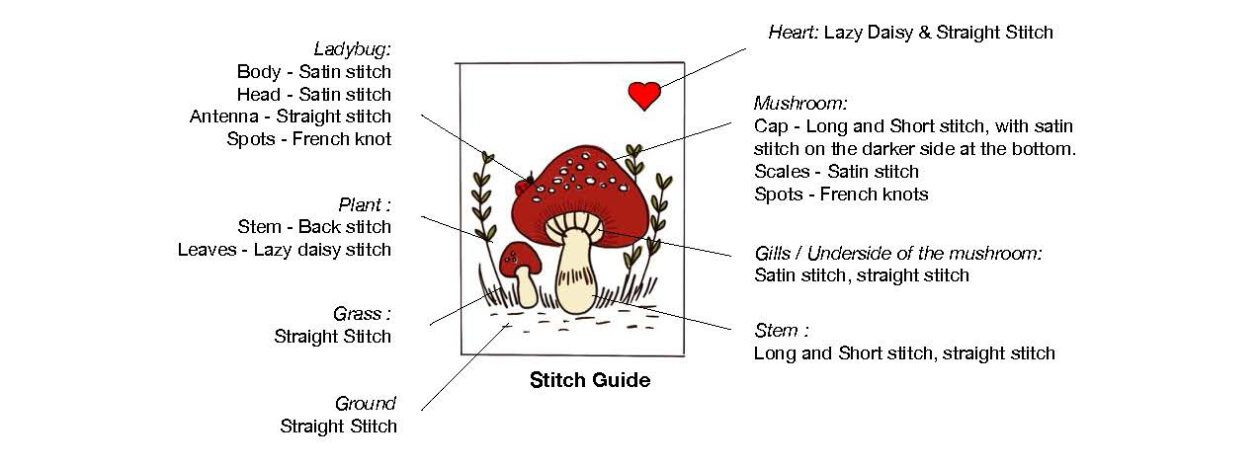
- Long and short stitch
- Satin stitch
- Back stitch
- Straight stitch
- Lazy Daisy stitch
- French Knot
Instructions
Preparation
I use wool blended felt for this project. Since we will use a water soluble transfer sheet, we should pre-wash the wool blend felt. Prewash in a sink of hot running water—immersing the felt completely. Lay flat to dry, or use a blow dryer to speed things up. Wool blend felt will shrink after washing. The washed felt is bubbly or wrinkled, and is thicker than its un-washed partner (this can be flattened by ironing, though).
You could also use more affordable acrylic felt, commonly found in craft stores. But, don’t use iron on this felt, as it will burn the felt.
Tracing Your Pattern
These are some methods to trace your pattern:
Option 1: Stick and stitch transfer paper.
If you use stick and stitch embroidery transfer paper, print the pattern directly onto the transfer paper. Remember to print the pattern at the correct scale. If you print the pattern in letter size paper, the scale should be 100%. Trace the pattern afterwards.
Option 2: Tracing with a light pad or glass window.
- Print your pattern with the correct scale. If you print the pattern in letter size paper, the scale should be 100%.
- Place the printed paper and the transfer paper on a light pad or on a glass window and trace the pattern.
Option 3: Tracing with an iPad
- Enlarge the pattern from the PDF file to a correct size.
- Screenshot the pattern and save it on the photos album.
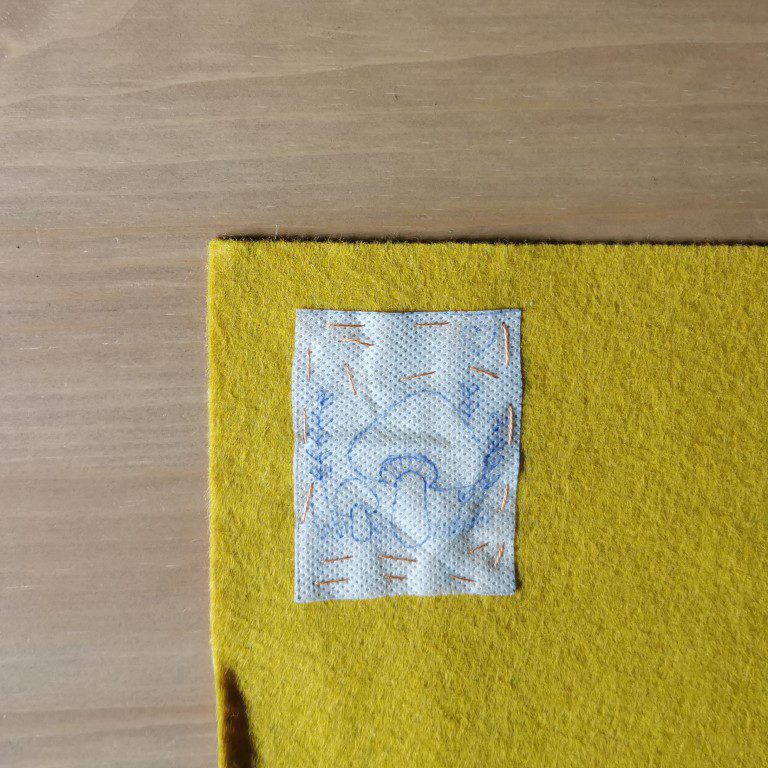
- Open the photo and turn on the “Guided Access” function, then trace it on the transfer paper.For this project, I used non-sticky water soluble stabilizer and traced the pattern with my iPad.
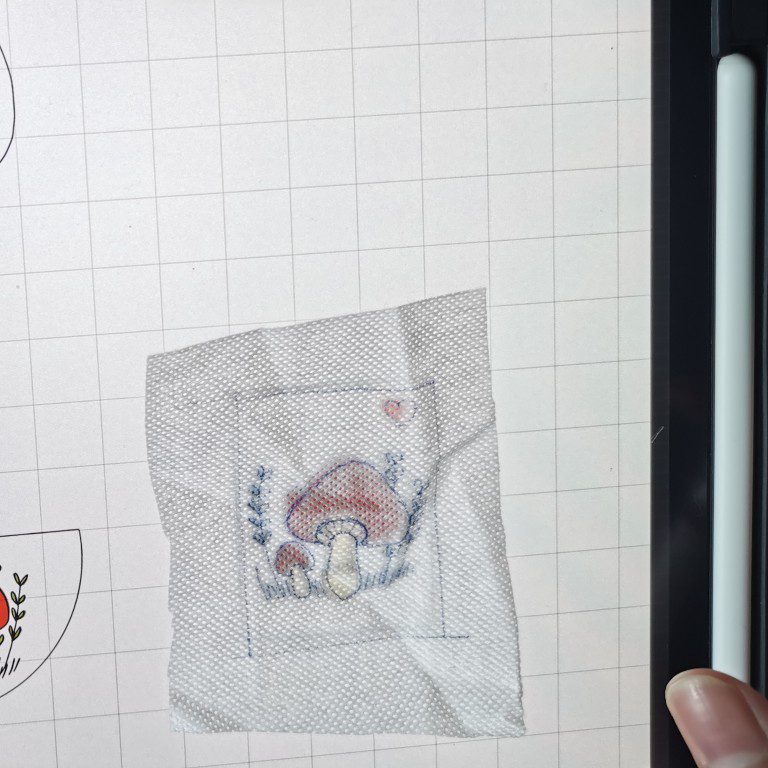
After tracing it, I cut away the excess, and basted it to the base felt with running stitch.
The Mushrooms
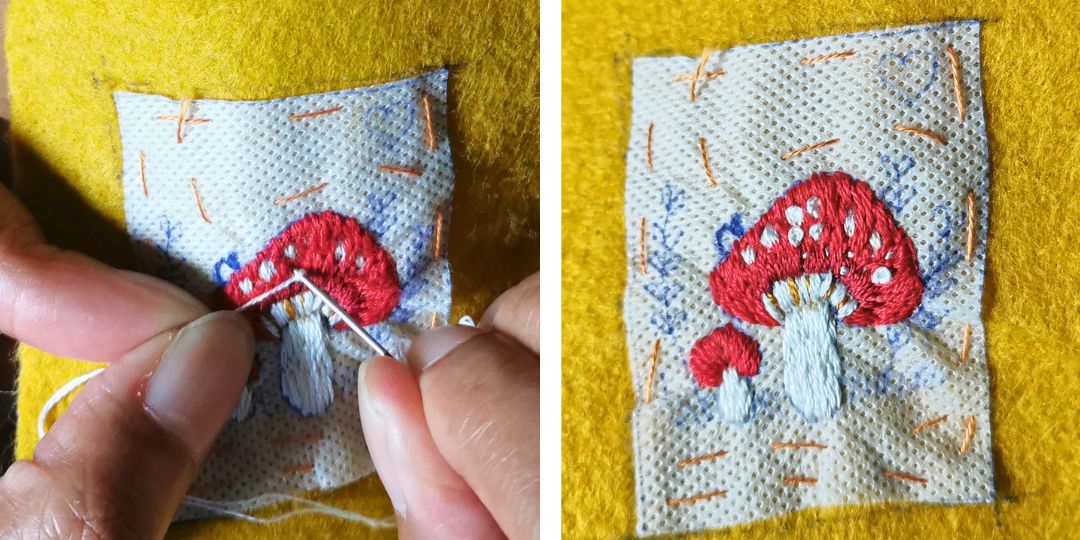
Stitches used: Long and short stitch, satin stitch
Color used: DMC 321 – red for the mushroom, DMC 816 – dark red for the darker shades of the mushroom, DMC 712 – off white for mushroom stem, DMC 3865 – white for mushroom spots, DMC 3829 – yellow ochre – the underside of the mushroom. Use 2 strands for all colors.
Start with 321 and use long and short stitch to cover the big mushroom and small mushroom. Don’t stitch the larger spots of the mushroom and leave a space on the bottom part of the bigger mushroom for the darker shades of red.
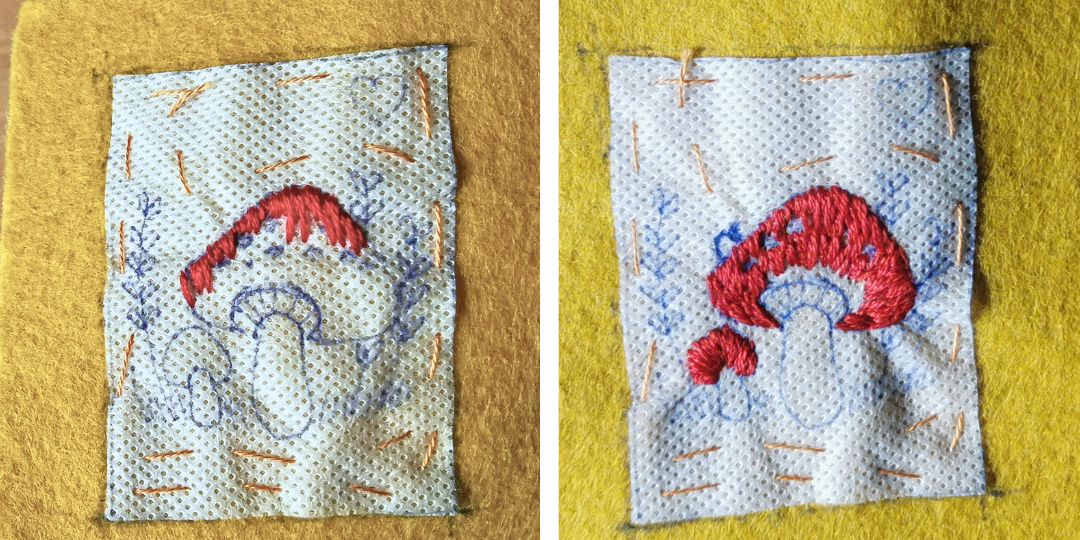
With 816, fill up the bottom part of the large mushroom with satin stitch.
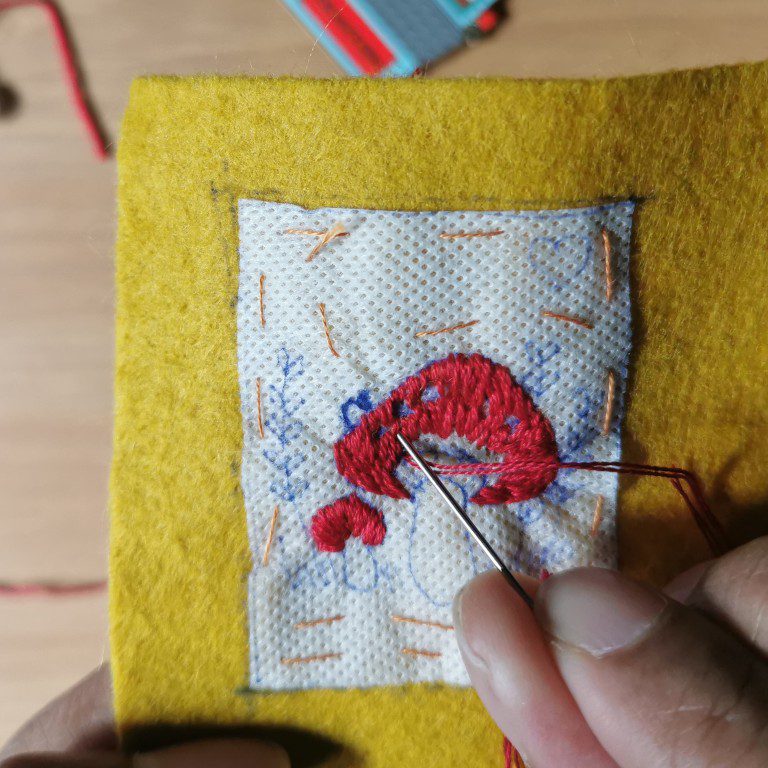
With 3829, use straight stitch to stitch the underside of the mushrooms as per the photos below. Then with 712 use satin stitch to fill up the spaces between those straight stitches. Still using 712, use satin stitch to fill up the mushroom stems and the larger spots of the mushroom.
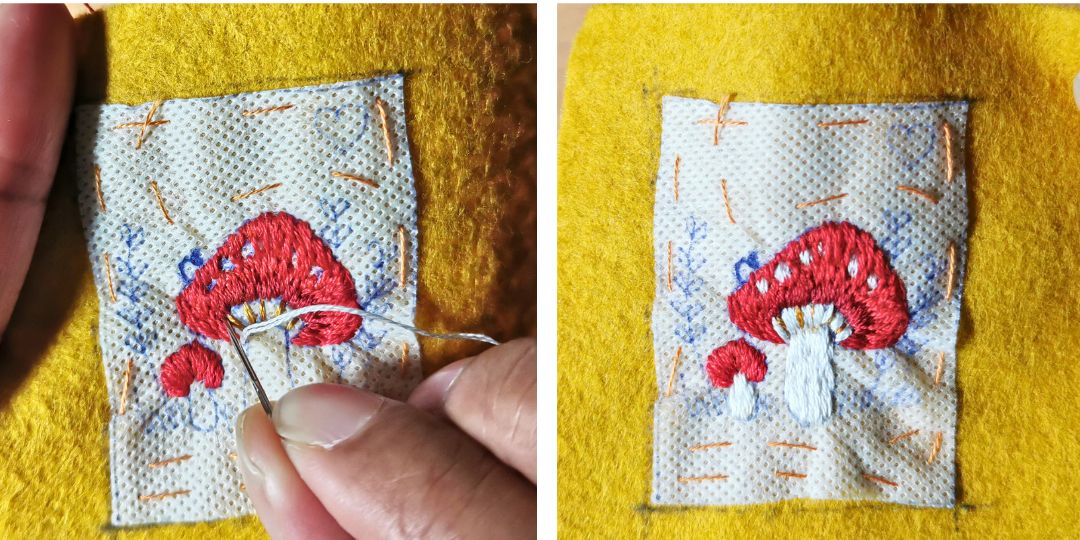
After that, with French knots, make small spots on the mushroom.
With 3829 yellow ochre and straight stitch, add some shading to the middle of the large mushroom stem and bottom of both mushrooms’ stems.
The Ladybug
Stitches used: Satin stitch, straight stitch, French knot
Color used: DMC 666 – red and DMC 310 – black. Use 2 strands for both.
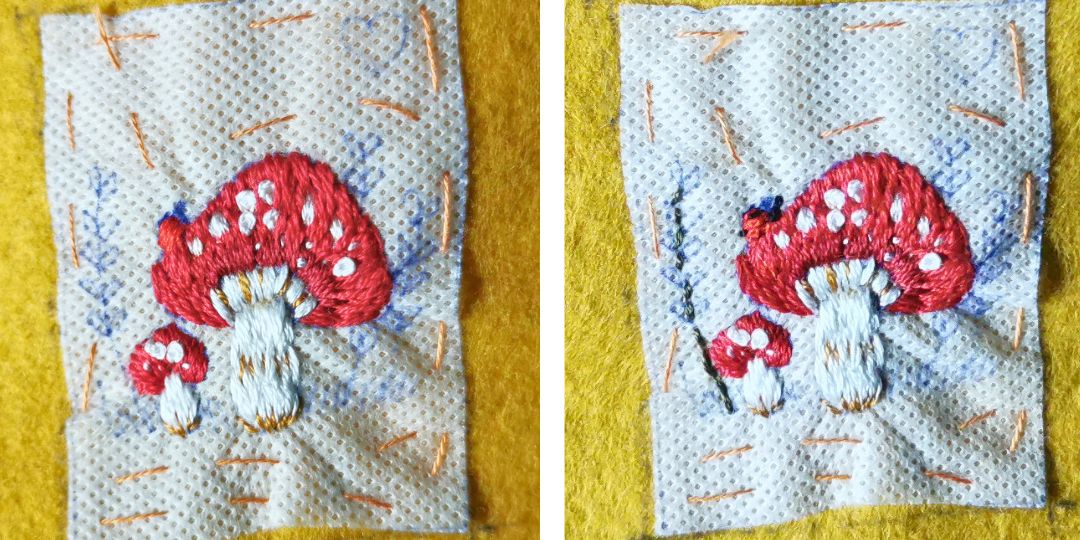
With 666, using statin stitch, stitch the ladybug body. With 310, use straight stitch and French knots to stitch the black spot on the body, the head, and the antenna.
The Plants and the Grass
Stitches used: Back stitch, lazy daisy stitch, straight stitch
Color used: DMC 890 – dark green, DMC 936 green. Use 2 strands.
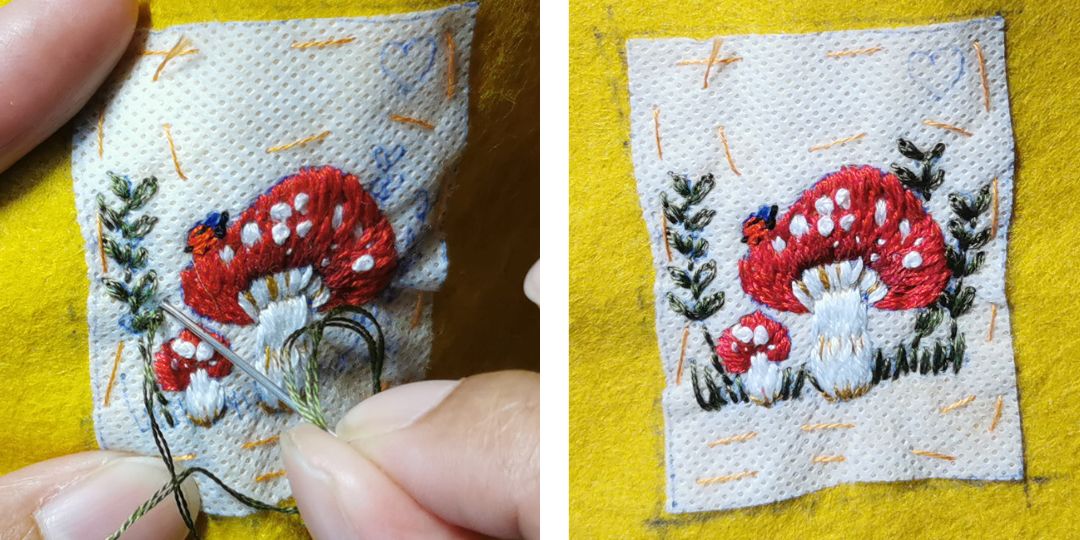
With 890, use back stitch to stitch the stems. After that, stitch the leaves with Lazy Daisy stitch.
Then, using 936, stitch the grass using straight stitch.
The Heart
Stitches used: Lazy Daisy stitch, straight stitch
Color used: DMC 666 – red. Use 2 strands.
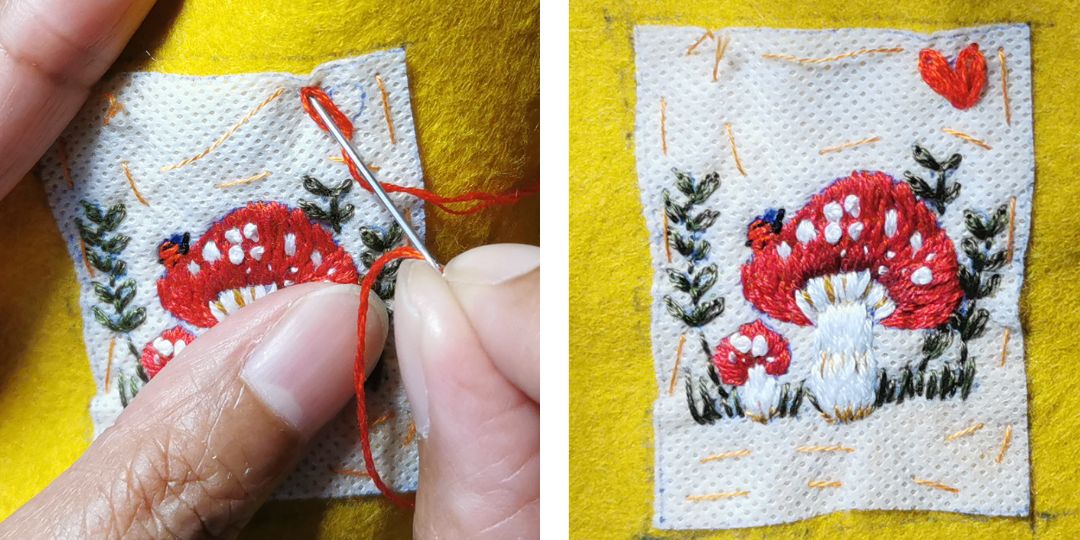
Using 666, stitch a lazy daisy stitch for one half of the heart, then fill it with straight stitch. Do it for the second half of the heart as well.
Finishing the Brooch
You are done with the embroidery, but you can also add some random small stitches using 898 dark brown to stitch the ground. Cut the excess of the embroidery transfer paper as much as possible. Then under the running water, let the transfer paper dissolve. Pat dry with a towel. You can also lightly iron it or use a hair dryer to help it dry faster. Please use a layer of fabric or towel on top of the embroidery if you use an iron to dry and smooth the felt.
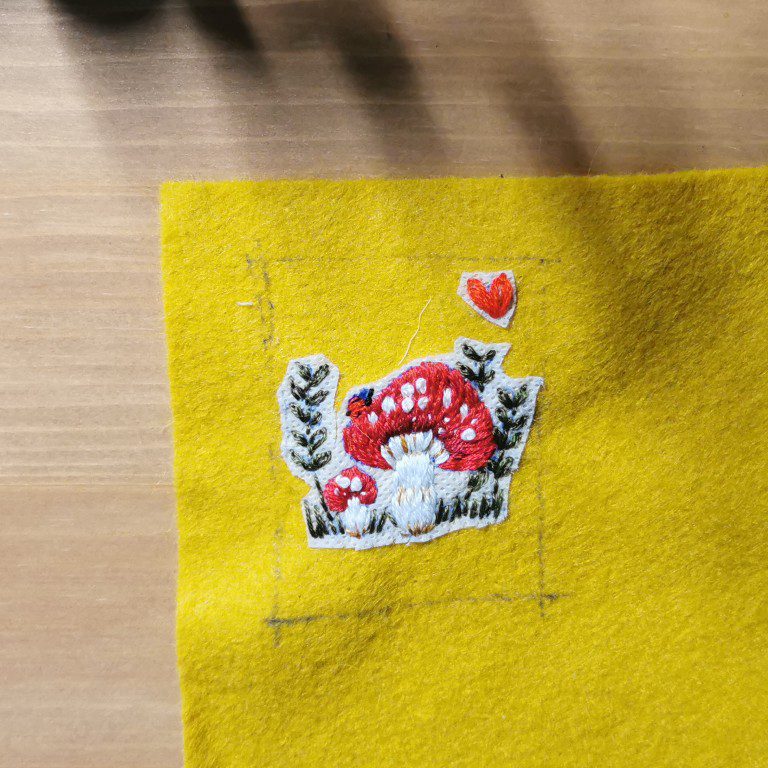
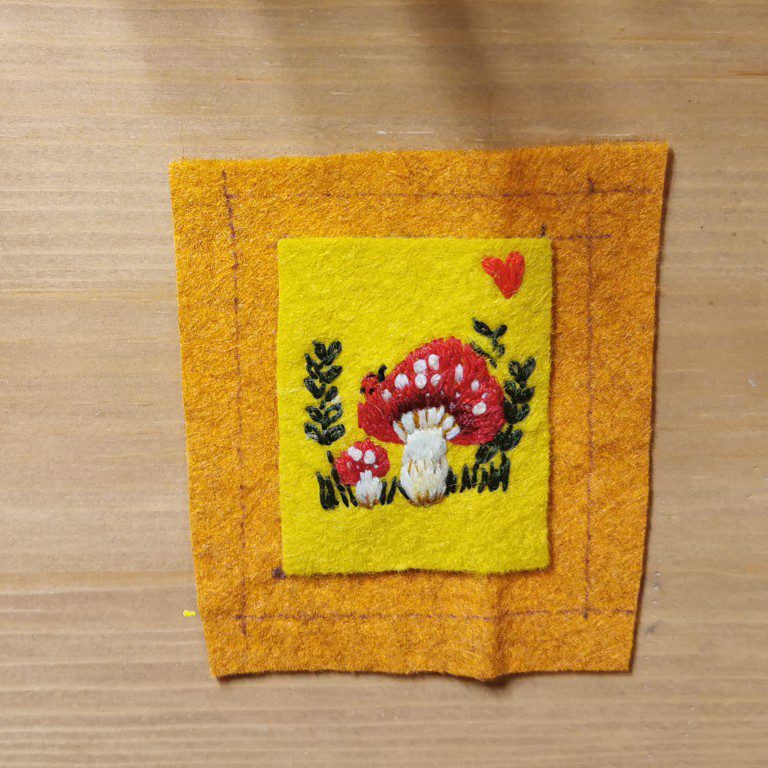
After it is dry, cut to size, then place it on top of the background felt. Mark the outline of the stamp.
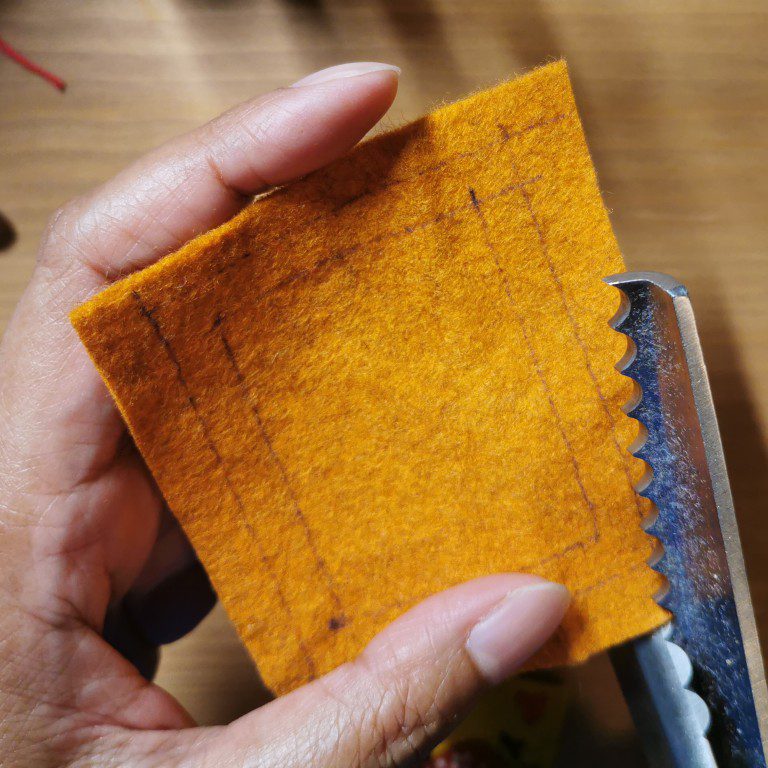
Use the pinking shears to cut the background fabric. I used scallop shaped pinking shears to mimic the look of a postage stamp, but you can also use normal pinking shears.
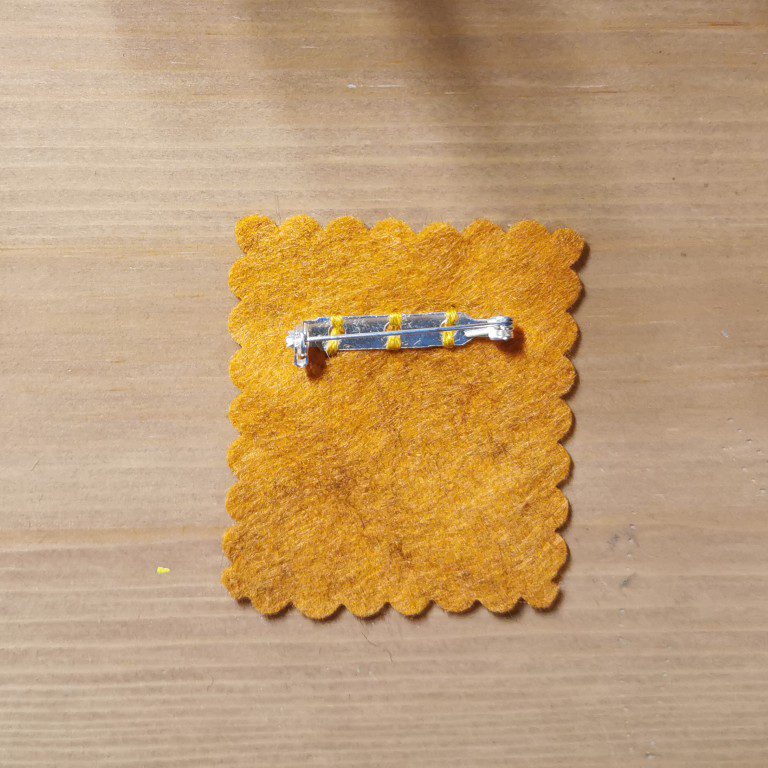
Grab your brooch, and sew it onto the background fabric.
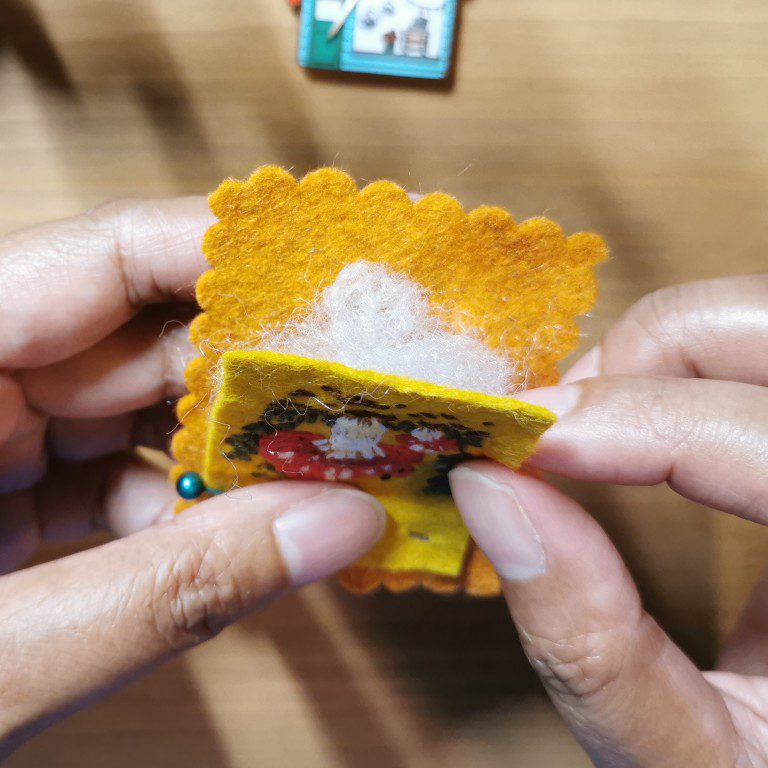
Grab the stuffing and fill up the space between the two pieces of felt. You can also skip this part.
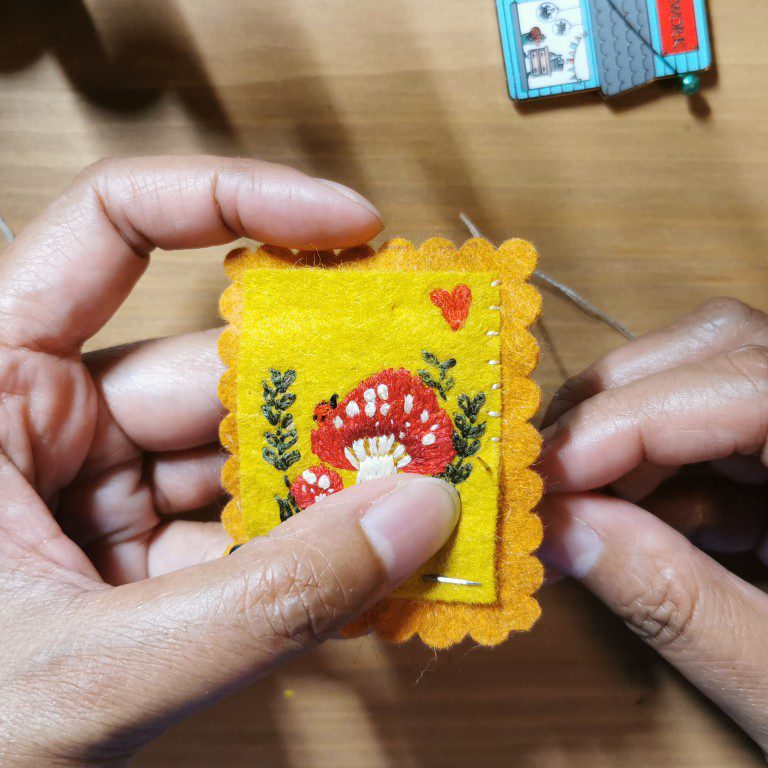
With the thread of your choice, make tiny straight stitches to stitch the top embroidered felt to the background felt. And you are done!