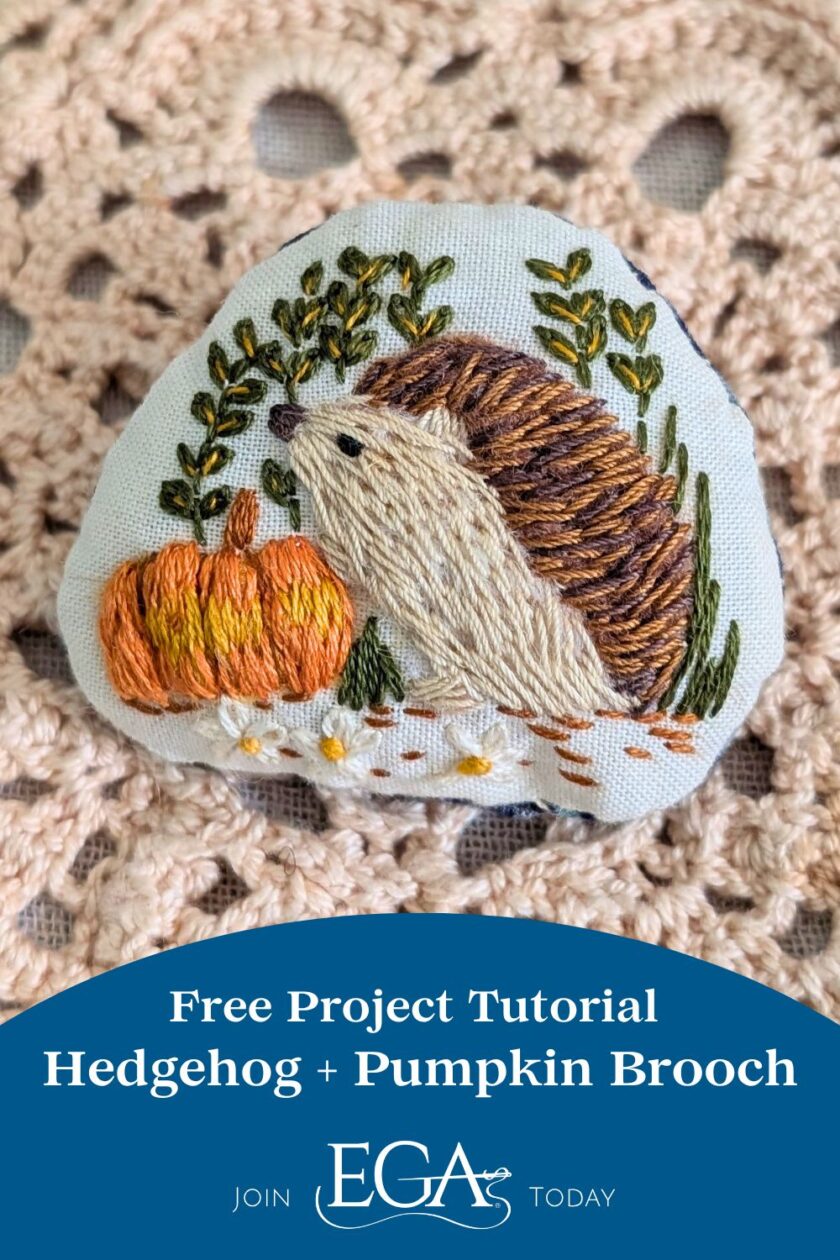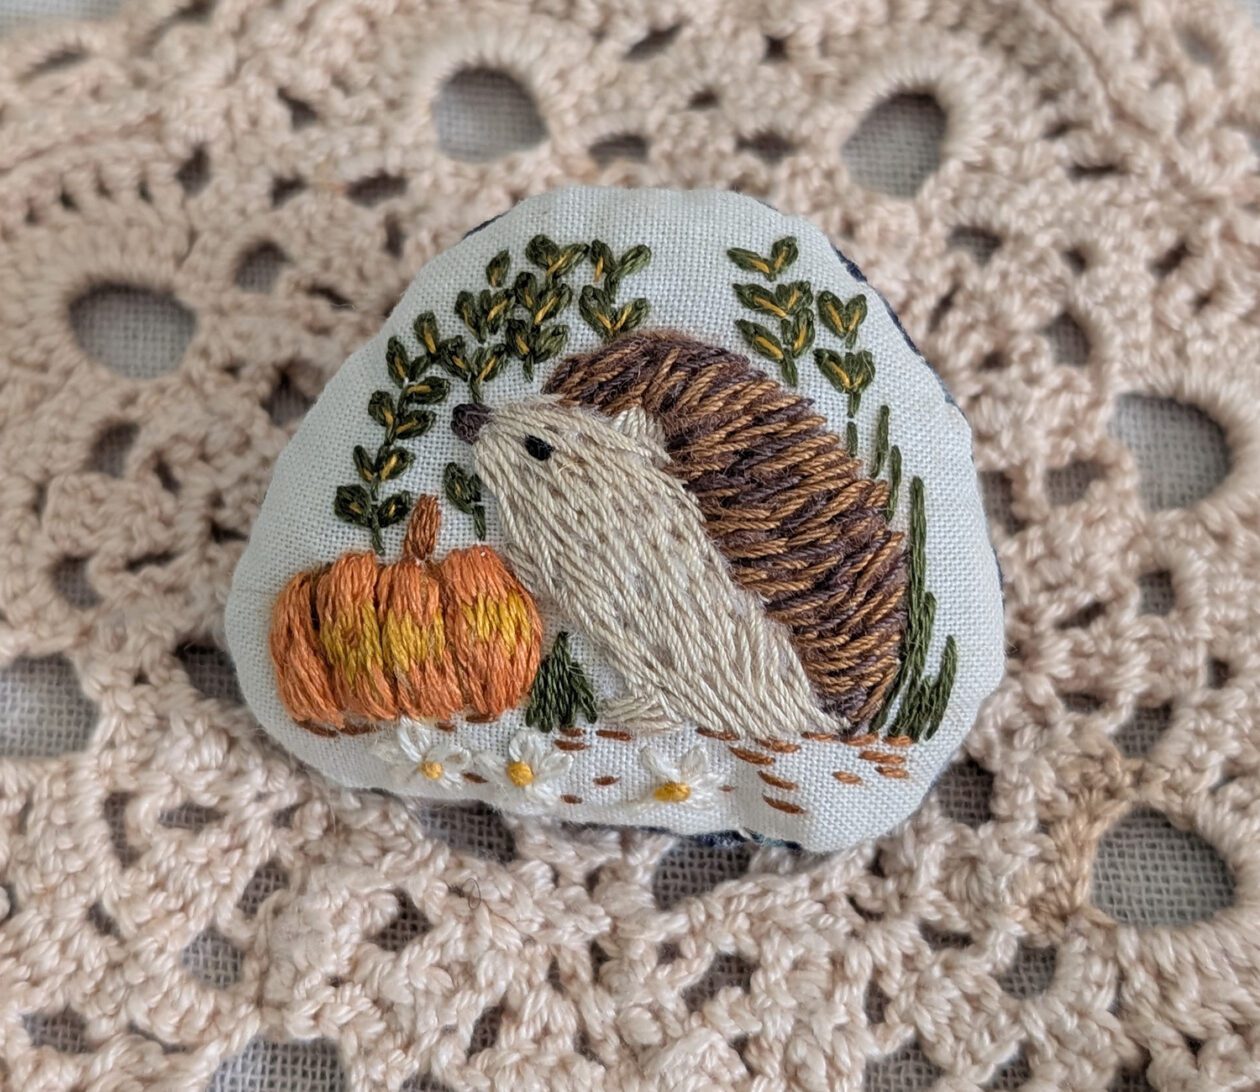
Maria Tapilouw learned embroidery and crochet from her mother when she was just six years old. She hasn’t stopped crafting and creating since then! Now working under the name Myacreates (@myacreates), Maria crafts whimsical pieces that run the gamut of the crafting world, from embroidery to sewing, painting, beading, felting, and more. Her Hedgehog with Pumpkin Brooch (as well as her Mushroom Stamp Brooch) makes a great project for adventurous embroiderers who want to wear their needlework. It involves surface embroidery, needle felting, sewing, and stuffing to create an autumnal, three-dimensional brooch. Interested embroiderers can follow Maria on her Instagram (linked above), YouTube channel, and Substack.
Embroidery Level
Advanced Beginner to Intermediate
Size: Approx 2 1/8 inch x 1 3/4 inch
Materials & Instruments
- Hedgehog and Pumpkin pattern for tracing – join the EGA newsletter to download! (EGA members can also download this pattern from the Publications page here.)
- 4” embroidery hoop
- Embroidery needle
- Embroidery threads:
- DMC cotton embroidery floss (color list according to the pattern)
- Wonderfil Specialty Threads Spaghetti thread size 12 (color list below) – can be substituted with a similar color of DMC.
- Fabric: any fabric of your choice. The example uses cotton in the color cream.
- Scrap fabric for backing
- Stuffing. You can also cut any fabric scraps in your stash into small pieces for the stuffing.
- Embroidery scissors/thread snips
- Fabric scissors
- Brooch or safety pin
- Felting Wool – a small amount of white, brown, and orange (these materials can be skipped if stitchers prefer to keep the hedgehog and pumpkin flat, and not 3-dimensional)
- Felting needle
- Felting pad
- Heat erasable pen
- Transfer tools:
- Print out pattern and use a light pad to trace it to the fabric, OR
- Trace the pattern using an iPad
- Heat erasable pen for tracing
Thread Guide
DMC Embroidery Floss
- 712 off white – hedgehog belly and flowers on the ground
- 898 dark brown – hedgehog spines
- 434 brown – hedgehog spines and pumpkin stem
- 310 black – hedgehog nose and eye
- 3853 orange – pumpkin
- 3852 deep yellow – pumpkin, leaves, and flowers on the ground
- 936 green – plants and grass
Wonderfil Specialty Threads – Spagetti no. 12
- SP103 – hedgehog belly
- SP20 – hedgehog spines
- SP21 – hedgehog spines
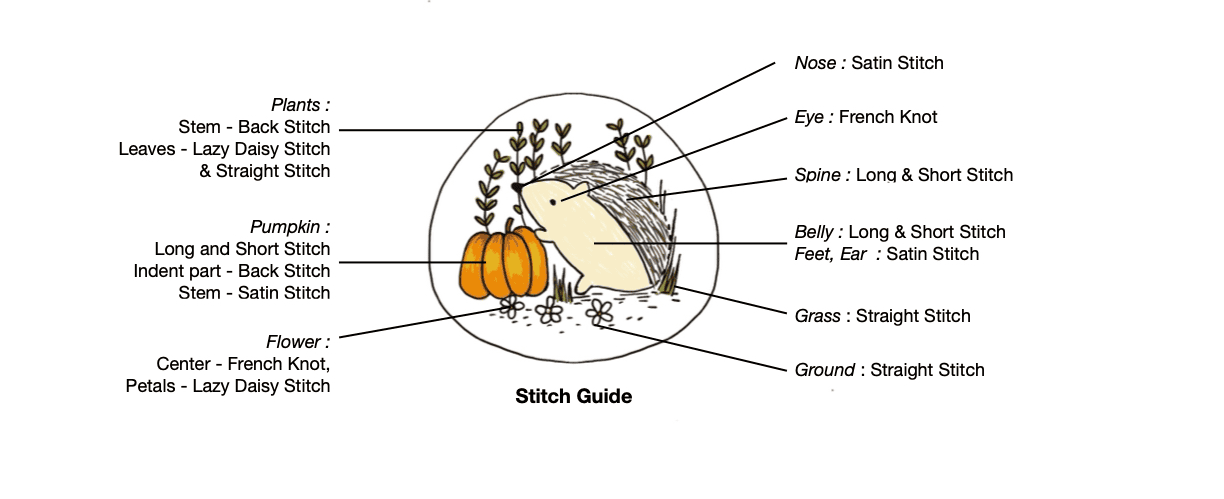
Stitches Used for this project
- Long and short stitch
- Satin stitch
- Back stitch
- Straight stitch
- Lazy Daisy stitch
- French Knot
- Ladder stitch (to assemble the brooch)
Access Maria’s instructional Stitch Guide to learn how to perform each stitch here.
Instructions
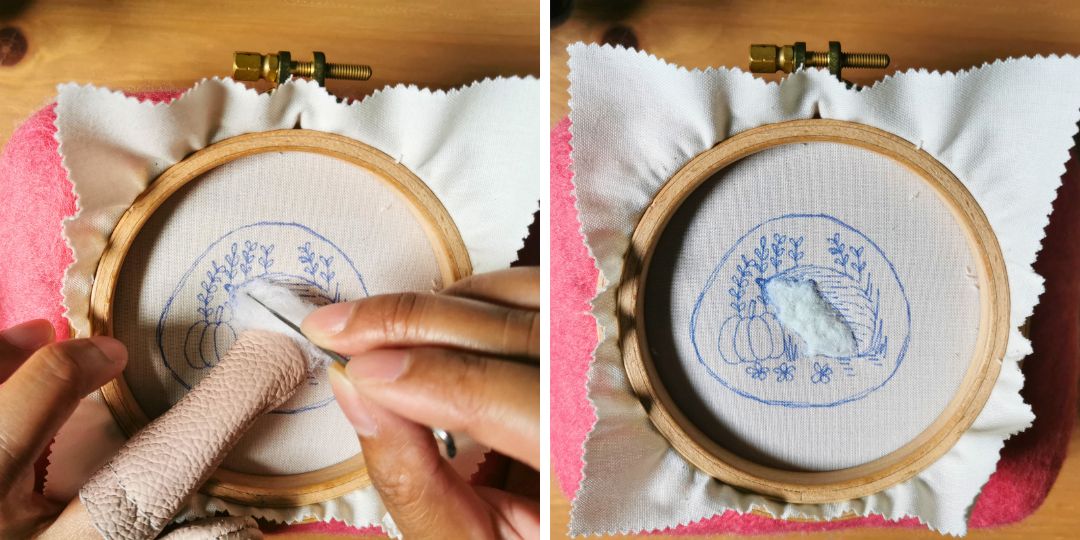
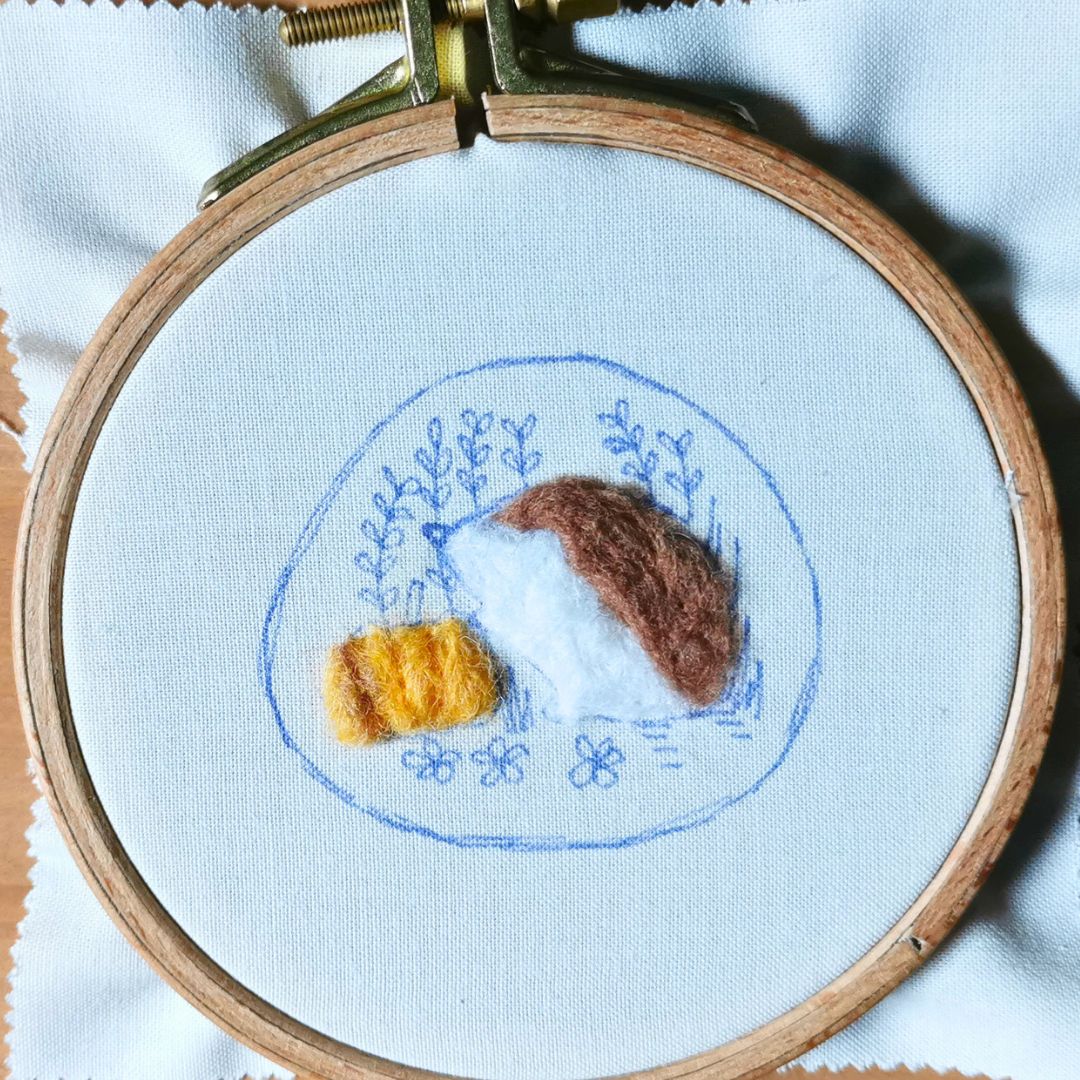
After transferring the design (see the Mushroom Stamp Brooch for additional transfer instructions and tips, if needed), place the fabric in the hoop, with the design in the well of the hoop (see below). Set the hoop against the felting pad. Take a small amount of white wool and begin stabbing the hedgehog body with the felting needle. You will need just a thin layer of wool.
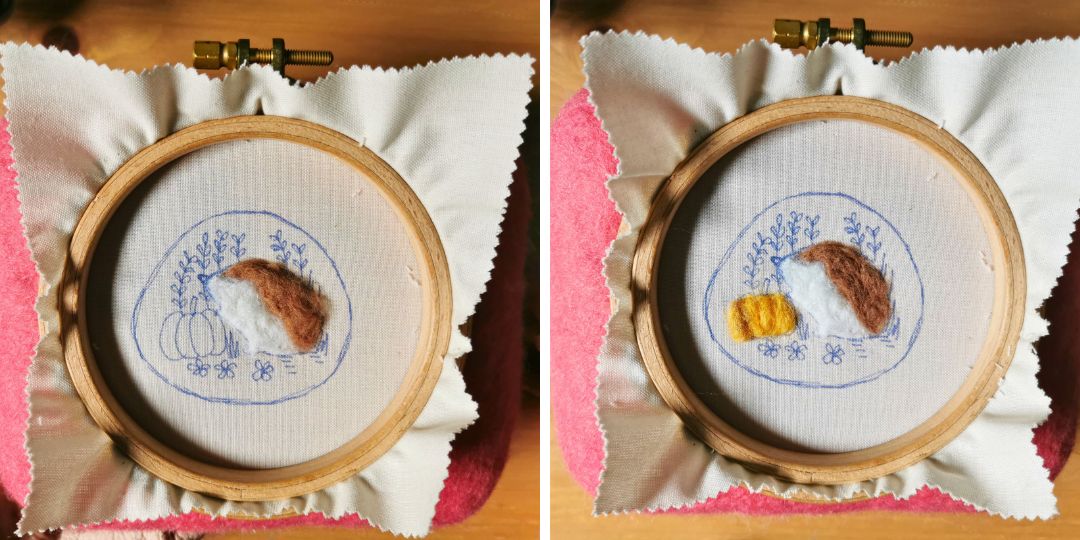
Perform the same needle felting, using the brown wool for the spines of the hedgehog. Then, use the orange wool to needle felt the pumpkin. With the felting needle, make dents in the orange wool, pressing with your felting needle, to create the pumpkin shape.
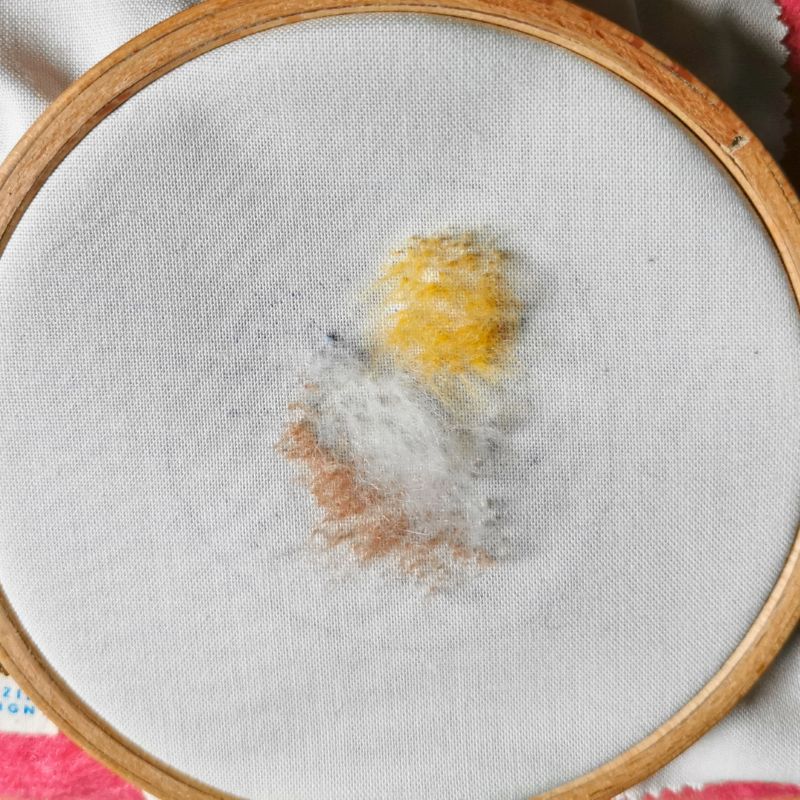
After the needle felting is finished, slowly and carefully remove the fabric and hoop from the felting pad. The back of your work will look something like this:
Then, remove the fabric from the hoop and secure the fabric in the hoop in the normal position. Screw the hoop tight and spread the fabric evenly, making sure your fabric is taut.
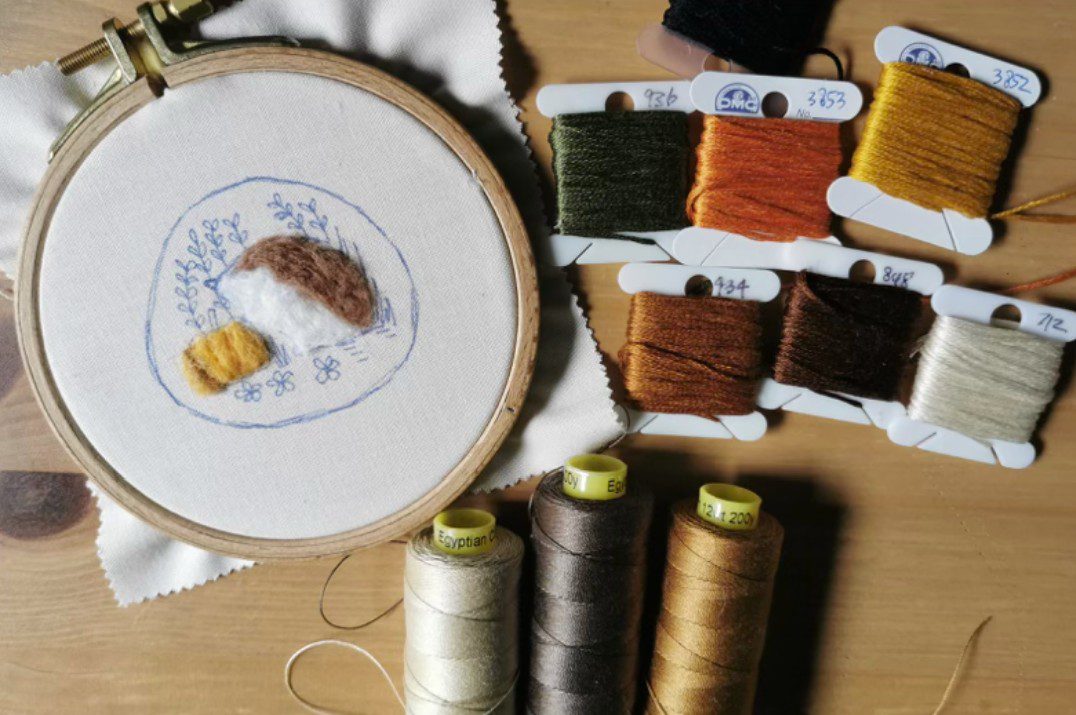
Prepare the thread and needle, and get ready to embroider! Before starting embroidery, please don’t forget to tie a knot at the very end of your thread.
Hedgehog Belly, Feet & Ear
Stitches used: Long and short stitch, satin stitch
Color used: Spagetti SP103 or DMC 712 Off White (2 strands)
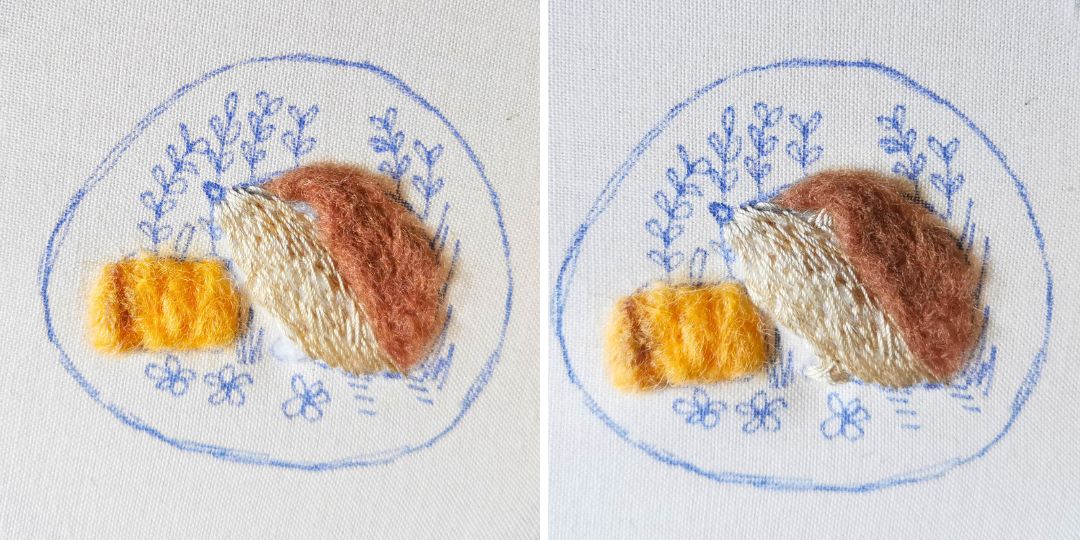
With the off white thread, stitch the hedgehog nose and belly using long and short stitch.
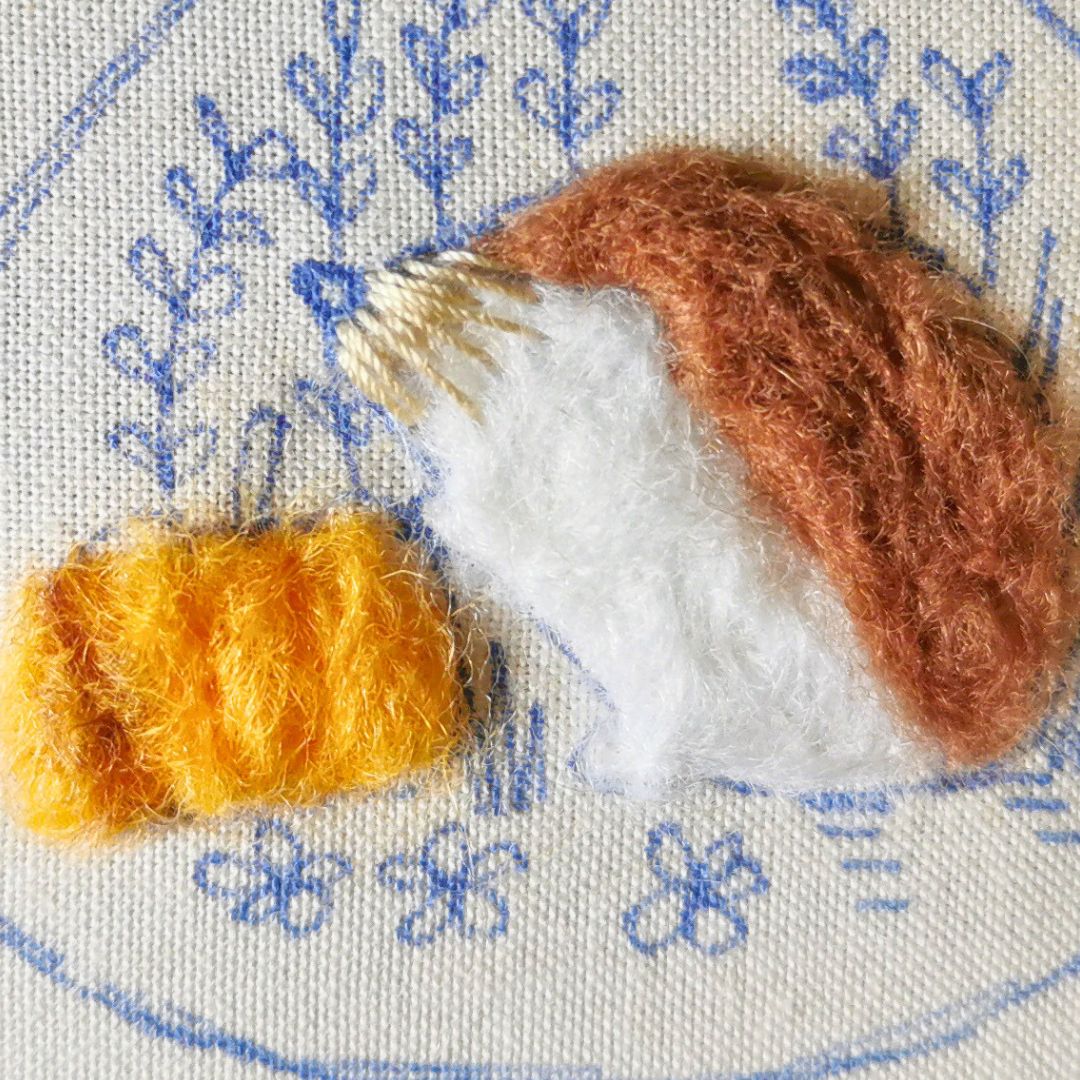
Then, use short satin stitches to stitch the legs and the ear.
Hedgehog Spines
Stitches used: Straight stitches
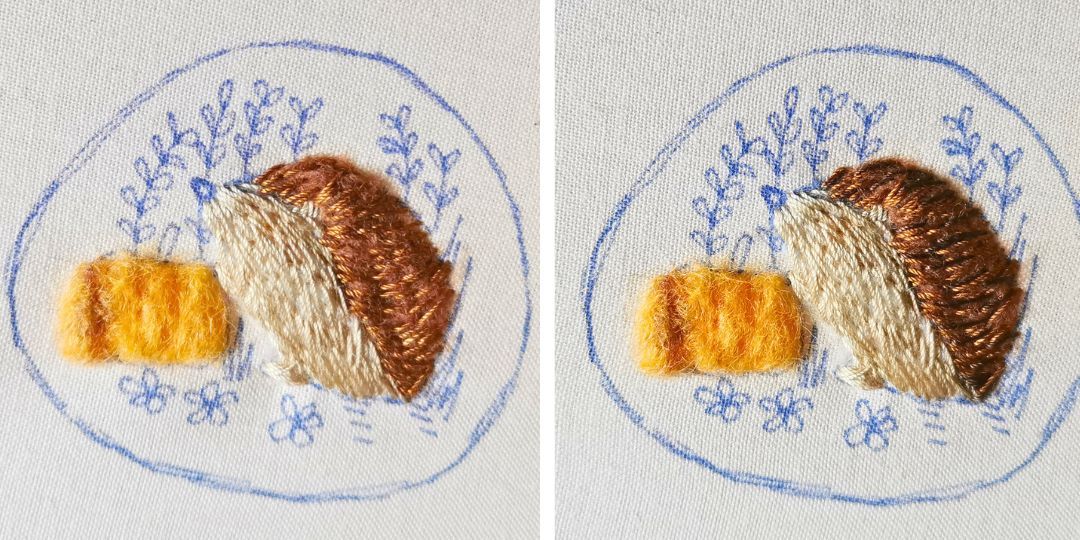
Color used: Spagetti SP21 (brown) and Spagetti SP20 (dark brown) or DMC 434 (brown) and DMC 898 (dark brown) (2 strands)
Stitch random straight stitches, following the direction of the pattern, to stitch the spines. First, use the brown thread, then use the dark brown thread. Create a slight overlap with the belly for a natural transition.
Hedgehog Nose and Eye
Stitches used: Satin stitch, French Knot
Color used: DMC 310 (black) (2 strands)
With 310 black thread, use small satin stitches to stitch the nose. Make a tiny french knot for its eye.
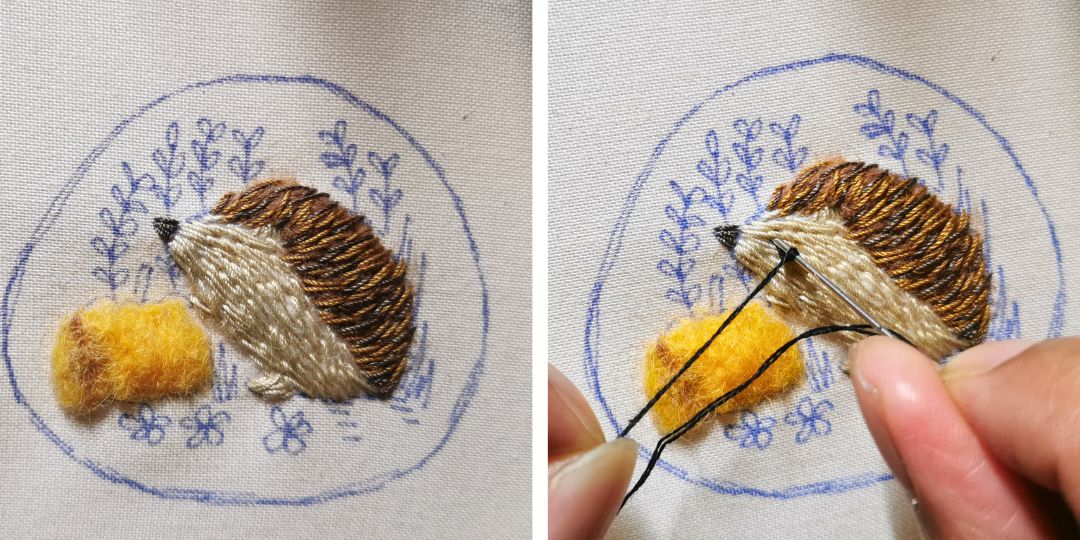
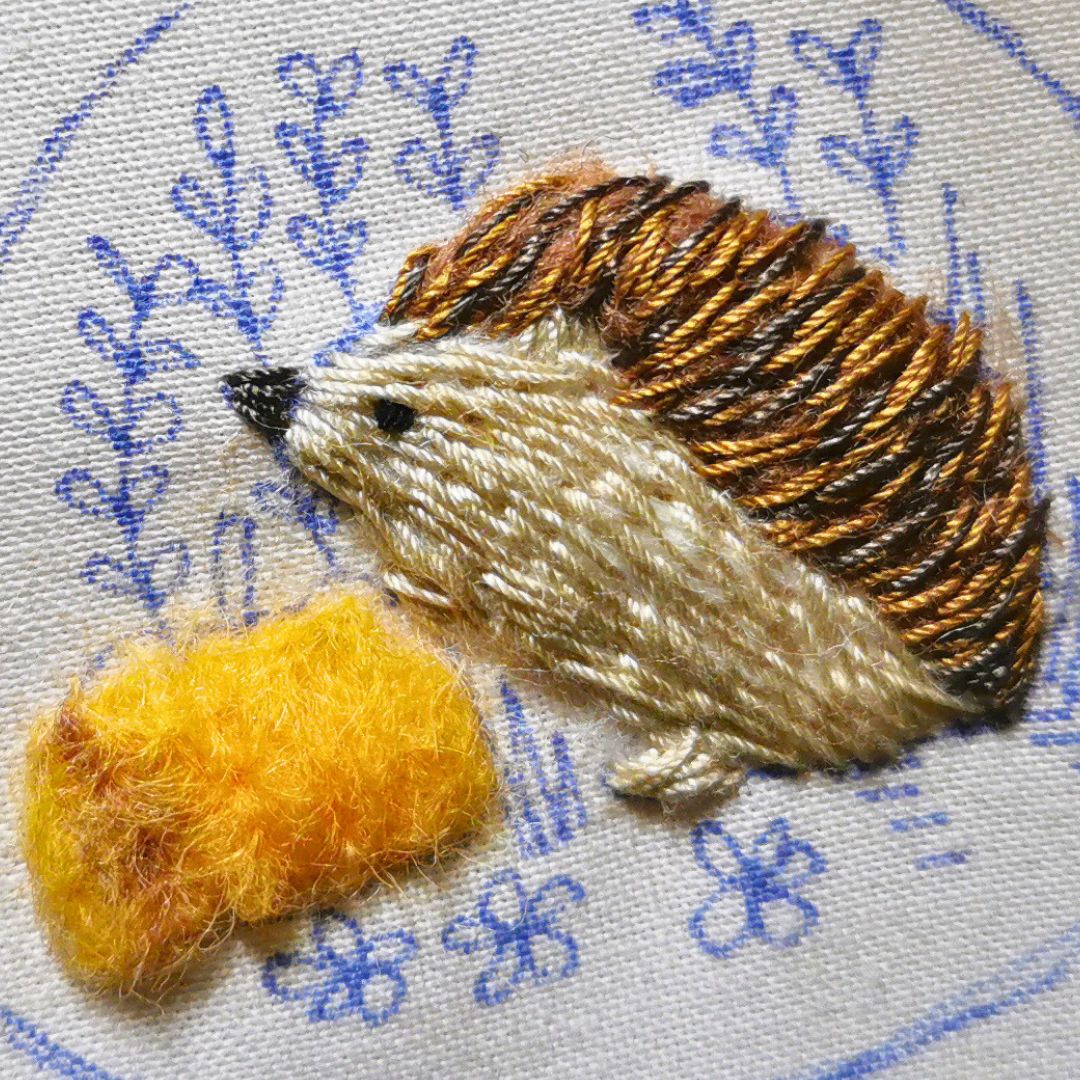
We are now done stitching the hedgehog. You can add more stitches to fill between the stitches on the belly and the spines. Since this brooch is going to be small, you will not see so many details.
Pumpkin
Stitches used: Straight stitch or long & short stitch, back stitch
Color used: DMC 434 (brown) for pumpkin stem and recessed lines on the pumpkin, DMC 3853 (orange), DMC 3852 (deep yellow) for the pumpkin. 2 strands for all.
Use 3853 orange and straight stitch or long and short stitch to stitch the top and bottom of the pumpkin. Then, use 3852 deep yellow and straight stitch to fill the middle portion of the pumpkin.
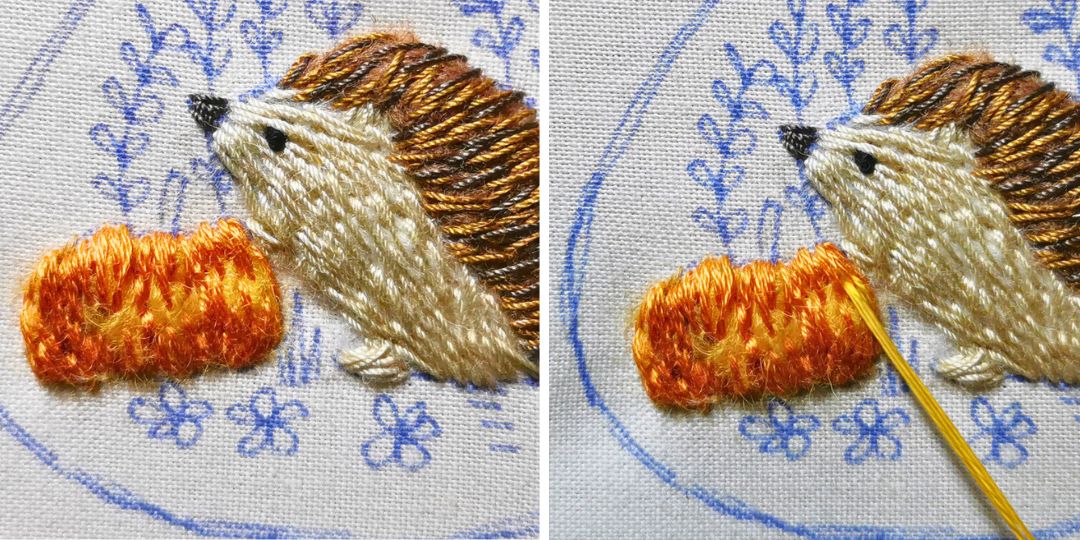
Use 434 brown and backstitch to create the recessed lines of the pumpkin.
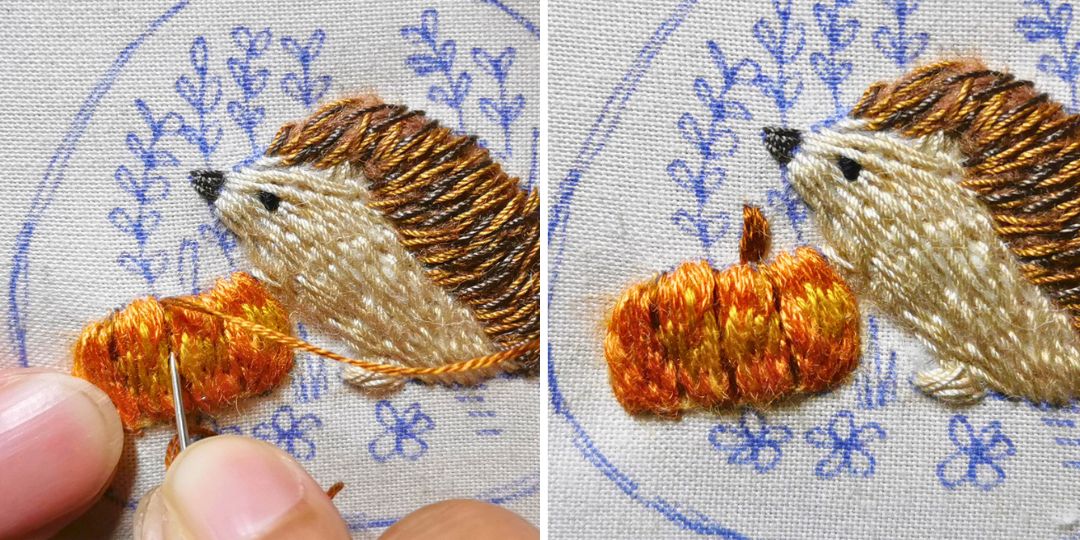
White Flowers
Stitches used: Lazy Daisy, French Knot
Color used: DMC 712 Off White for the flower, DMC 3852 (deep yellow). 2 strands for all.
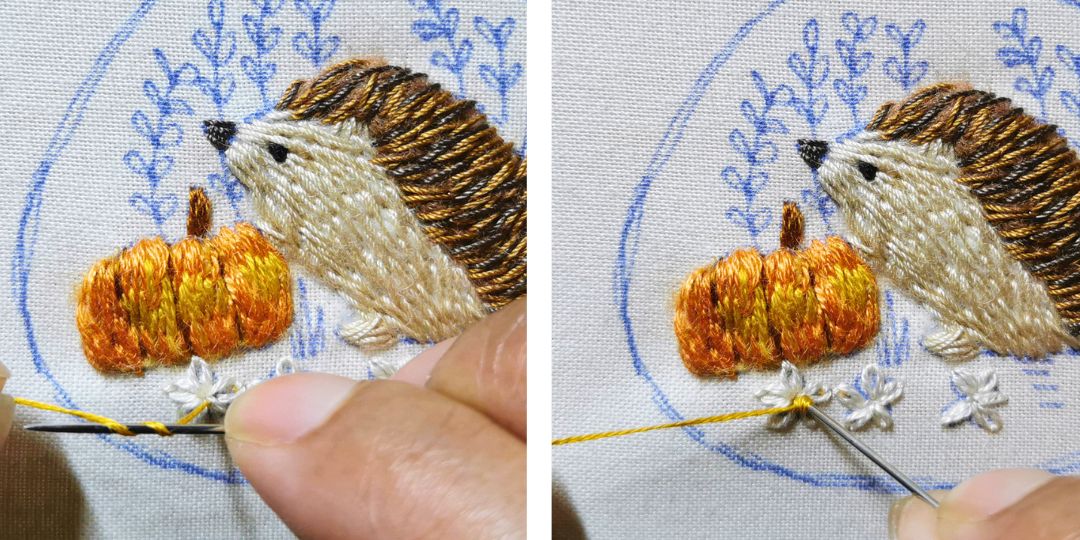
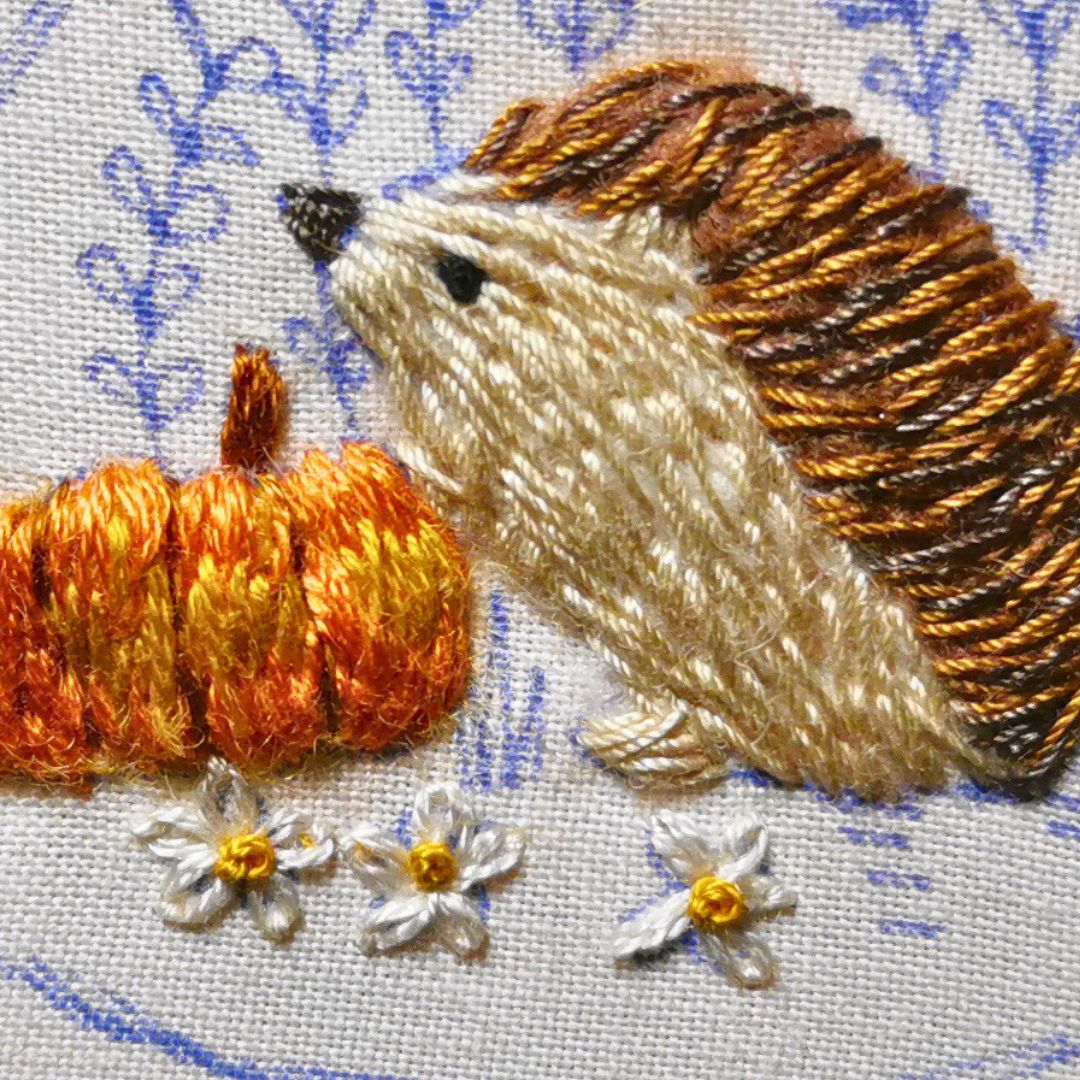
With 712 off white, stitch the flower petals with lazy daisy stitch.
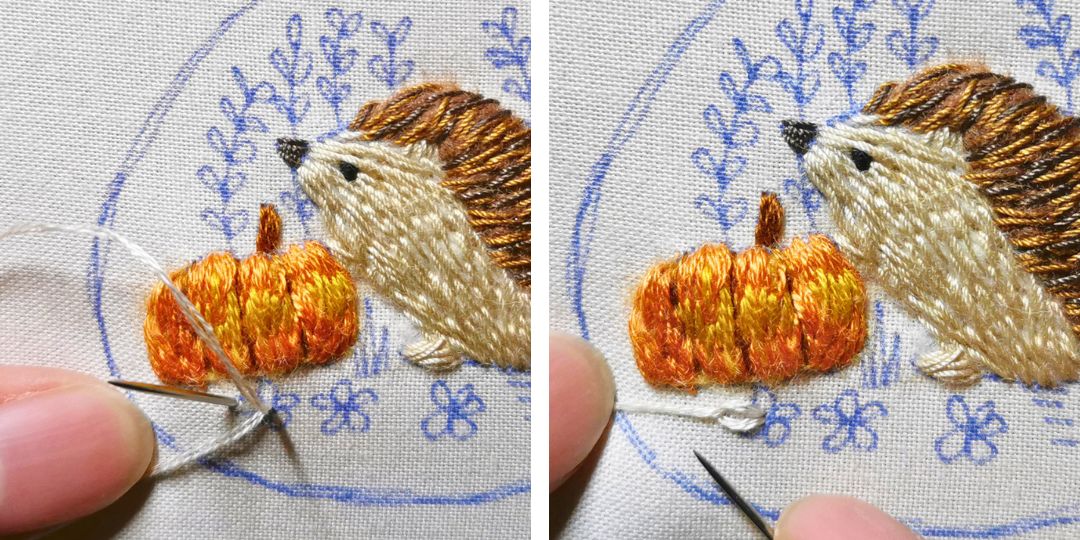
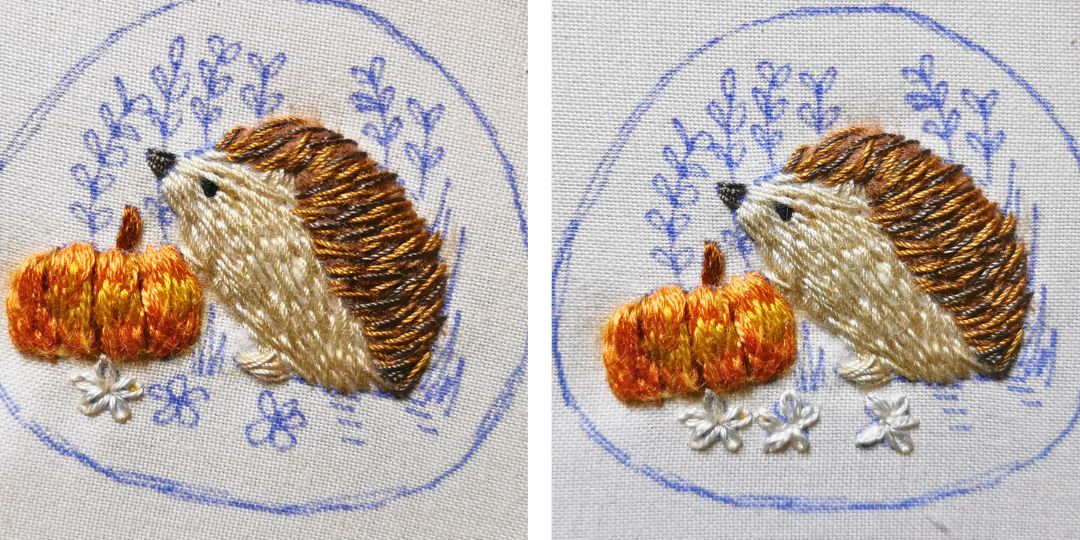
Use 3852 yellow to stitch a French knot in the middle of the flowers.
Grass and Plants
Stitches used: Straight stitch, back stitch, lazy daisy
Color used: DMC 936 green, DMC 3852 deep yellow, DMC 434 brown – 2 strands
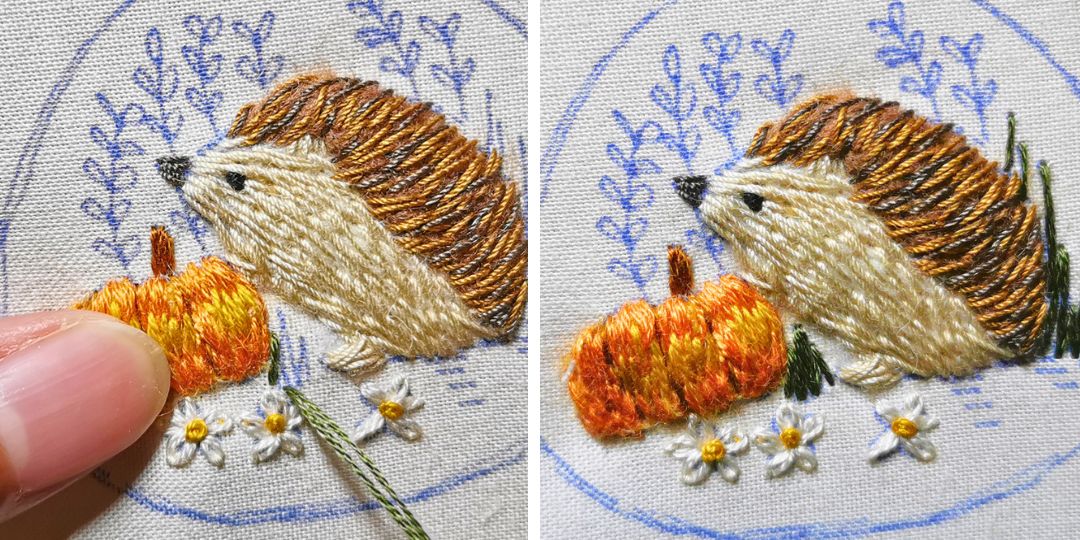
Use 936 green and straight stitch to stitch the grass.
Then, use back stitch to stitch the stem of the plants on the background.
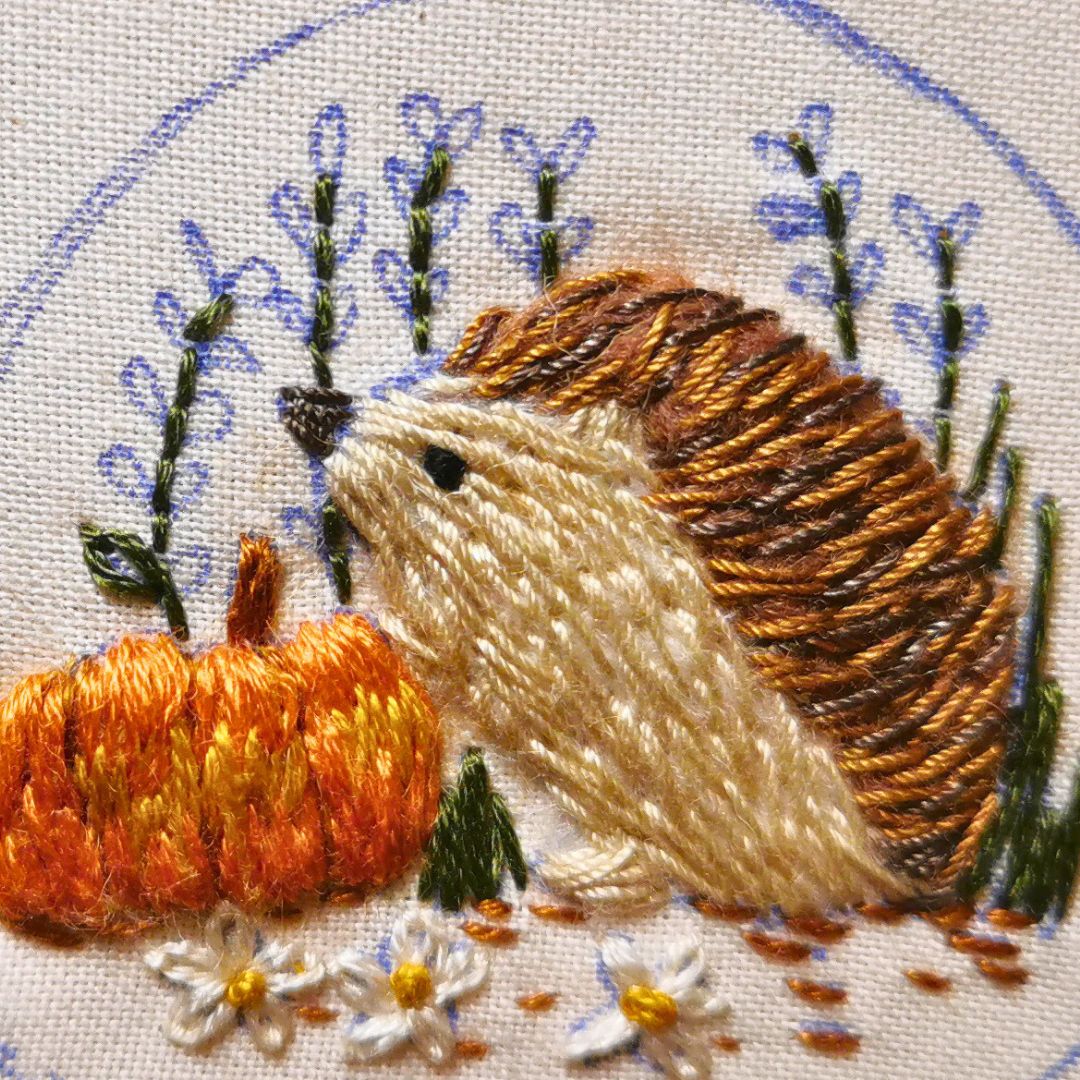
Use 936 green and lazy daisy stitch to stitch the leaves. After that, use 3852 deep yellow and straight stitch in the center of each lazy daisy stitch to add highlight to the leaves. Use 434 brown to add some straight stitches on the ground.
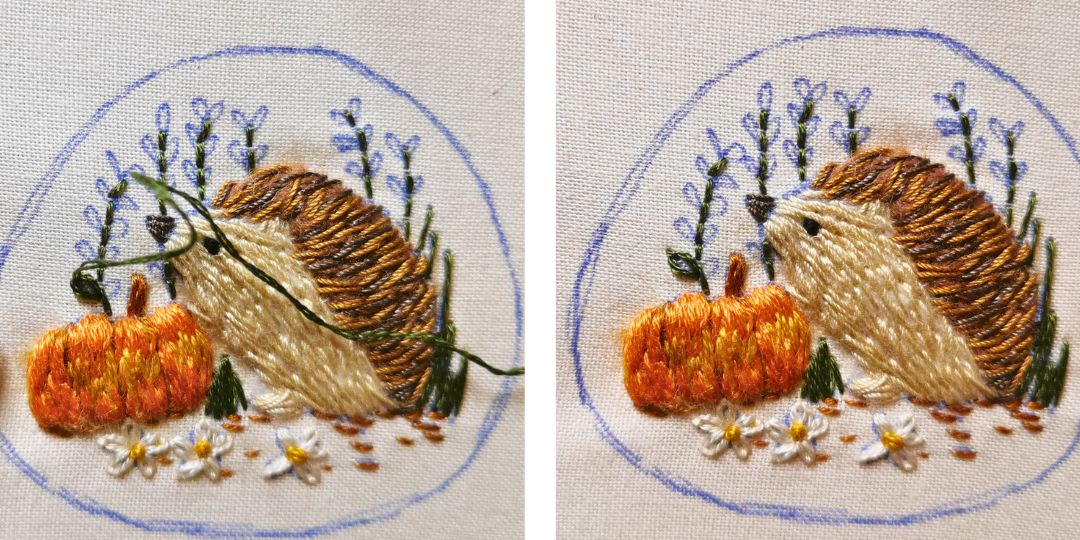
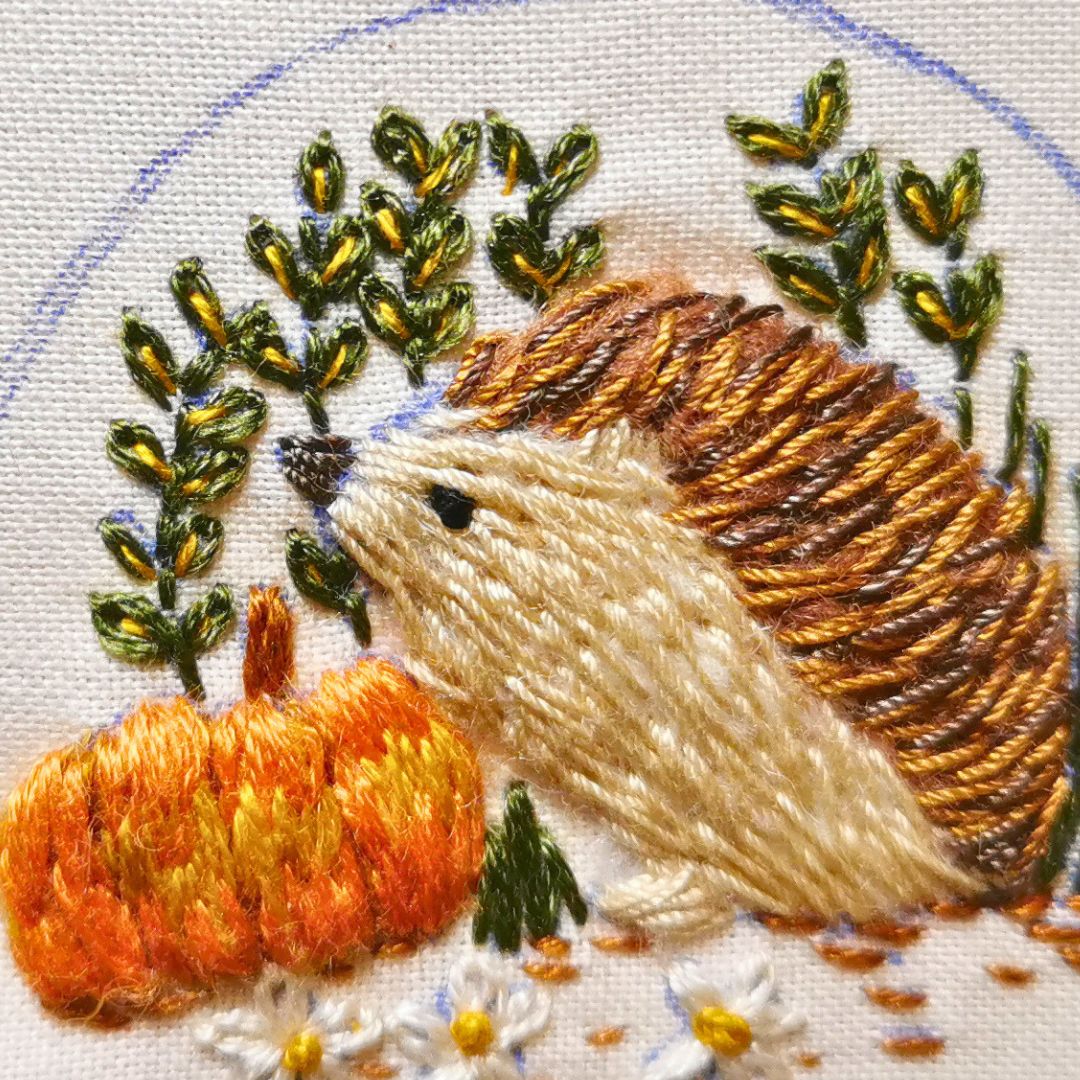
Finishing the Brooch
If you are using a cotton fabric, you should be able to easily see the outline markings you drew on the front side. Turn your hoop around, and using a heat erasable pen, trace the outline of the brooch on the back of the fabric. You can follow my shape, or you can also make a simple circle outside of your embroidery. Make sure you give enough allowance around the embroidery.
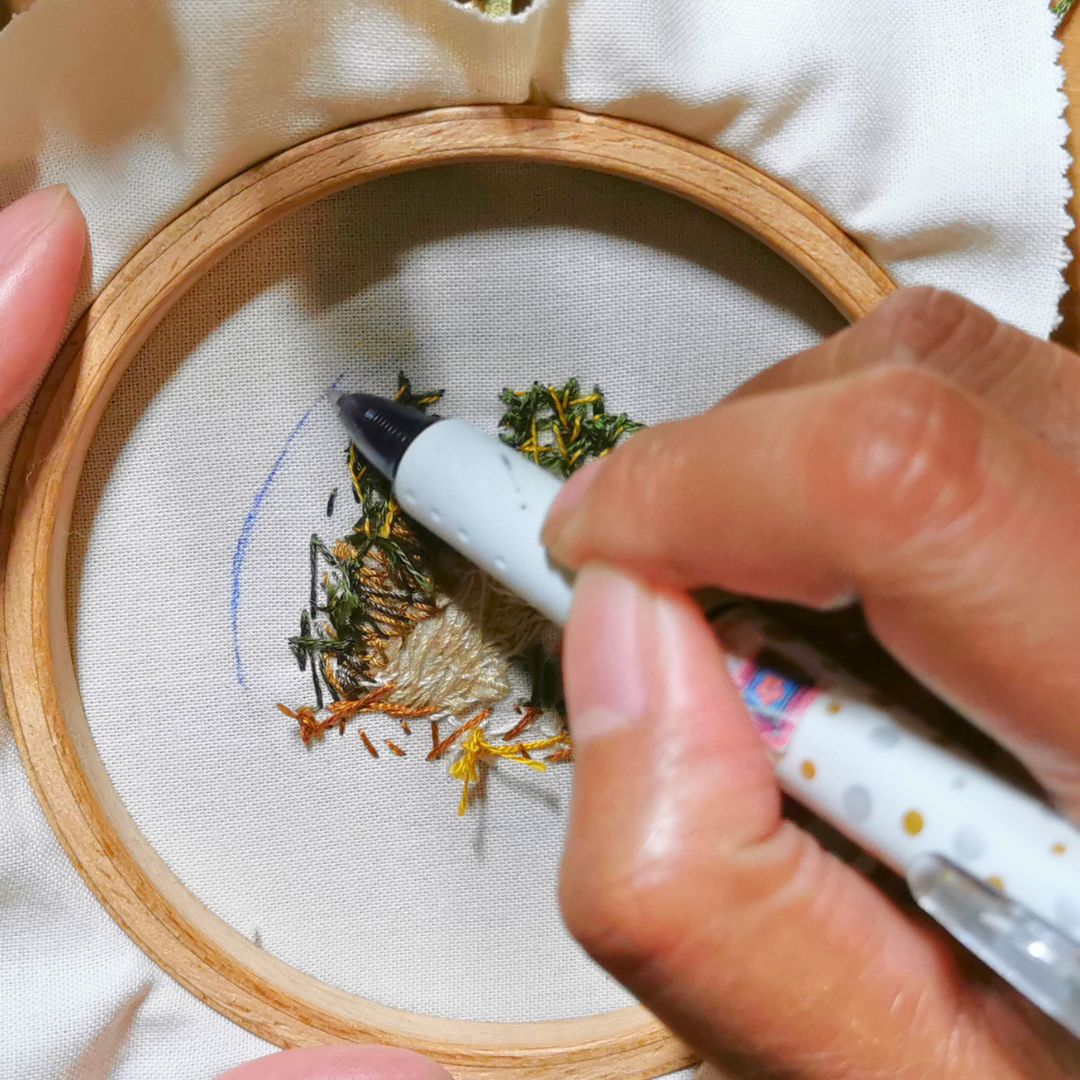
After that, remove the fabric from the hoop, take your backing fabric, and sandwich the fabrics together with the right sides facing each other. Put them back in the hoop.
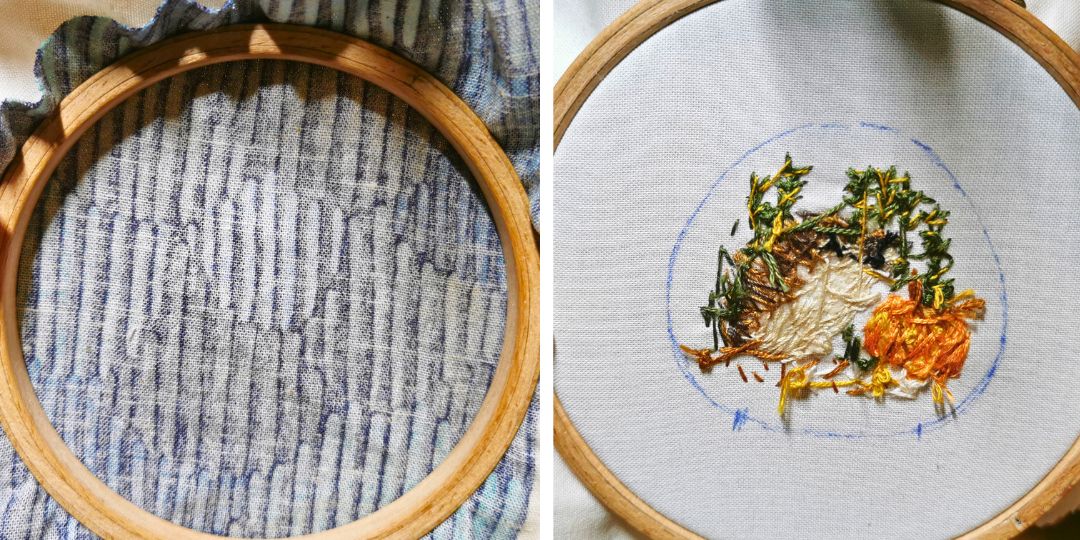
Using back stitch, stitch around the shape of the brooch. Remember to leave an opening on the bottom, so that later on you can turn the embroidery inside out (see above, the two short vertical lines I drew in the outline circle—I did not stitch the space between those vertical lines, as shown below).
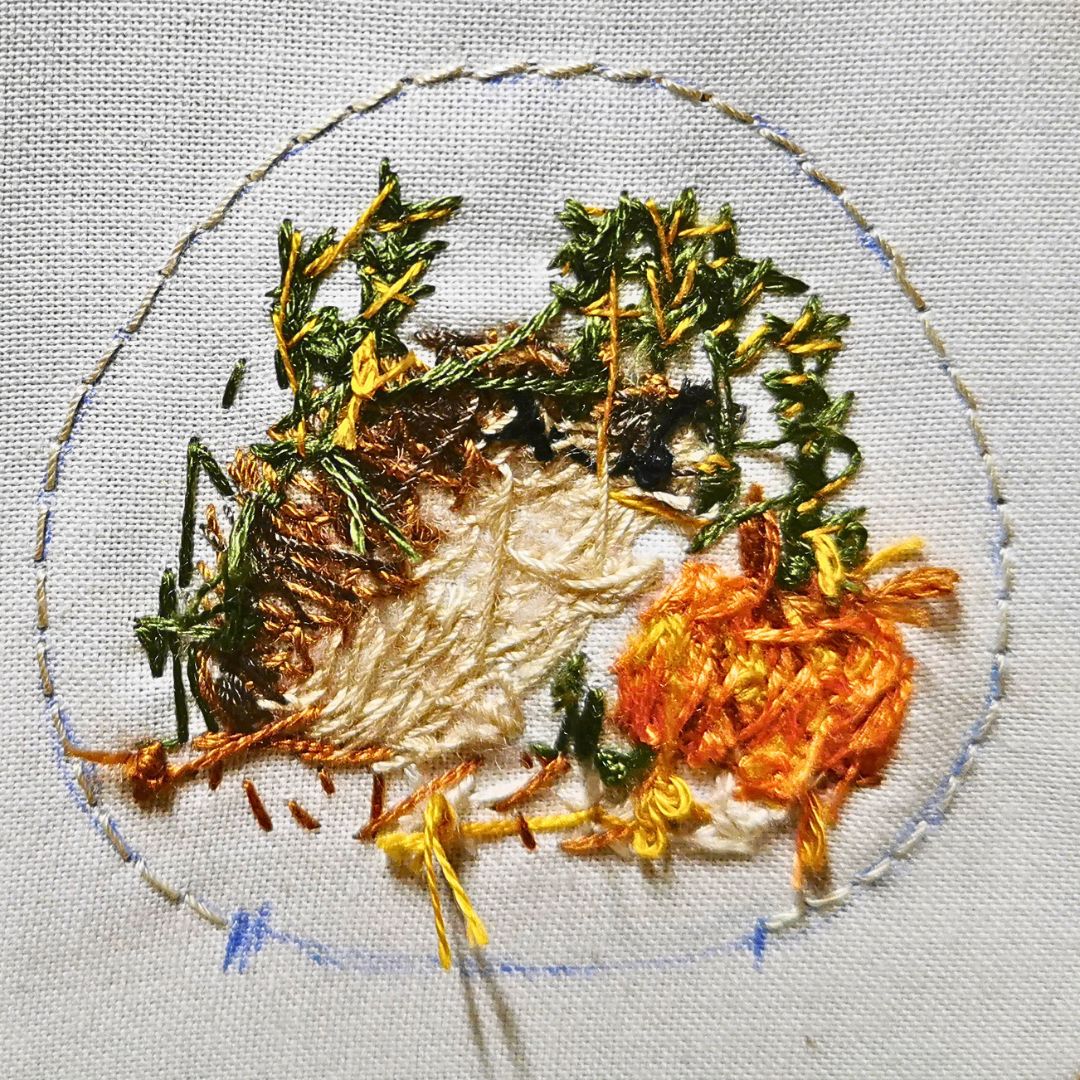
Remove the fabric from the hoop and cut the fabric with about 1/4 inch seam allowance. Cut some slits in the outer perimeter of your fabric, particularly around the curves.
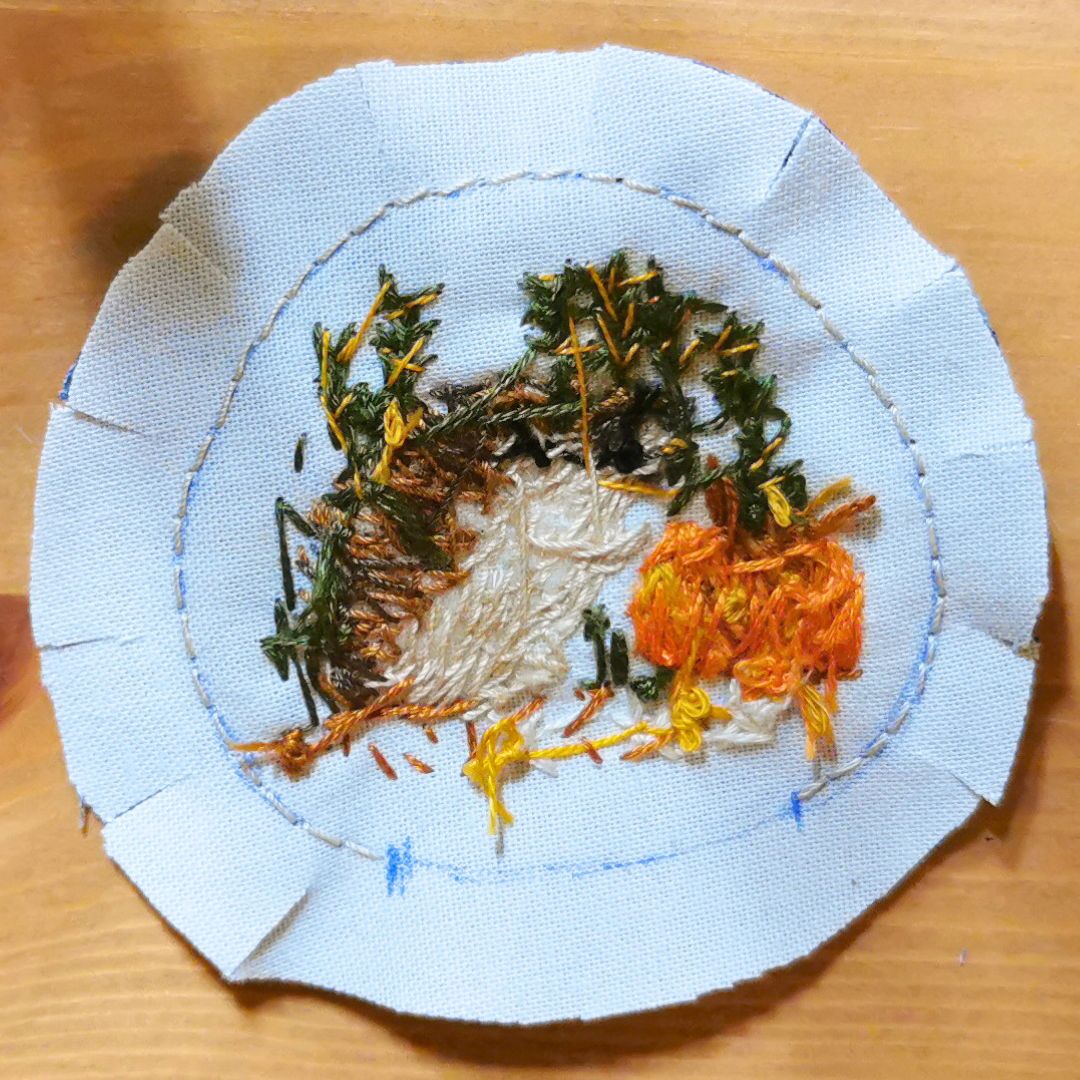
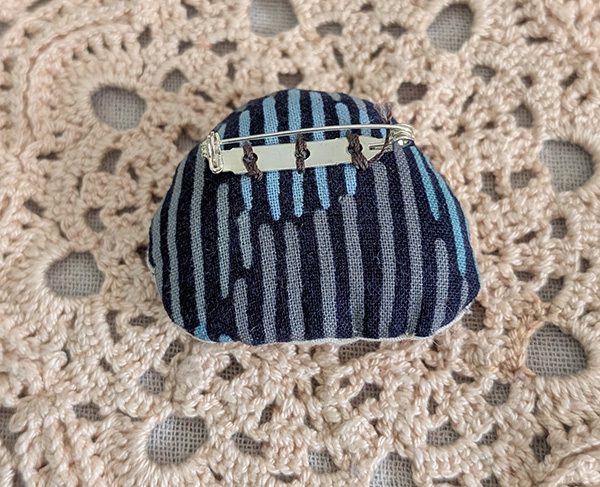
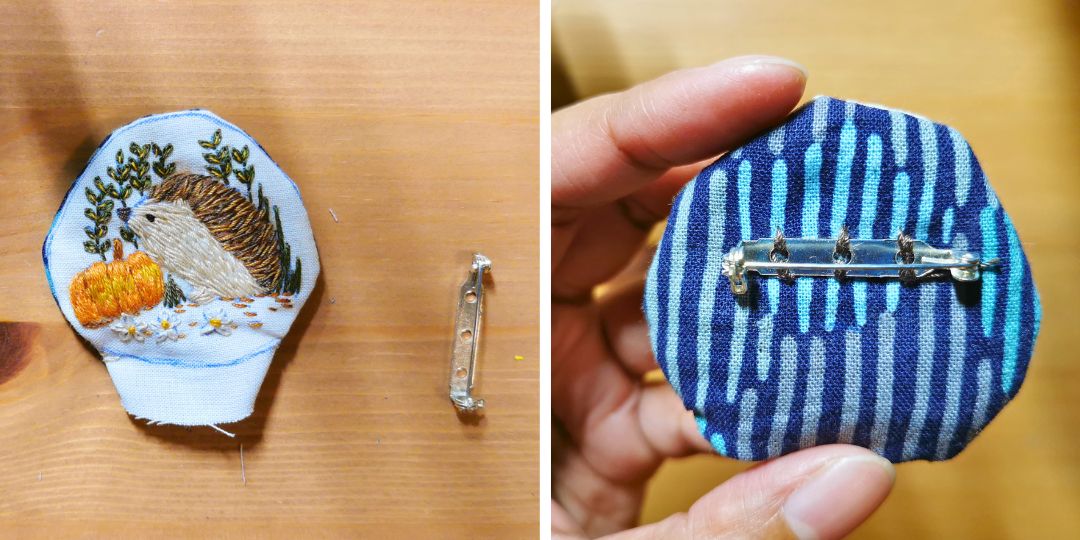
Now, turn your project inside out. Take the brooch or safety pins that you will stitch at the back. Attach the brooch carefully to the backing fabric, make sure you don’t stitch through the embroidery part.
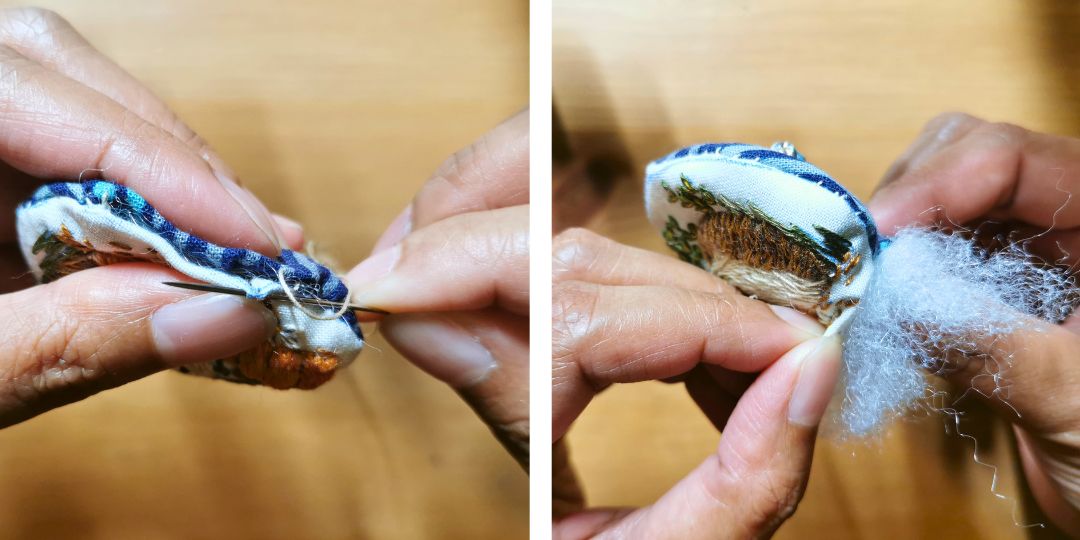
Push around the curve part from inside to shape it nicely. Take your stuffing of choice and stuff the brooch. You don’t need too much, just enough to make it fluffy. If you choose to fill with fabric scraps, be mindful that it will not feel so soft later on. Close the opening with ladder stitch, and you’re done!
You can remove any markings with an iron or hair dryer. If ironing, don’t press too hard. You can also use a piece of fabric on top of the embroidery while ironing.