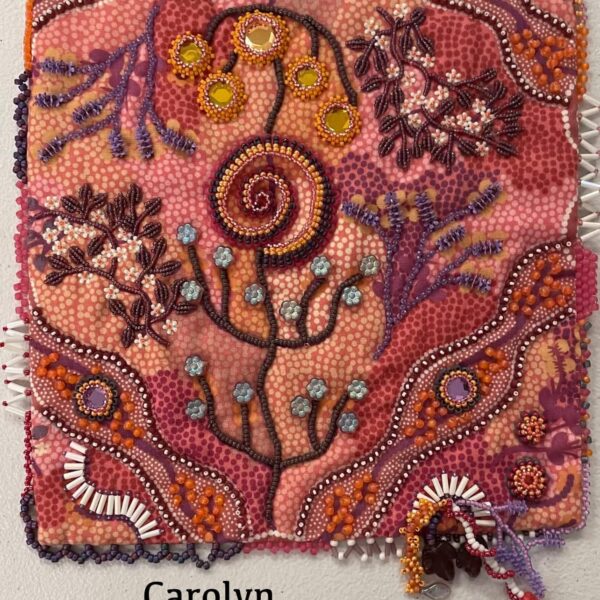
Amanda Fox is an embroidery artist, teacher, and founder of Crewel Ghoul, an embroidery blog that inspires others to use their creativity to learn the wonderful art of embroidery. Her designs evoke the beauty of nature and celebrate the quiet, simple moments in life that offer a mindful escape from this fast-paced, digital world. You can find even more of her tutorials and patterns on her website, crewelghoul.com, and follow along on Instagram.
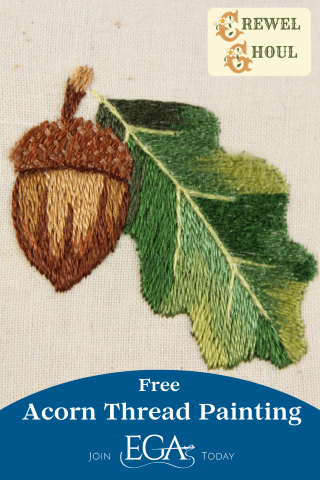
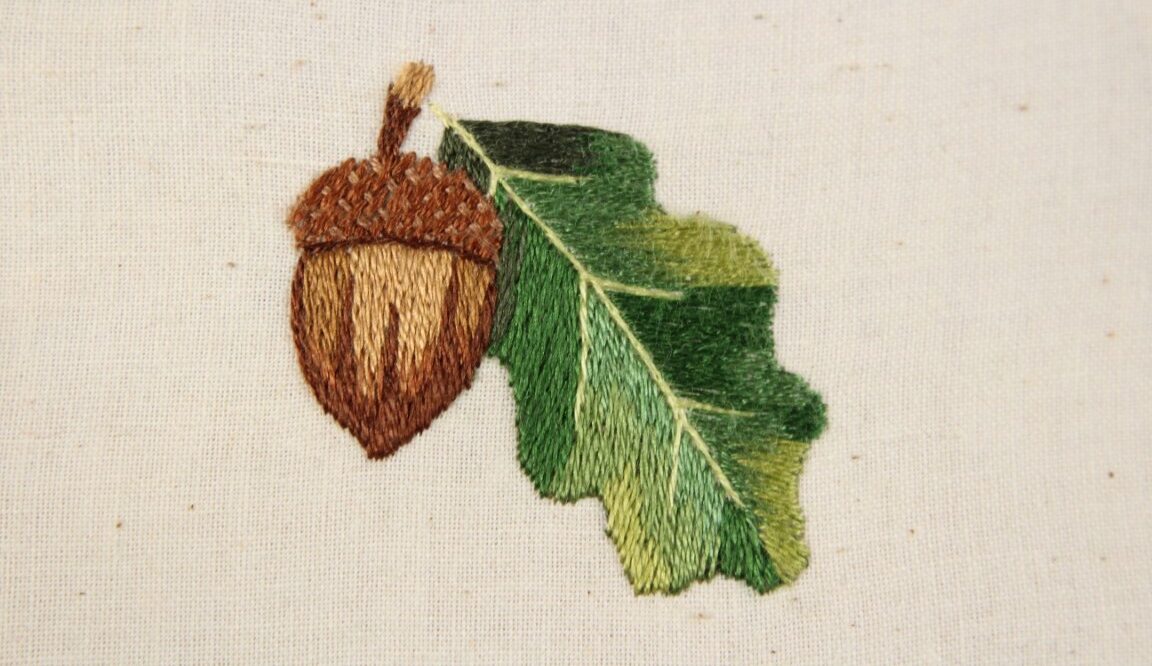
Amanda has created the Acorn Thread Painting Tutorial to introduce stitchers to the thread painting technique, an excellent method for adding depth of color and shading to embroidery work. She has also included a YouTube tutorial below, for stitchers who’d like to learn by following along!
Embroidery Level
Beginner
Materials and Instruments
- Acorn design – register for the EGA newsletter to receive it in your inbox! (EGA members can download this design from the Member Publications page here.)
- Fabric pen or marker for transferring the design
- Cotton or linen fabric
- 4 or 5-inch embroidery hoop
- Embroidery scissors
- Size 9 embroidery needle
- Size 24 tapestry needle
- DMC embroidery thread (167, 433, 471, 472, 869, 898, 935, 937, 986, 987, 3862)
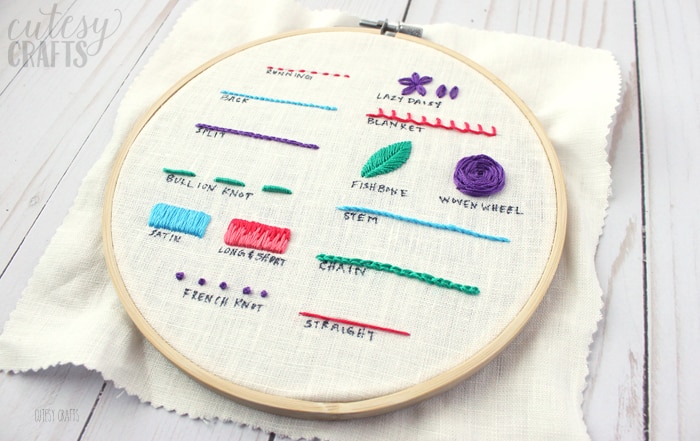
Stitches Used
- Long and short stitch
- Basketweave stitch
- Back split stitch
Long and Short Stitch Basics
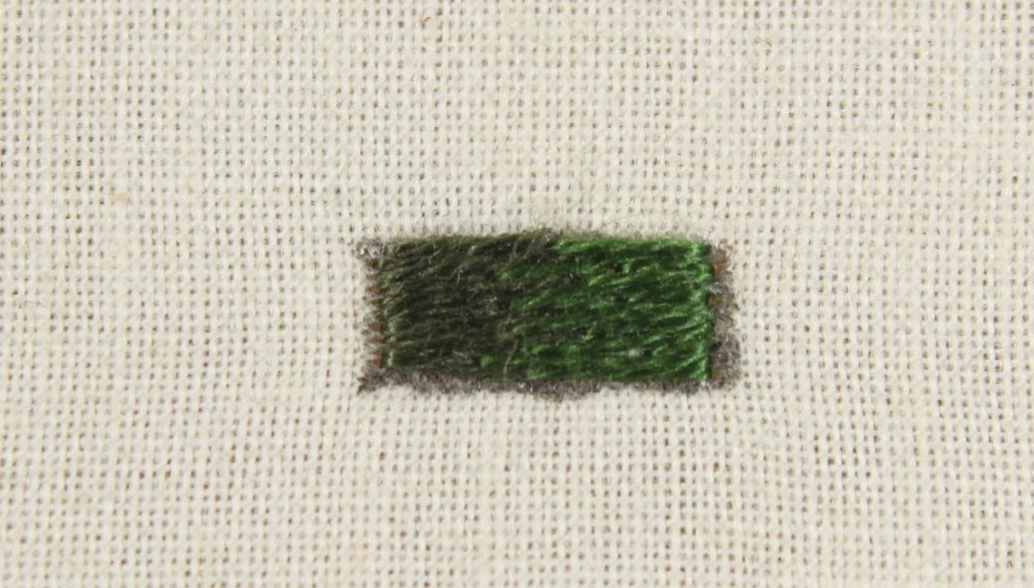
Before we get into the thread painting example, it’s helpful to understand the backbone of this technique: the long and short stitch.
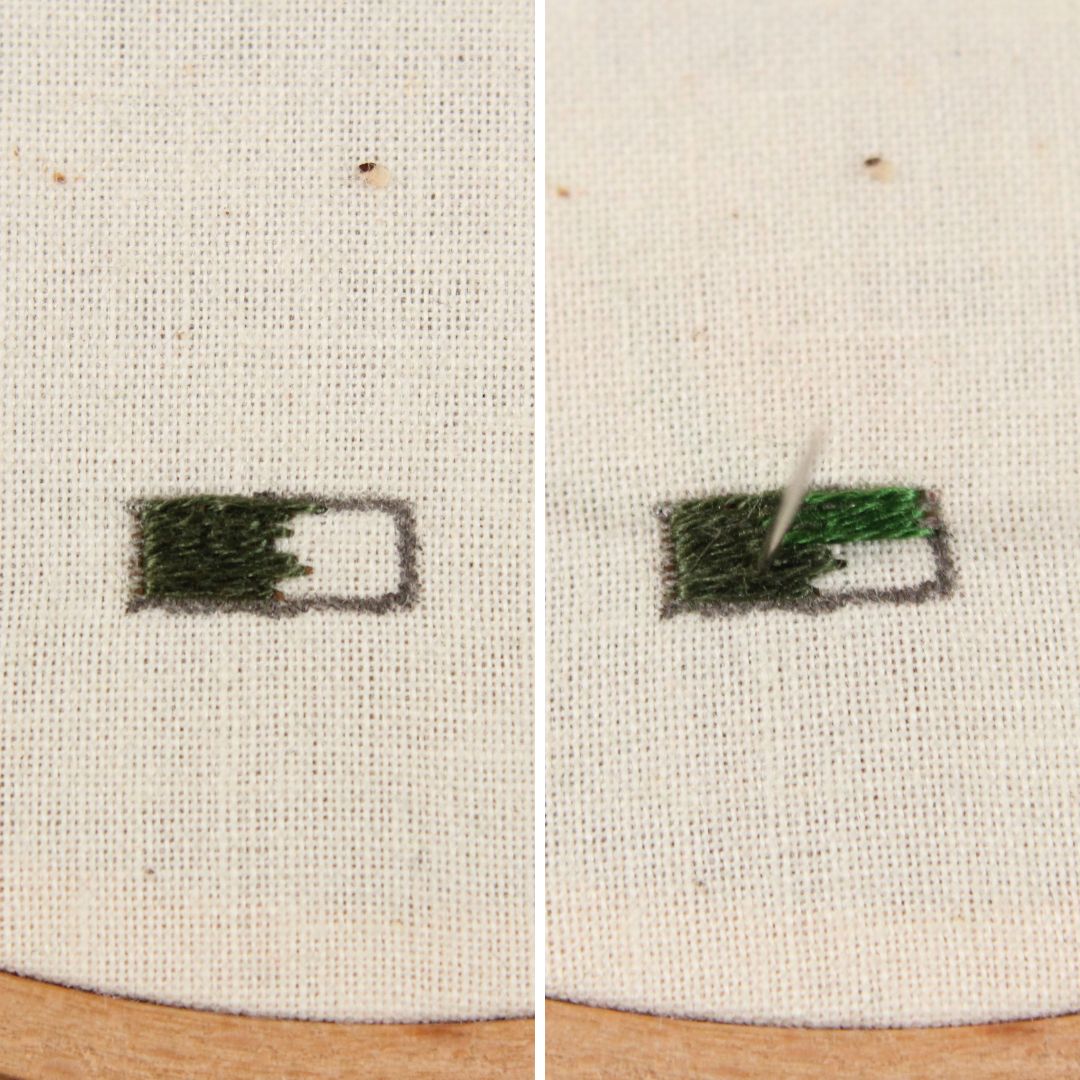
The long and short stitch is precisely what the name suggests. You make a series of stitches of varying lengths. To blend two colors, overlap stitches in one color on top of stitches in the other color, keeping the stitch length at random. Varying and overlapping the stitches adequately will make the blend less noticeable.
Getting Started
For this design, I transferred it using a Frixion heat-erasable pen, but you can use any transfer method you feel most comfortable with.
The pattern uses one strand of floss at a time with a size nine embroidery needle, unless otherwise noted.
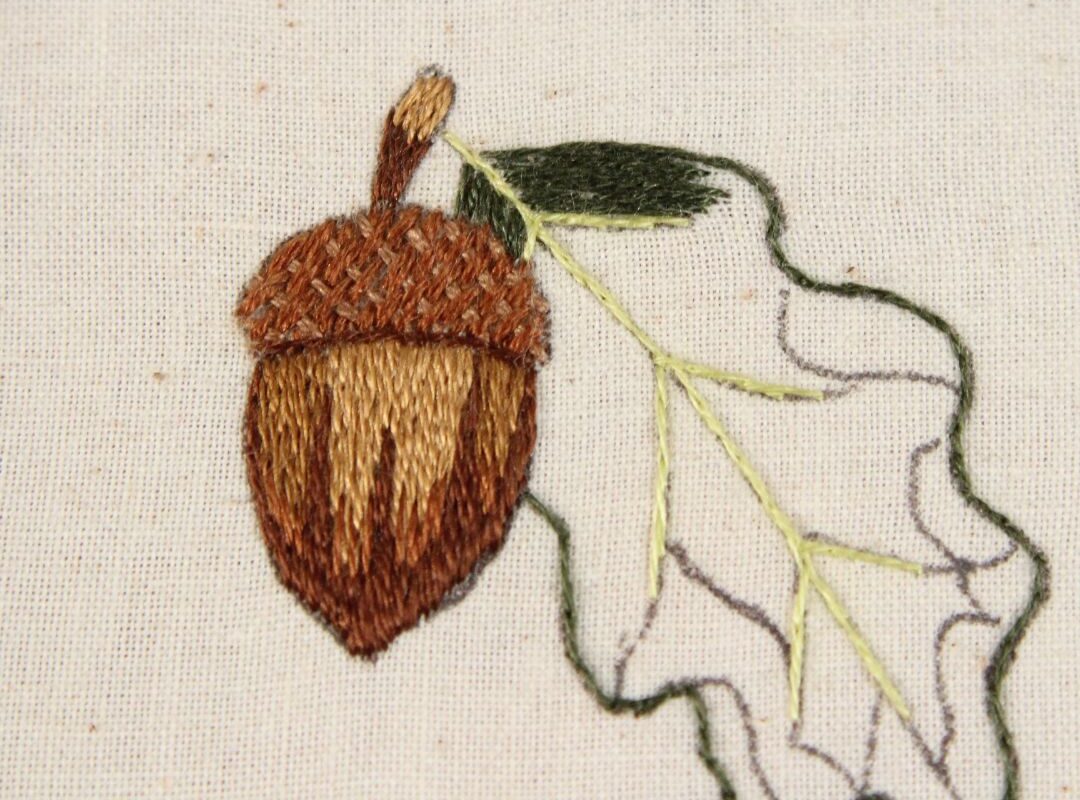
Stitch The Acorn
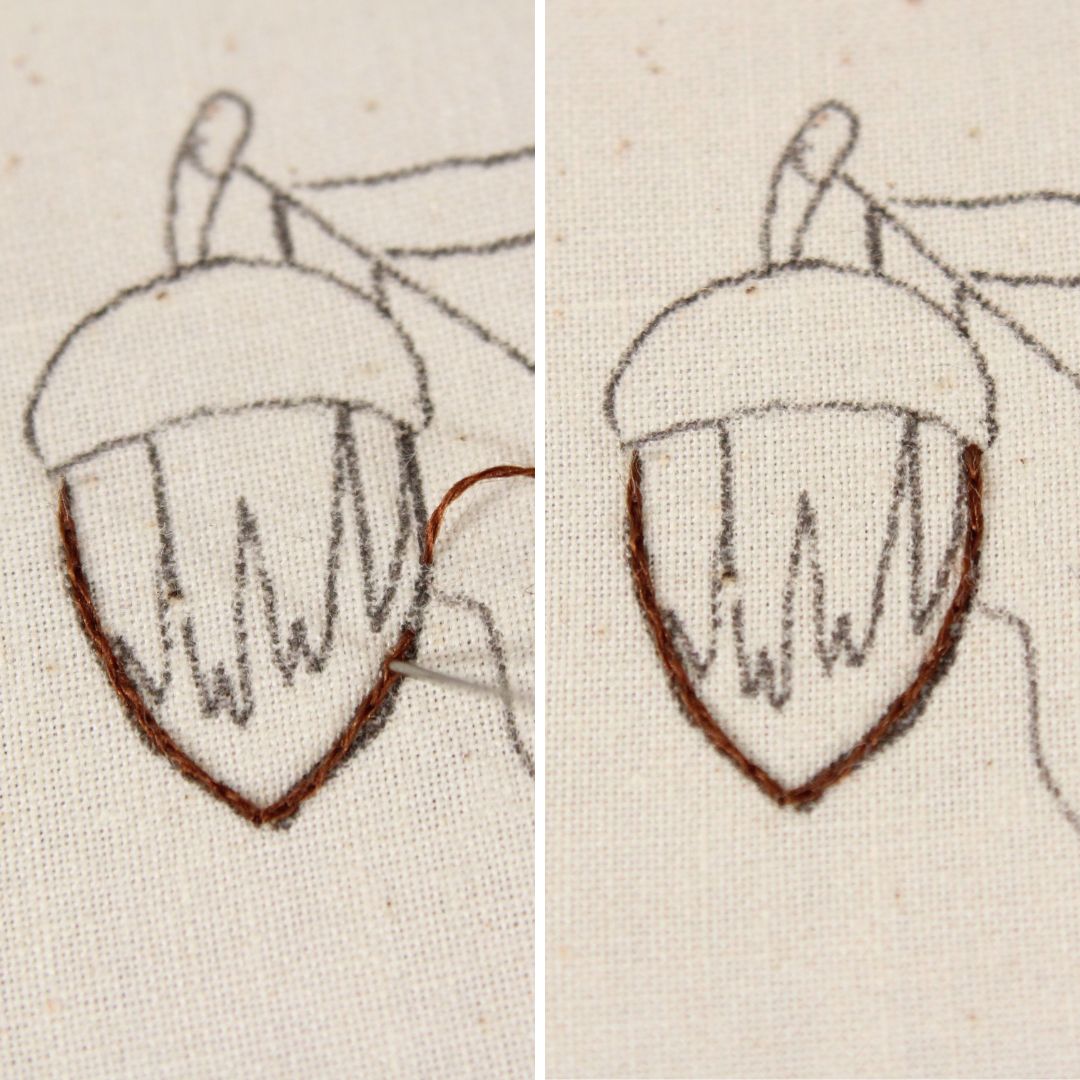
Start by outlining the bottom of the acorn using a back split stitch with color 898. This outline will serve as a guideline and a little extra padding, as we’ll be overlapping long and short stitches on top of it.
Begin filling in the bottom marked area of the acorn with vertical long and short stitches using color 898. Make sure to overlap the split-stitched outline along the bottom edge.
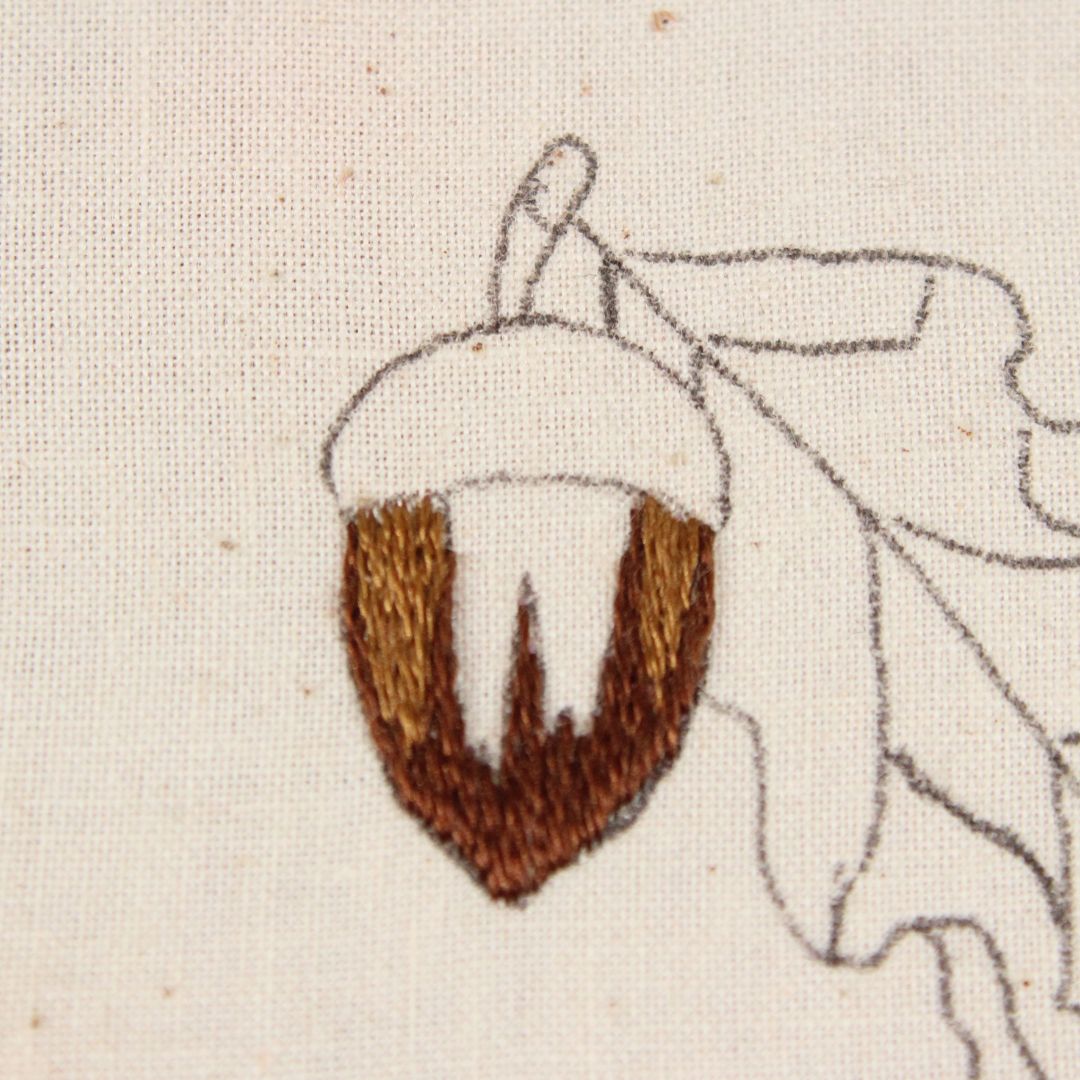
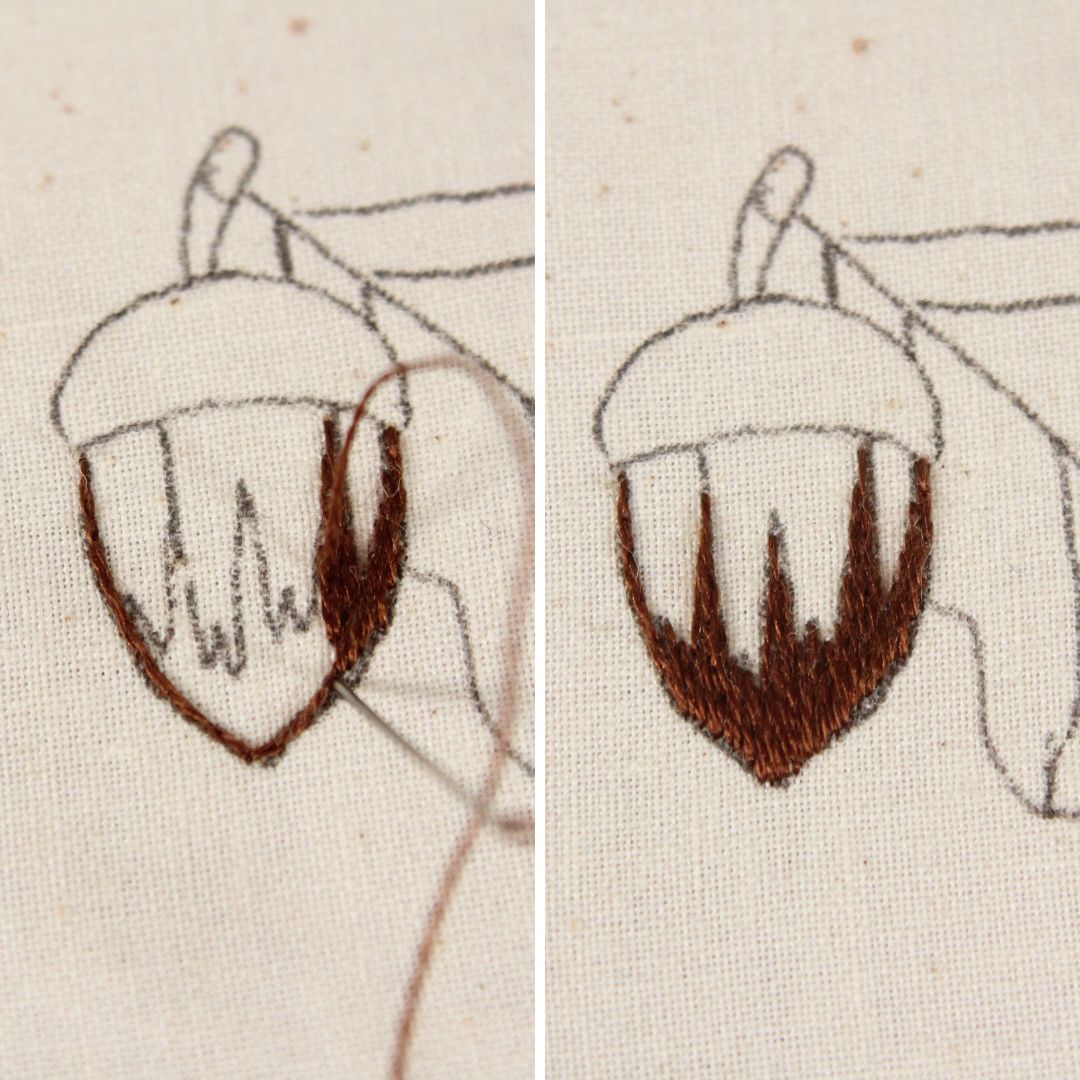
Fill in the two spots along the left and right sides of the acorn with long and short stitches using color 869. Begin along the edge of the darker stitches and overlap them to blend. Don’t worry if the colors aren’t blending smoothly yet. We’ll be going back over this area with another color shortly.
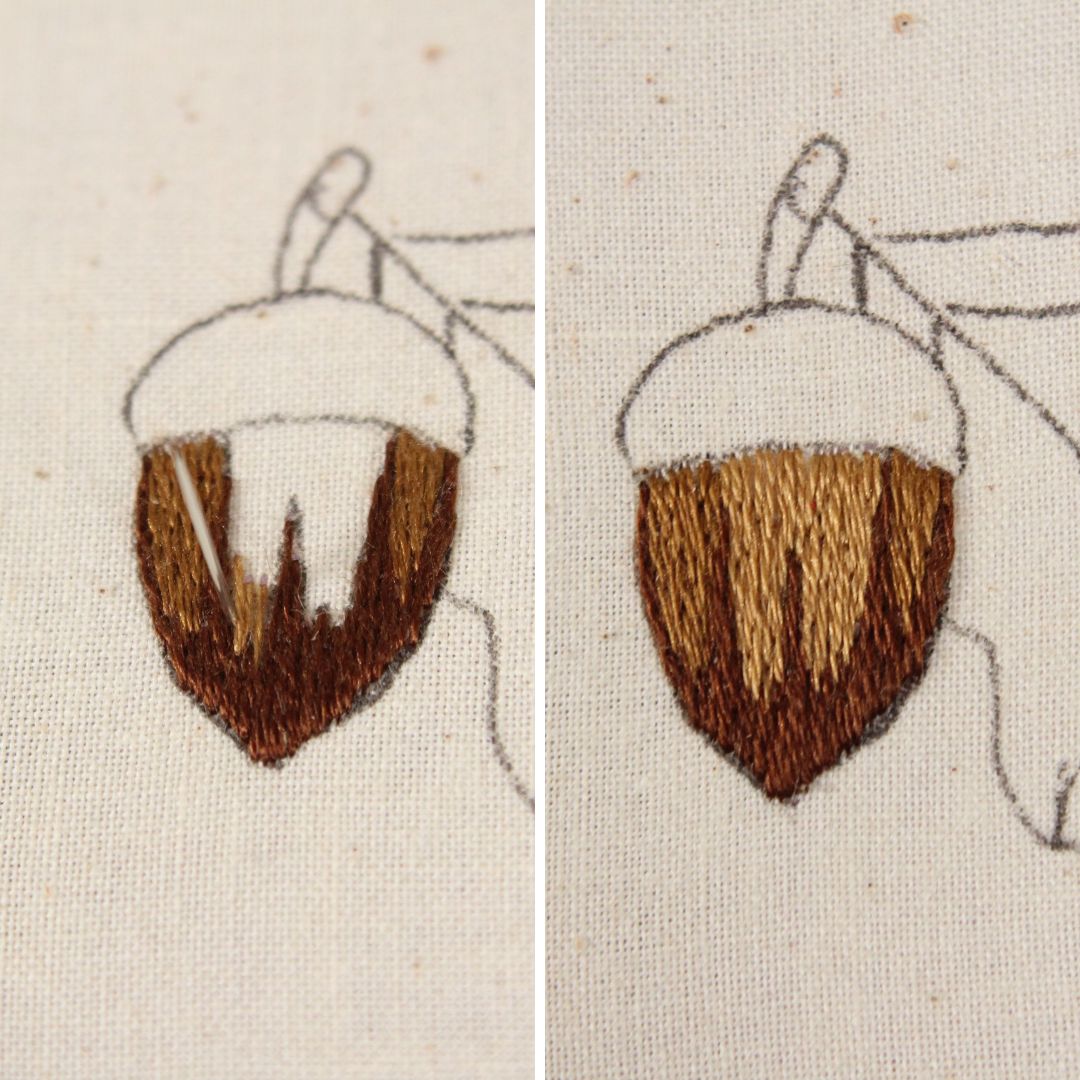
Fill in the center area of the acorn with long and short stitches using color 169, beginning along the edge of the darker stitches, and overlapping into them.
In between the lighter and darker brown colors, add some long and short stitches using color 433 to create a more subtle color transition.
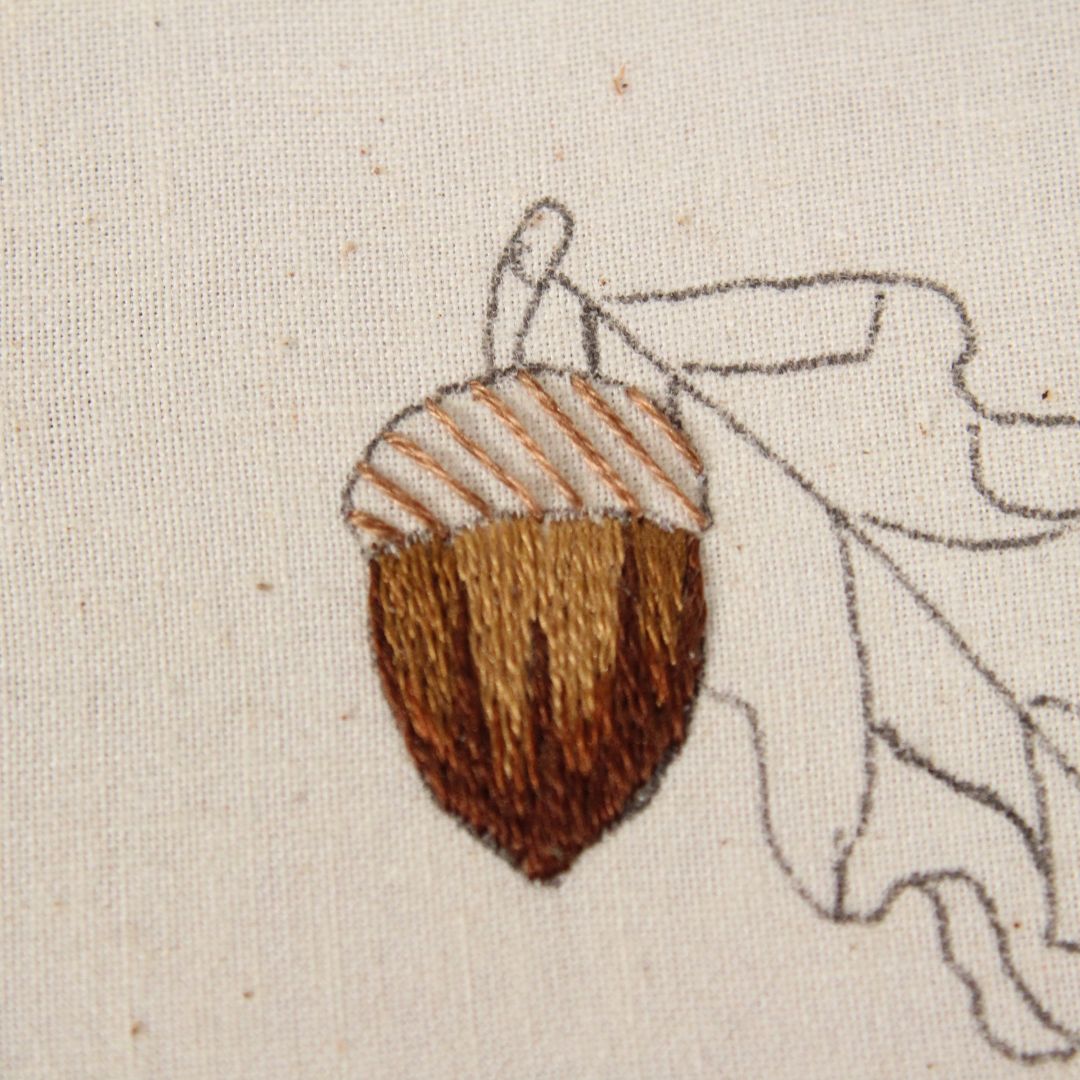
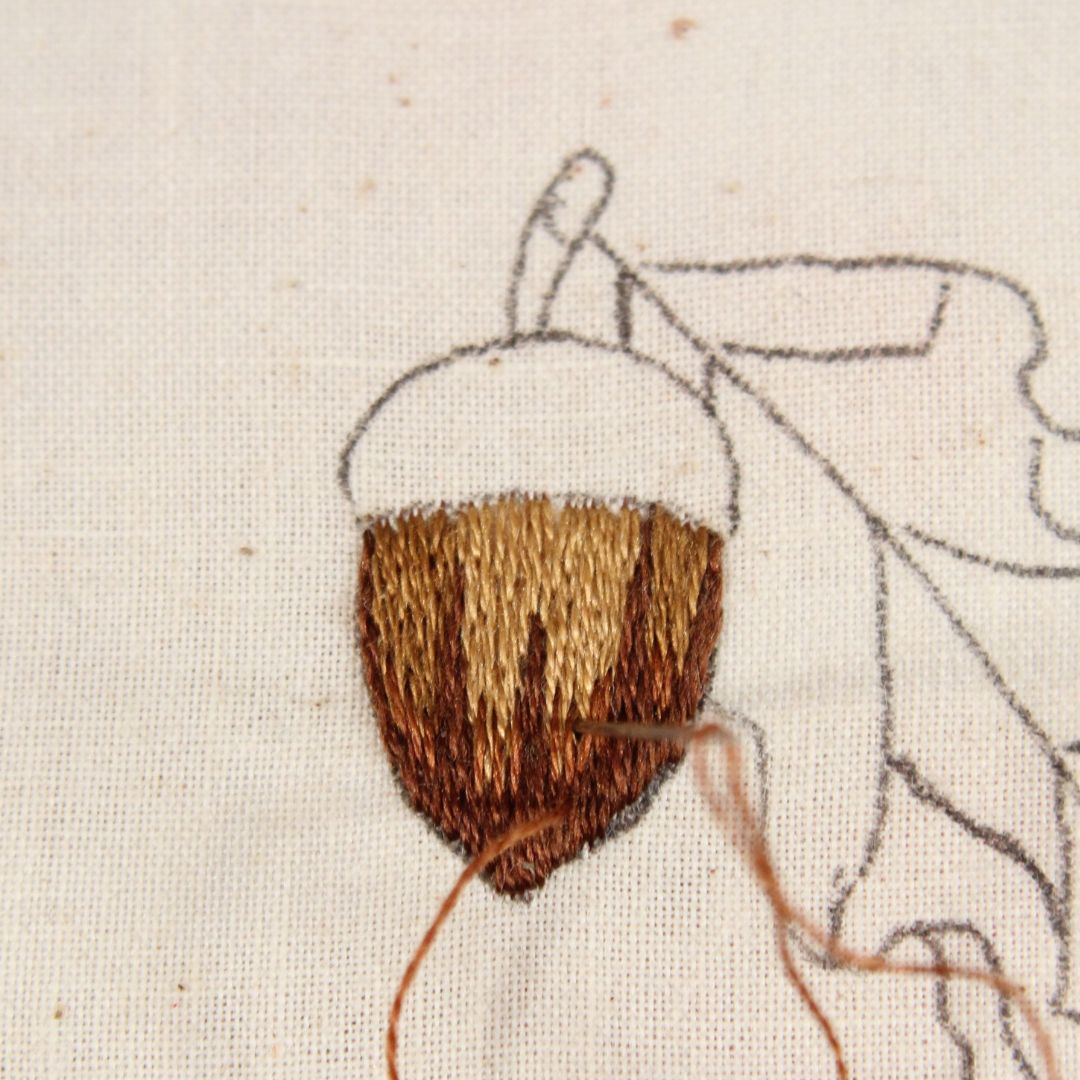
Using two strands of 3862, make evenly spaced, diagonal stitches across the top of the acorn.
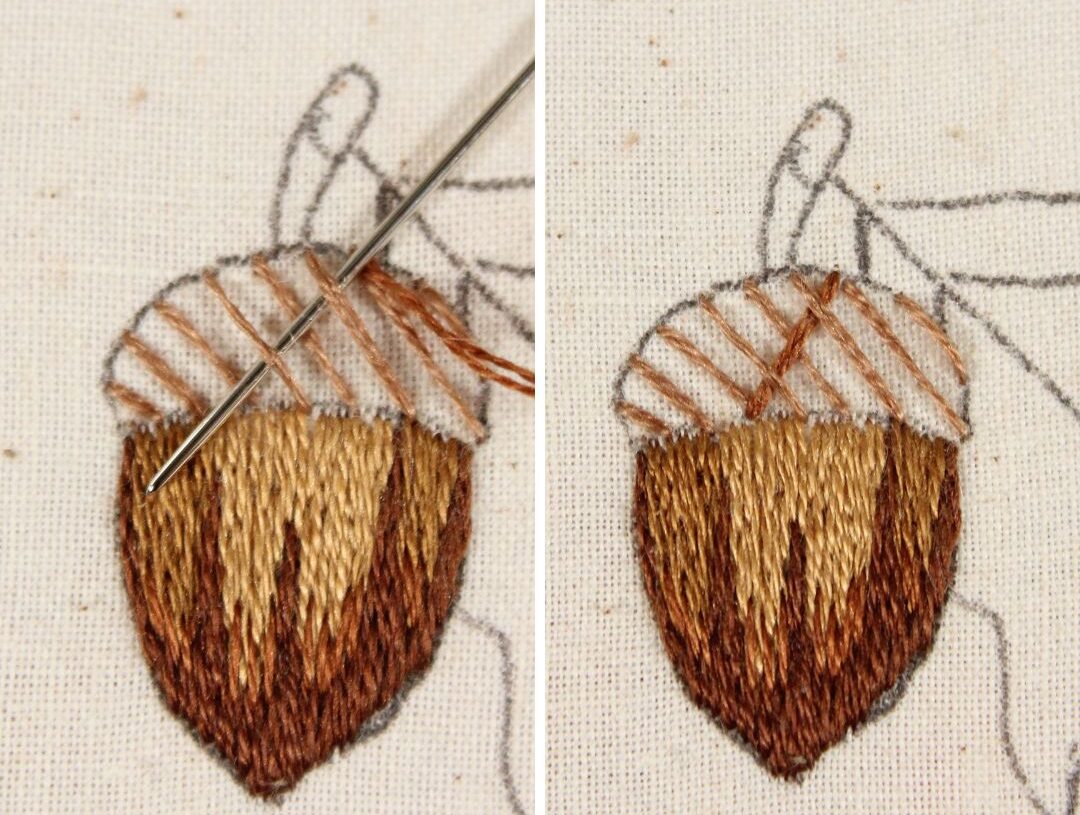
Switch to a tapestry needle and thread two strands of color 433 onto it. Begin working a basketweave stitch along the opposite diagonal, weaving under and over the stitches to fill in the top.

It’s easiest to start in the very center of the shape and work your way out along the sides to achieve a more uniform stitch direction and fill.
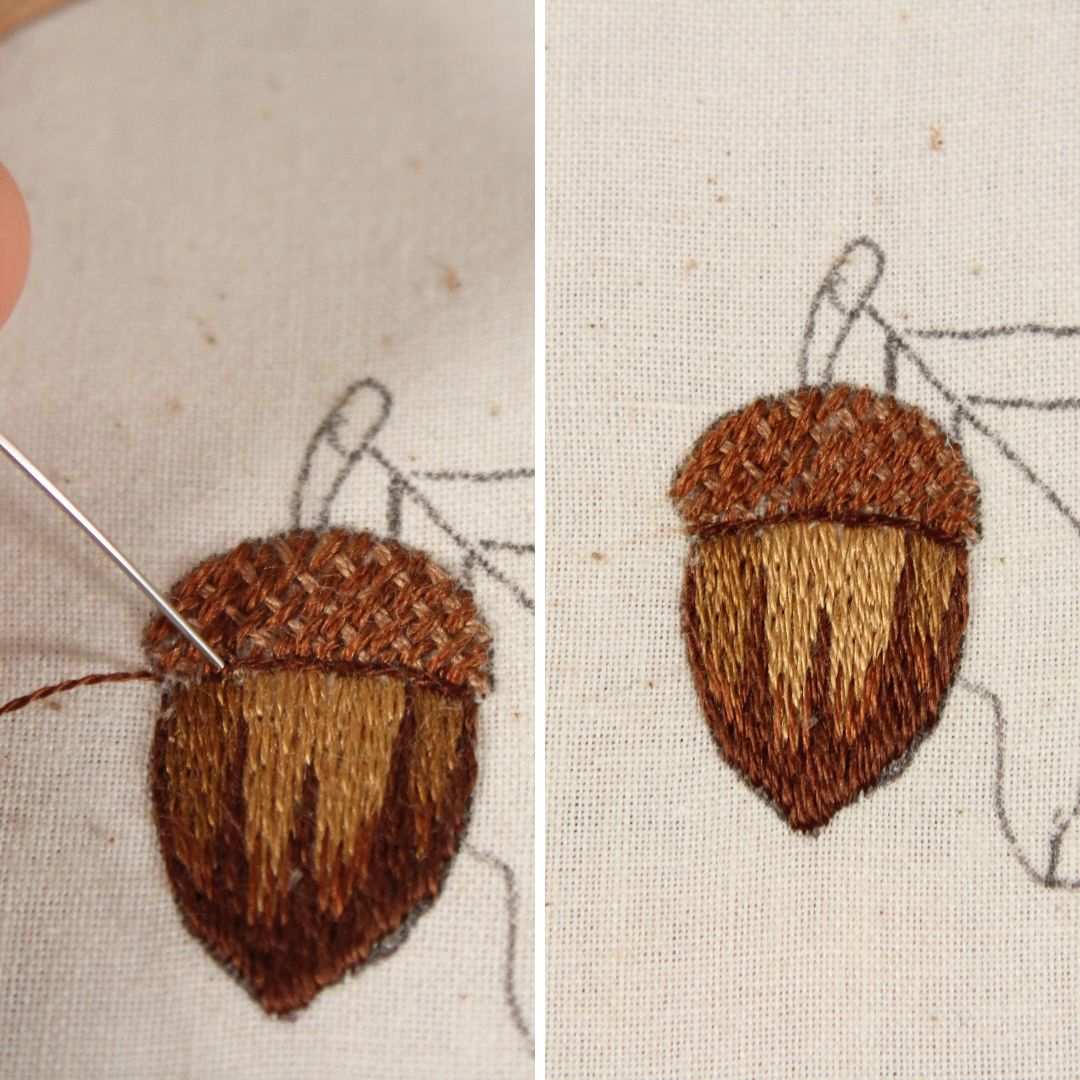
There may be some white space between the top and bottom of the acorn. To fill that in and also to add some visual separation between the two elements, switch back to an embroidery needle and split stitch a line using color 898.
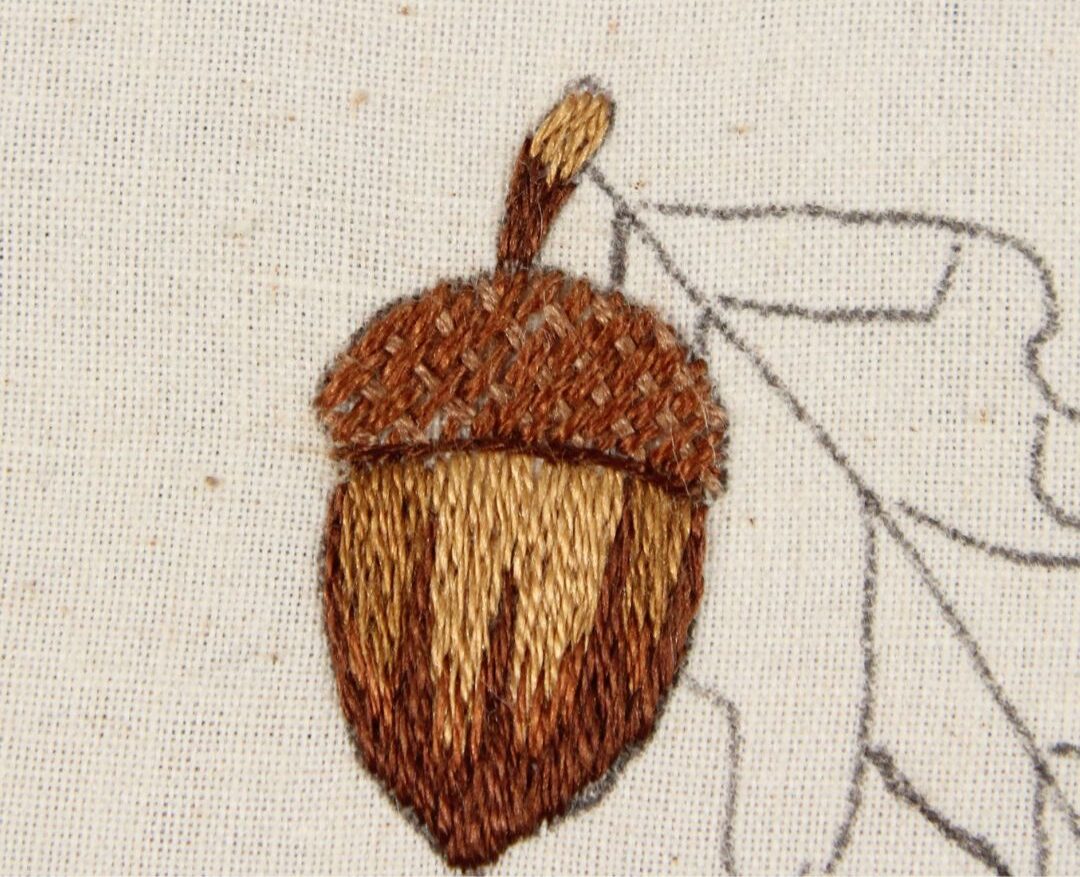
Fill in the top of the acorn stem with long and short stitches using colors 898 and 167.
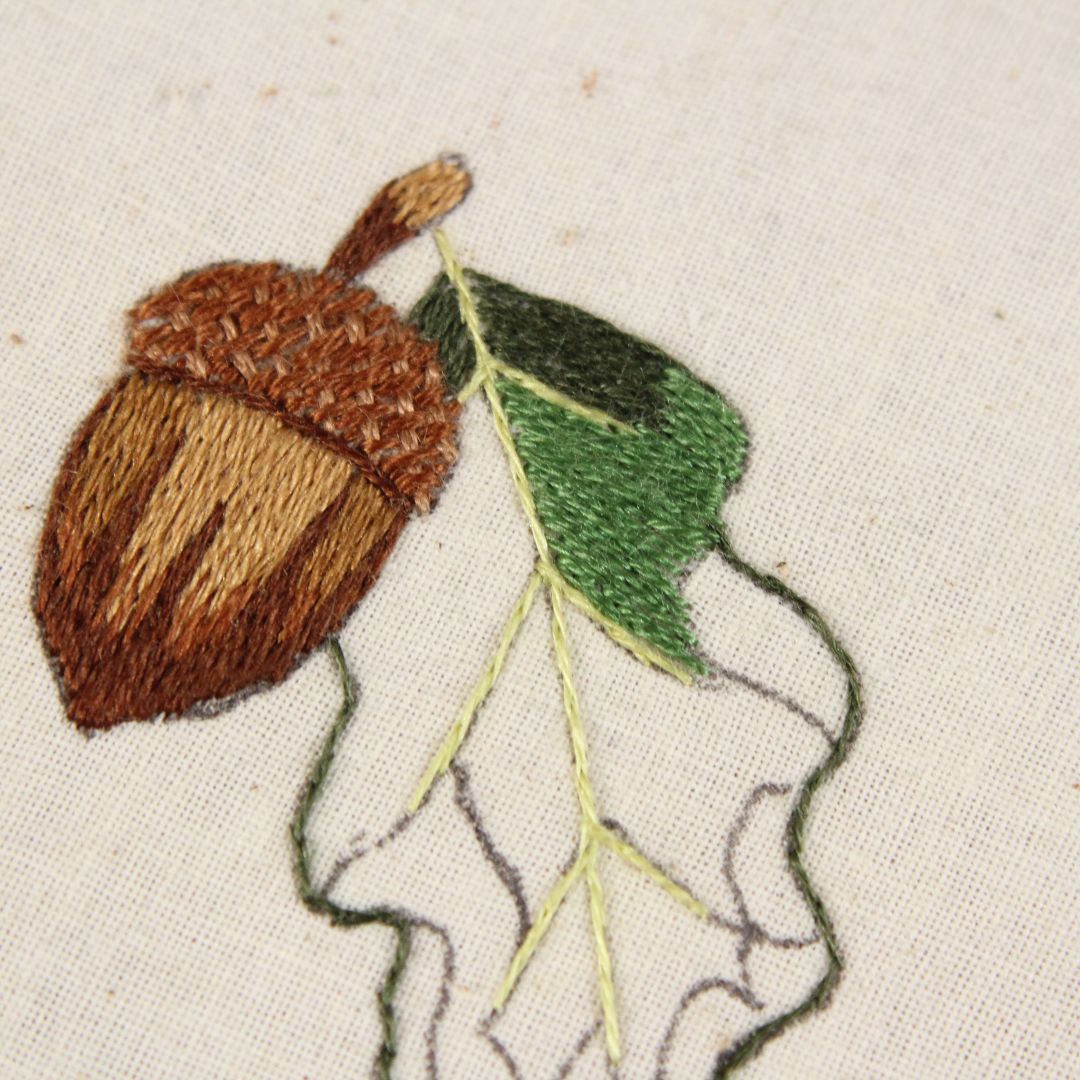
Stitch The Leaf
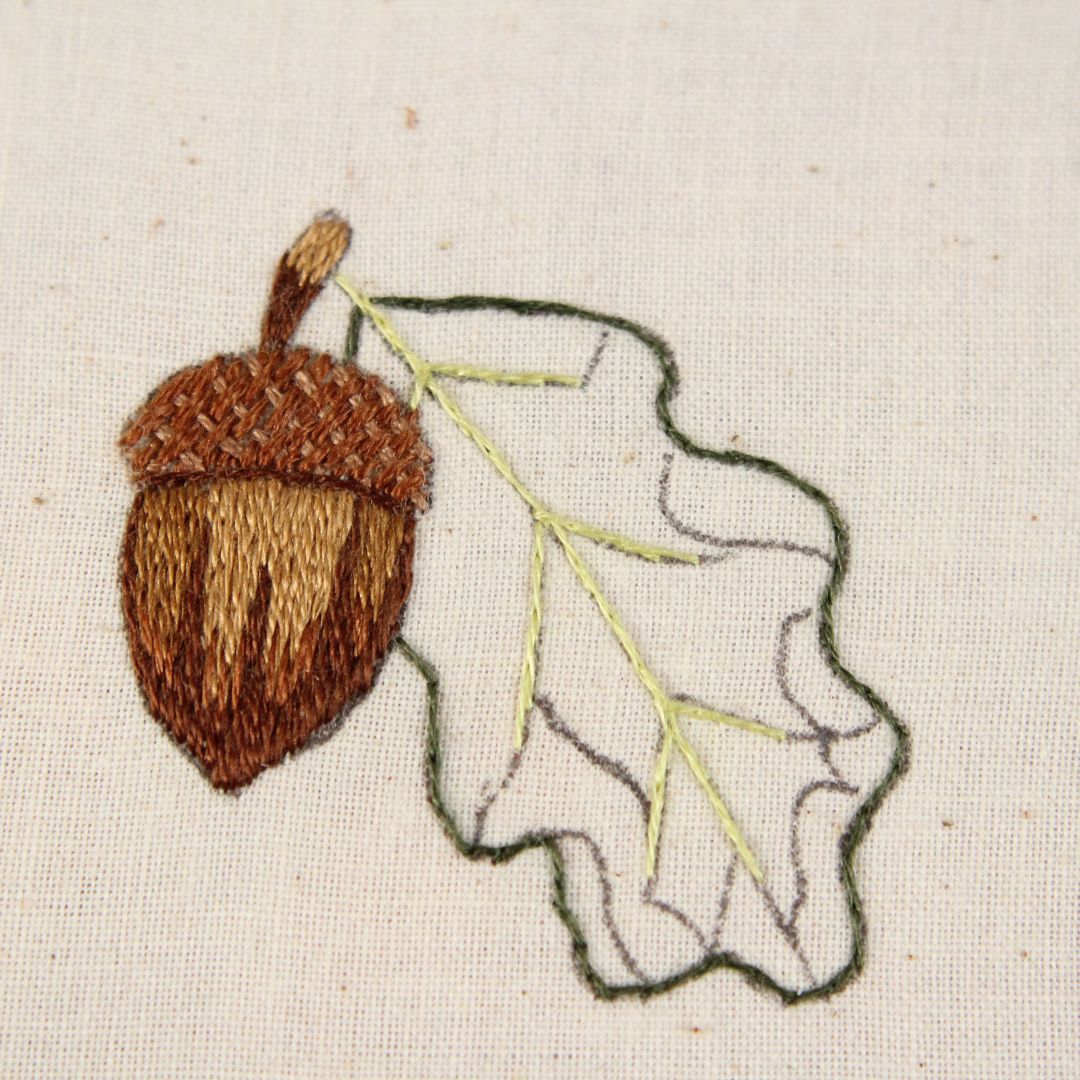
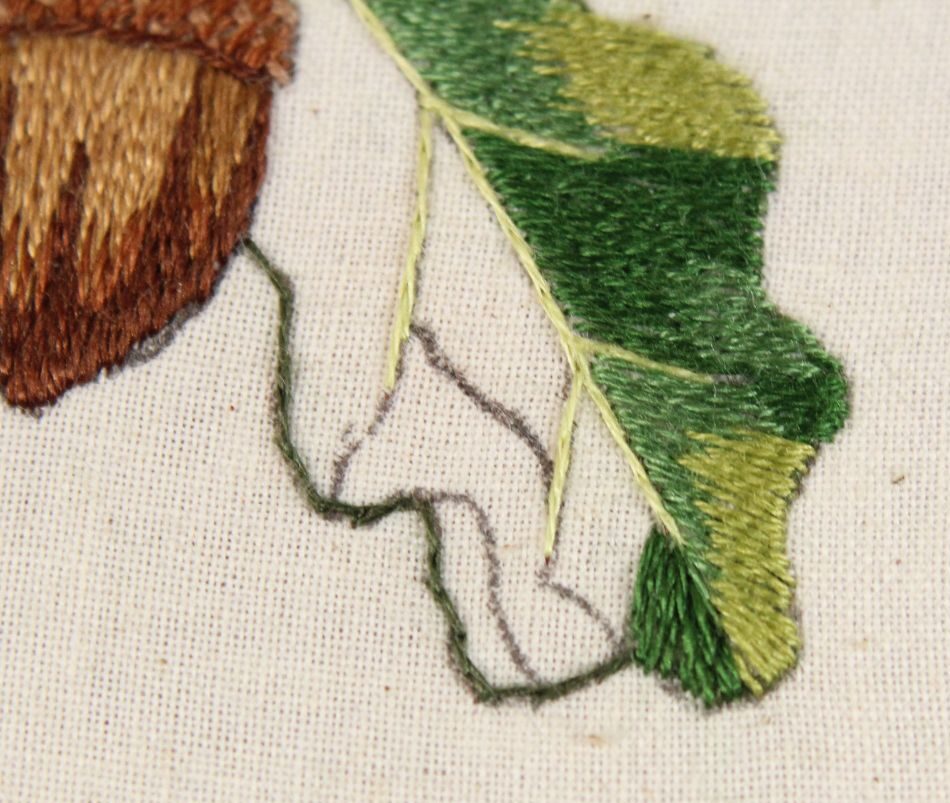
Split stitch the veins of the leaf with color 472. Then, outline the leaf with split stitches using color 935.
The leaf will be filled in with long and short stitches that branch out from the center. Follow the contour of the veins in the leaf to guide you. Fill in the two areas pictured with long and short stitches using color 935.
Fill in the next marked area using color 987, blending out from the darker stitches. Make sure to overlap on top of the split stitched edge as you fill in the leaf.

Start along the edge of the stitches in the last step, blending out and filling in the next area with color 471.
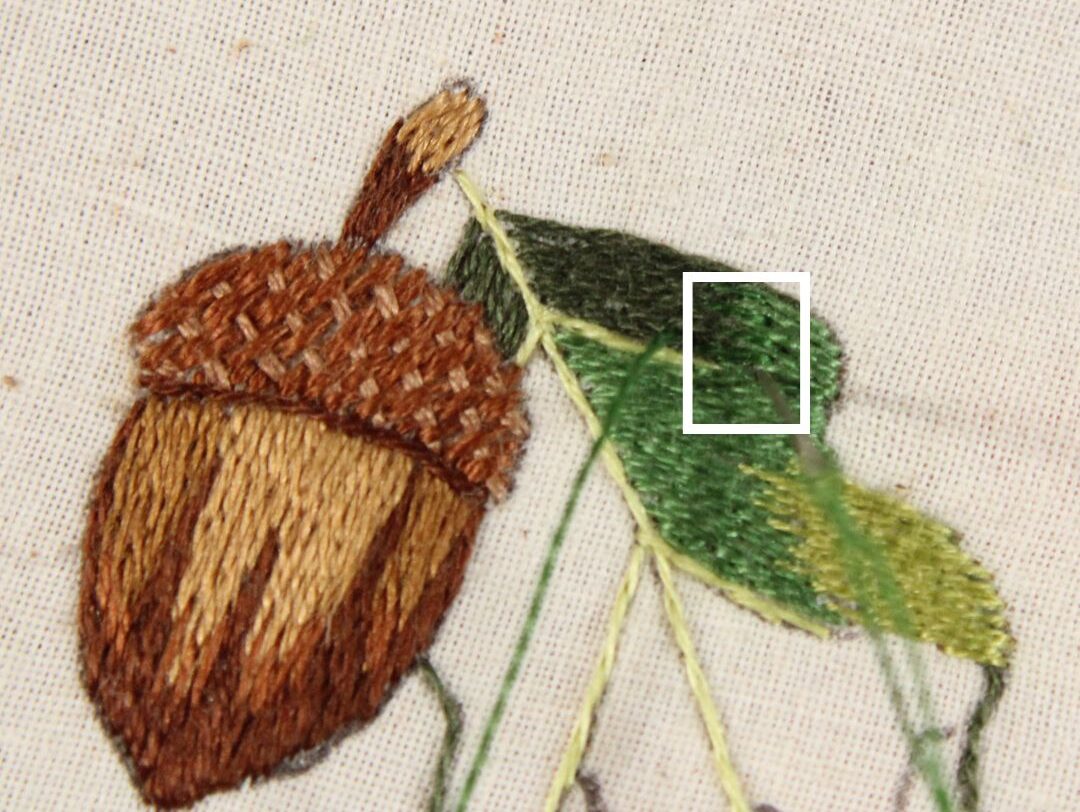
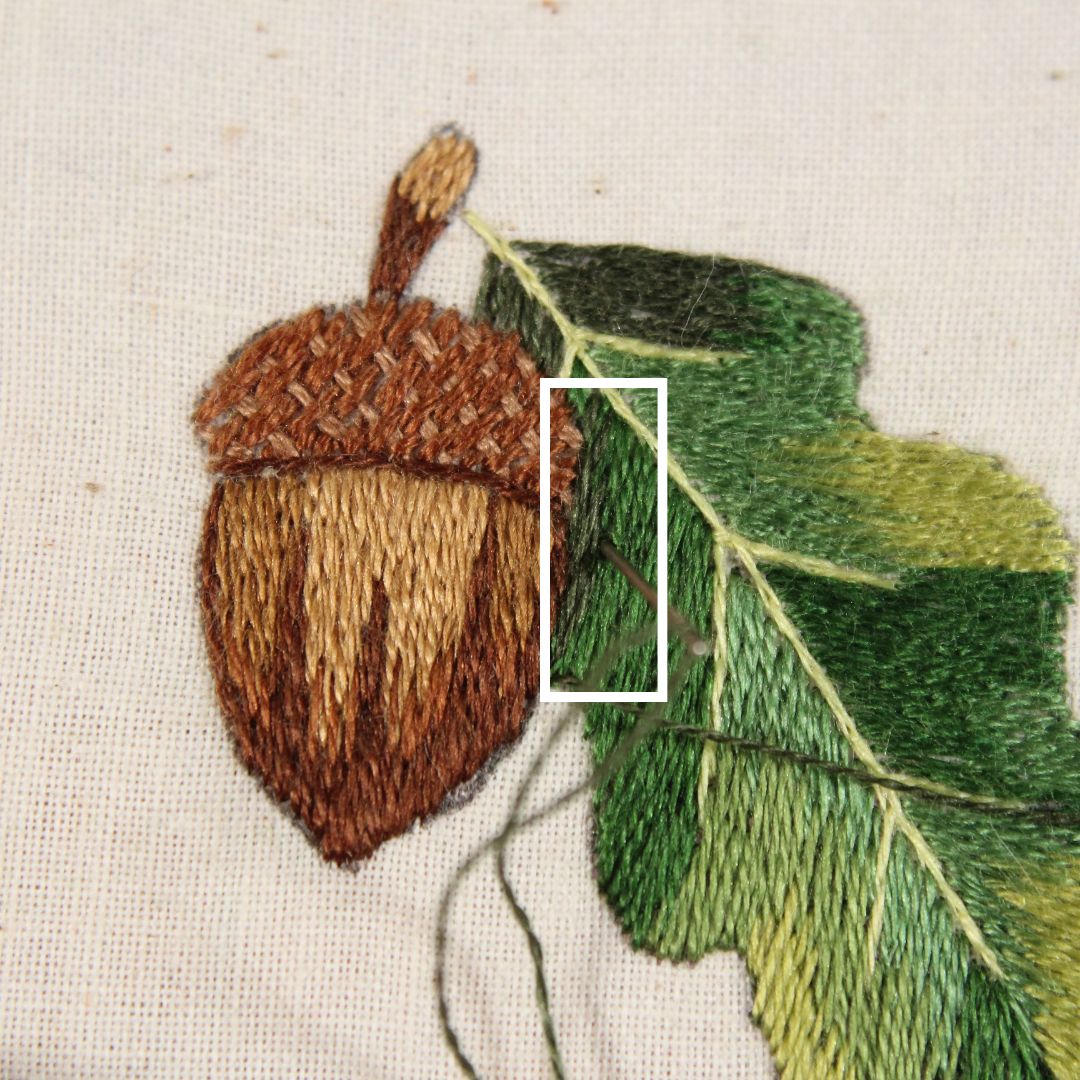
Between the dark and medium green stitches (see square), add some long-and-short stitches using color 986.
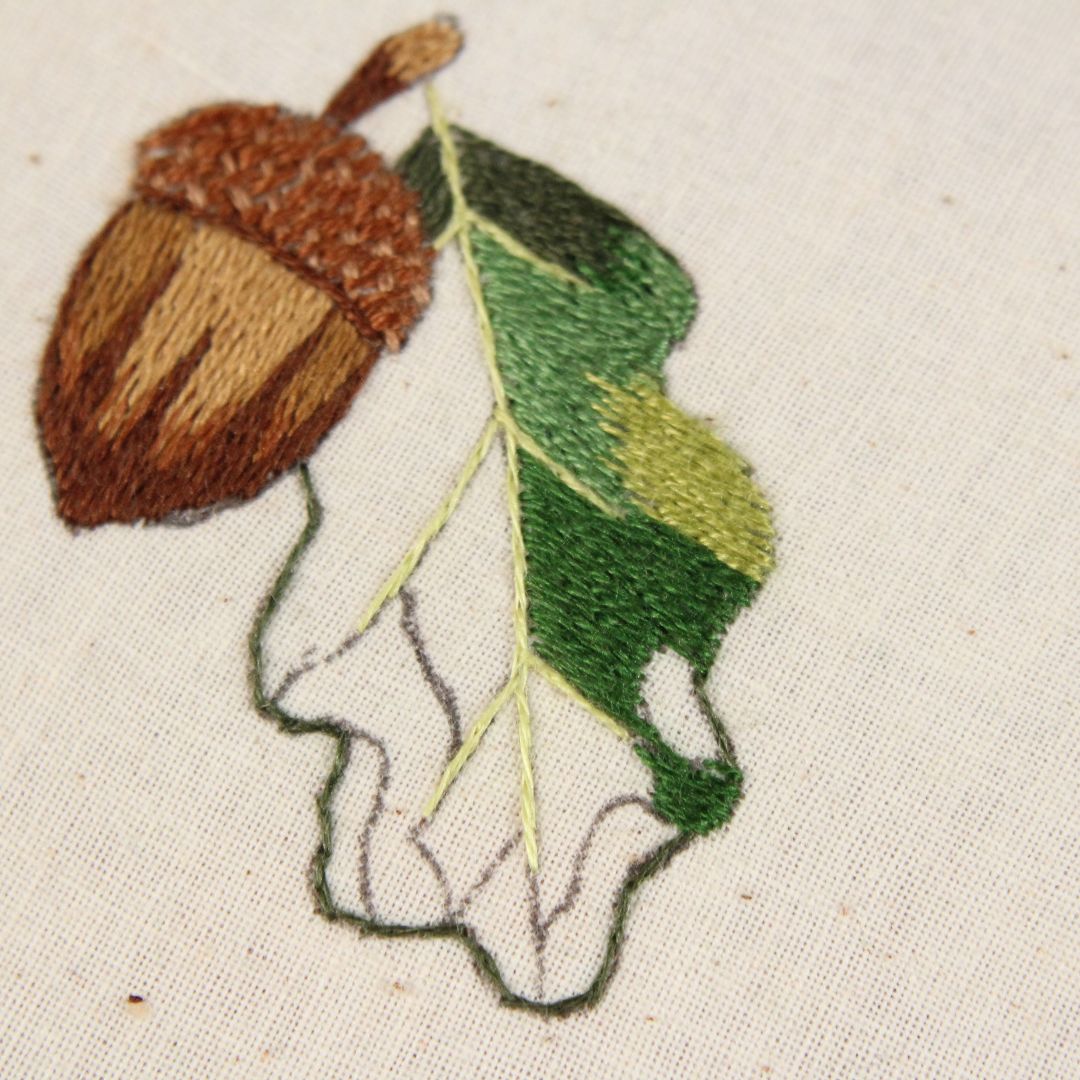
Stitch the next area using color 986.
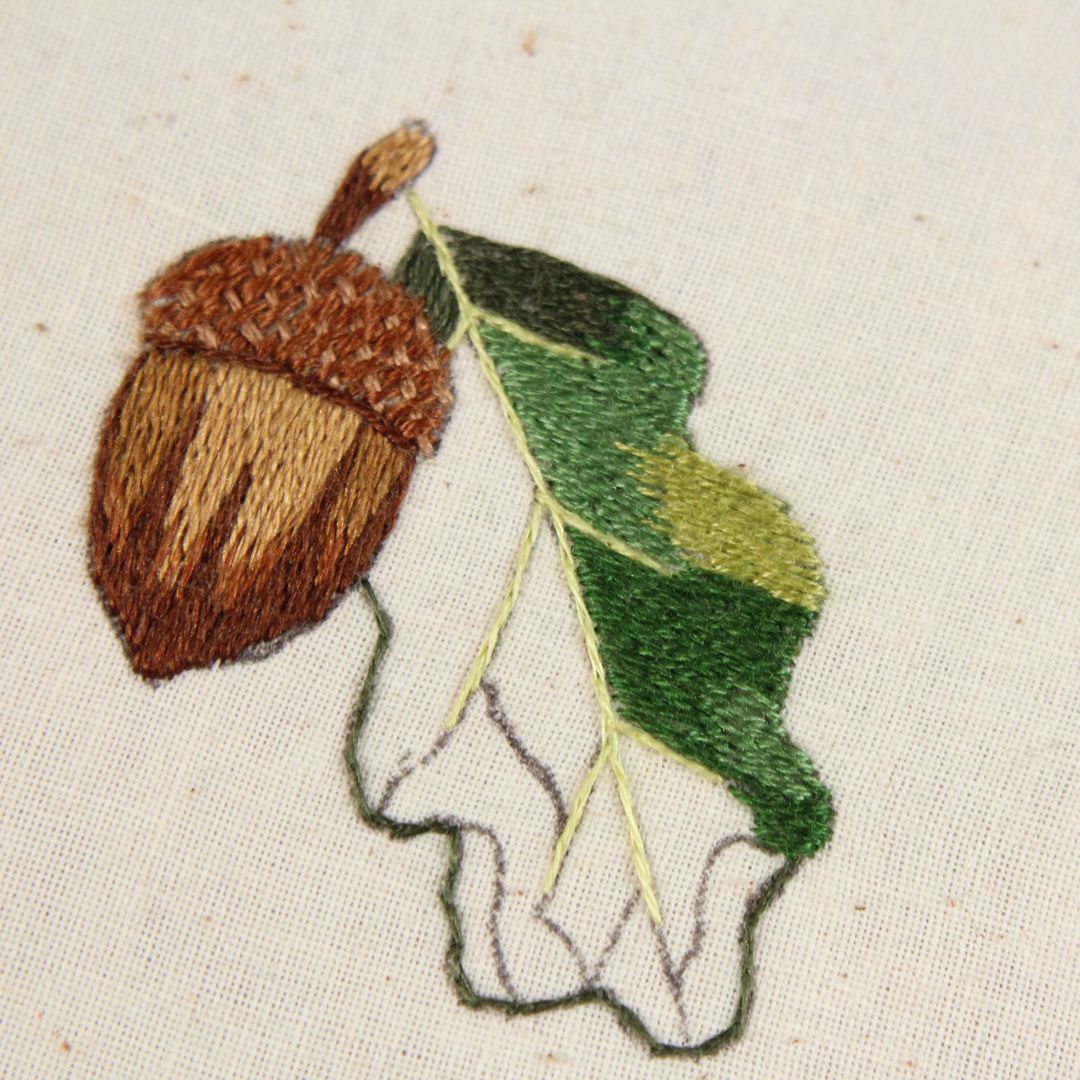
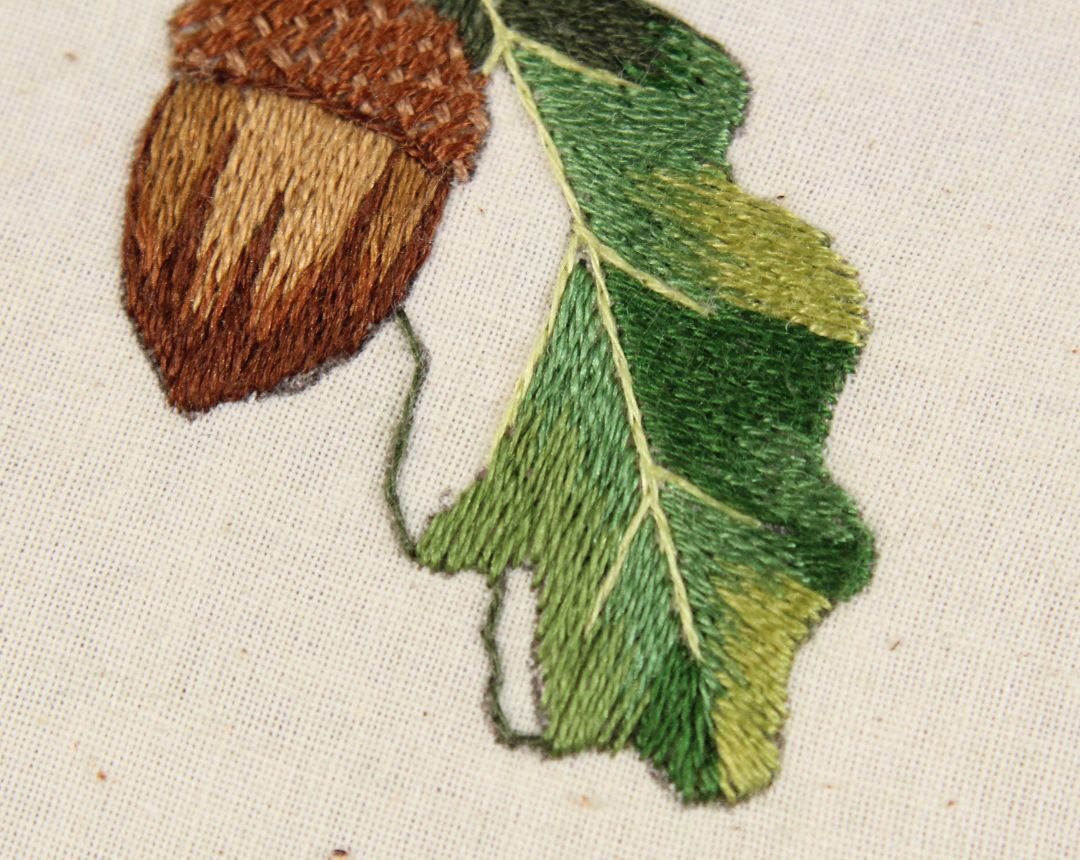
Fill in the small area shown in the picture using color 987, overlapping into the darker stitches to blend well.
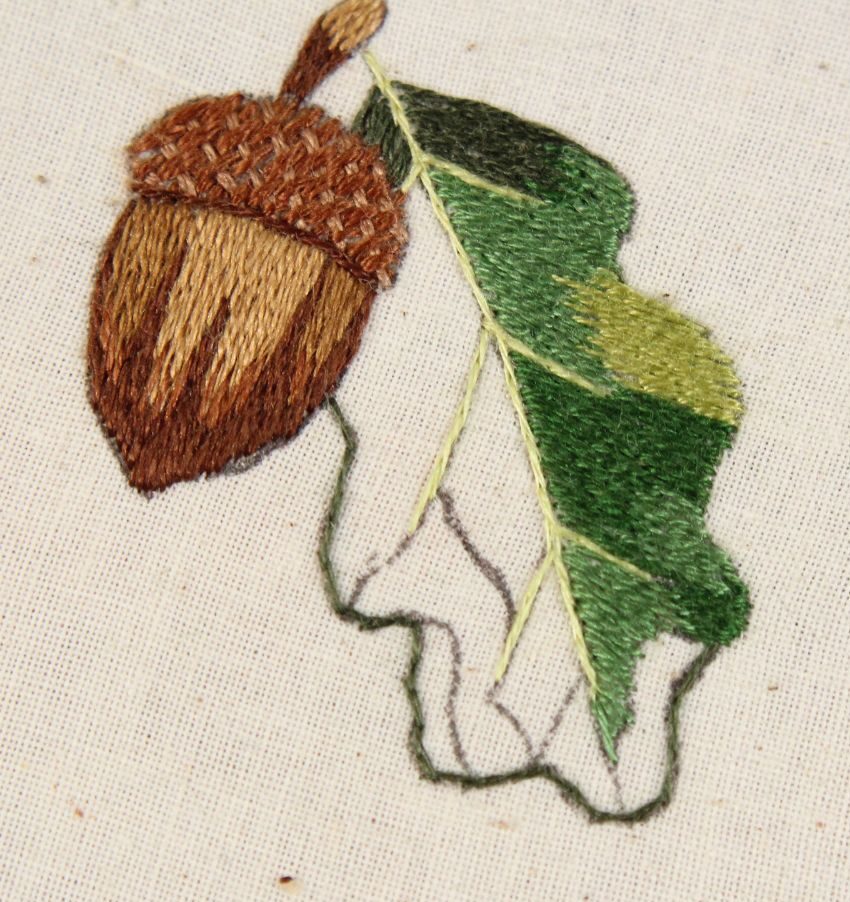
The next area uses color 987.
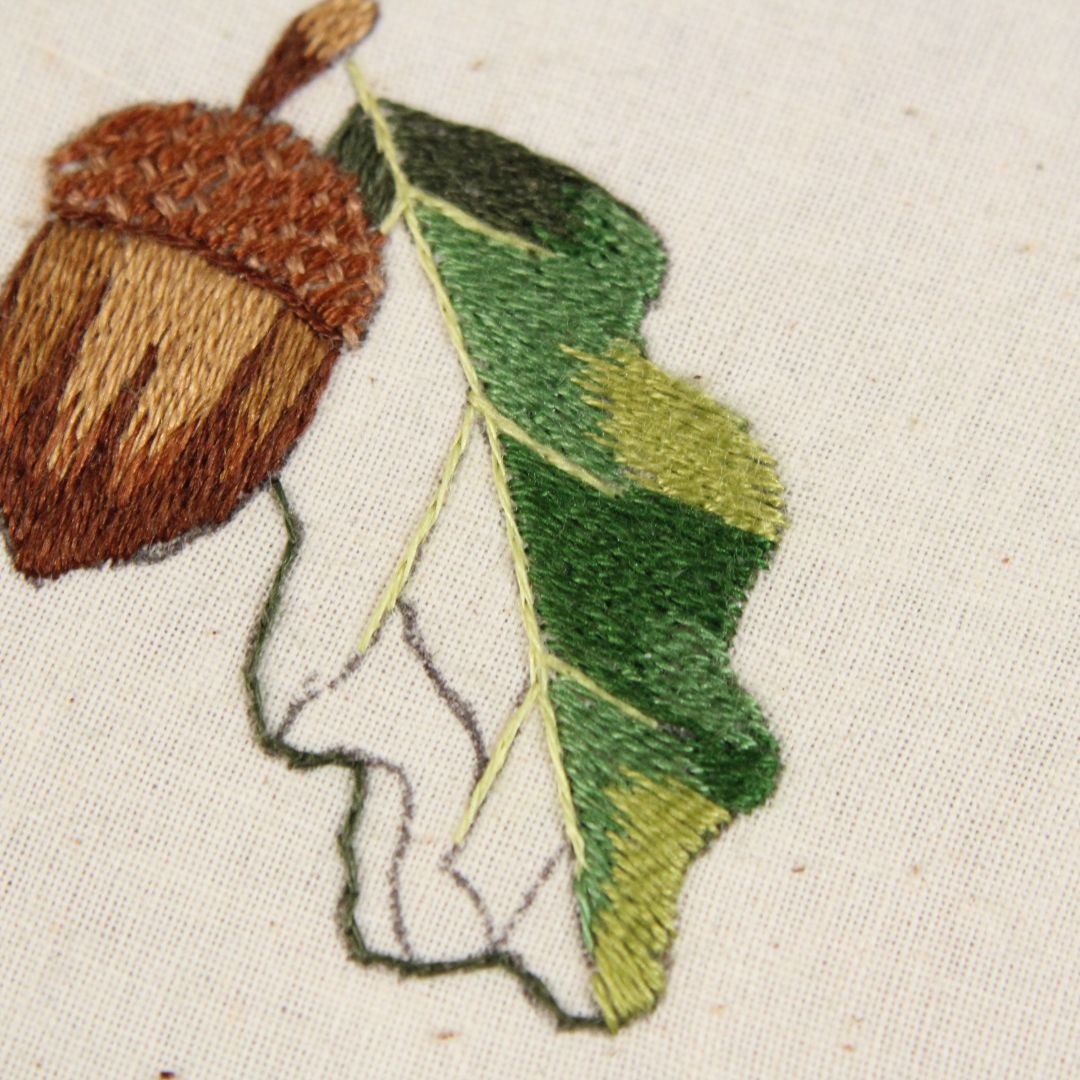
Fill in the tip of the leaf with color 471.
Stitch the area along the tip of the leaf with color 986. Note that the stitch direction will start to fan out in the opposite direction, following the contour of the veins along the left side of the leaf.
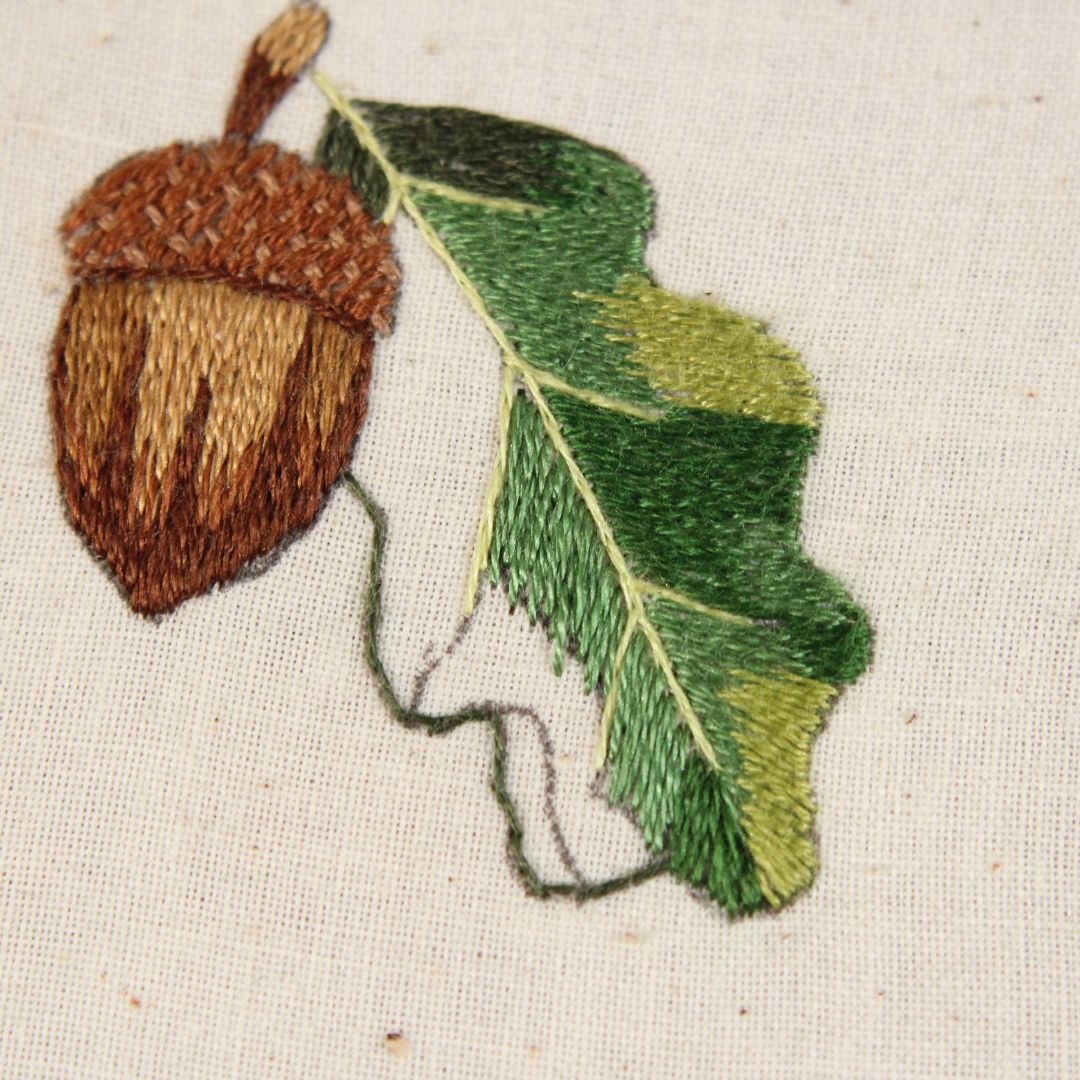
Fill in the following two areas with color 987.
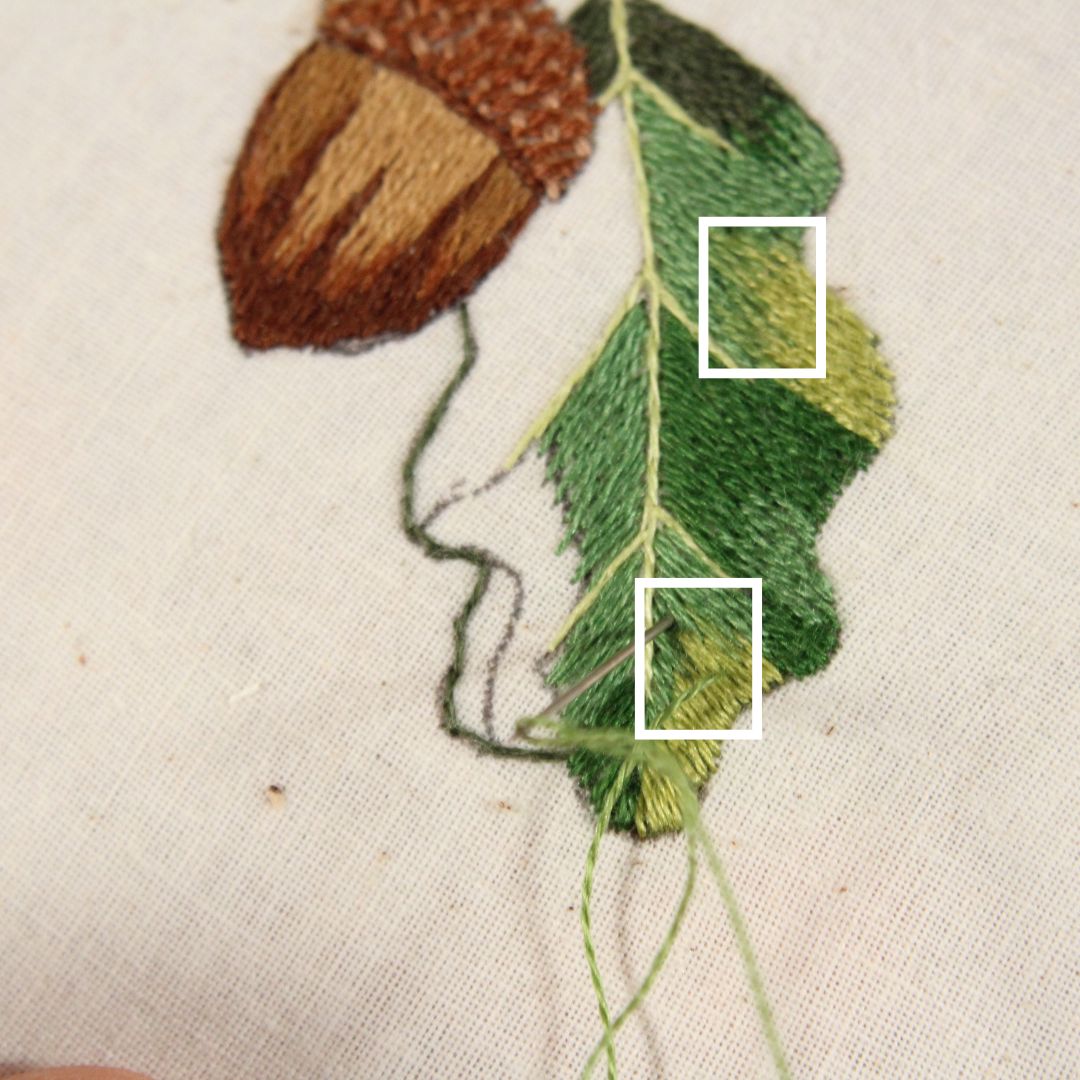
Between the light and medium green areas marked with white squares, add some long and short stitches in color 937 to transition the colors better.
Fill in the next area with color 937.
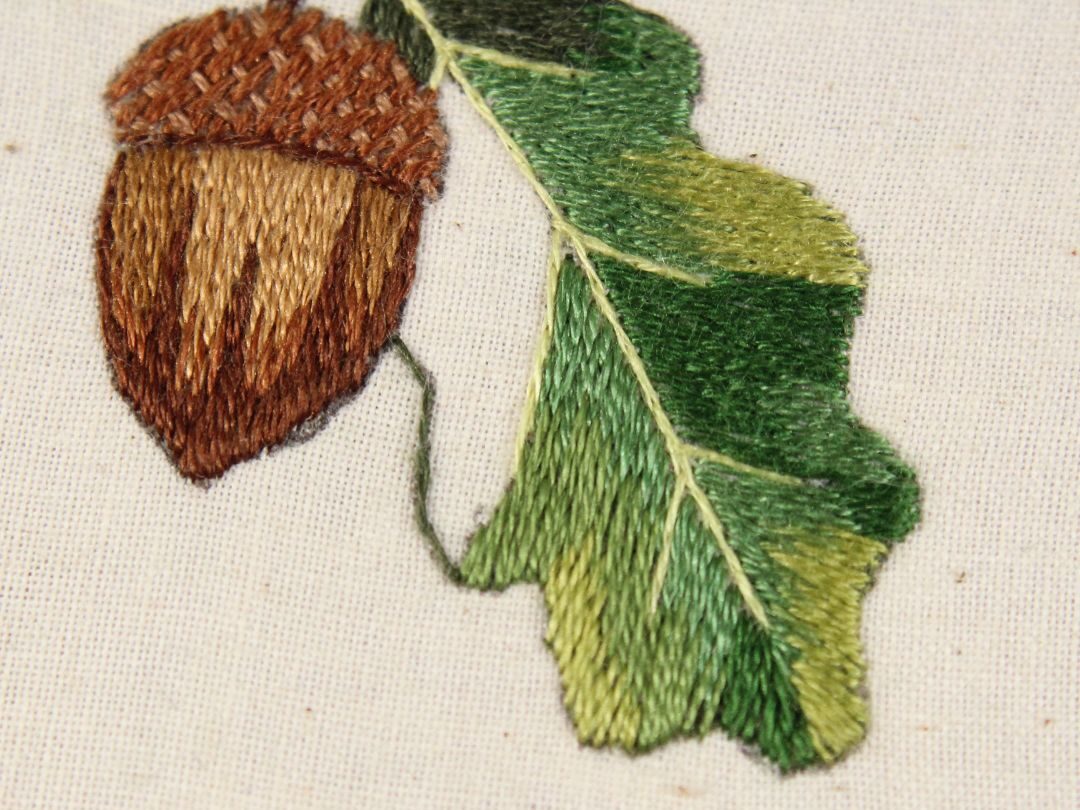
Stitch the next area with color 471.
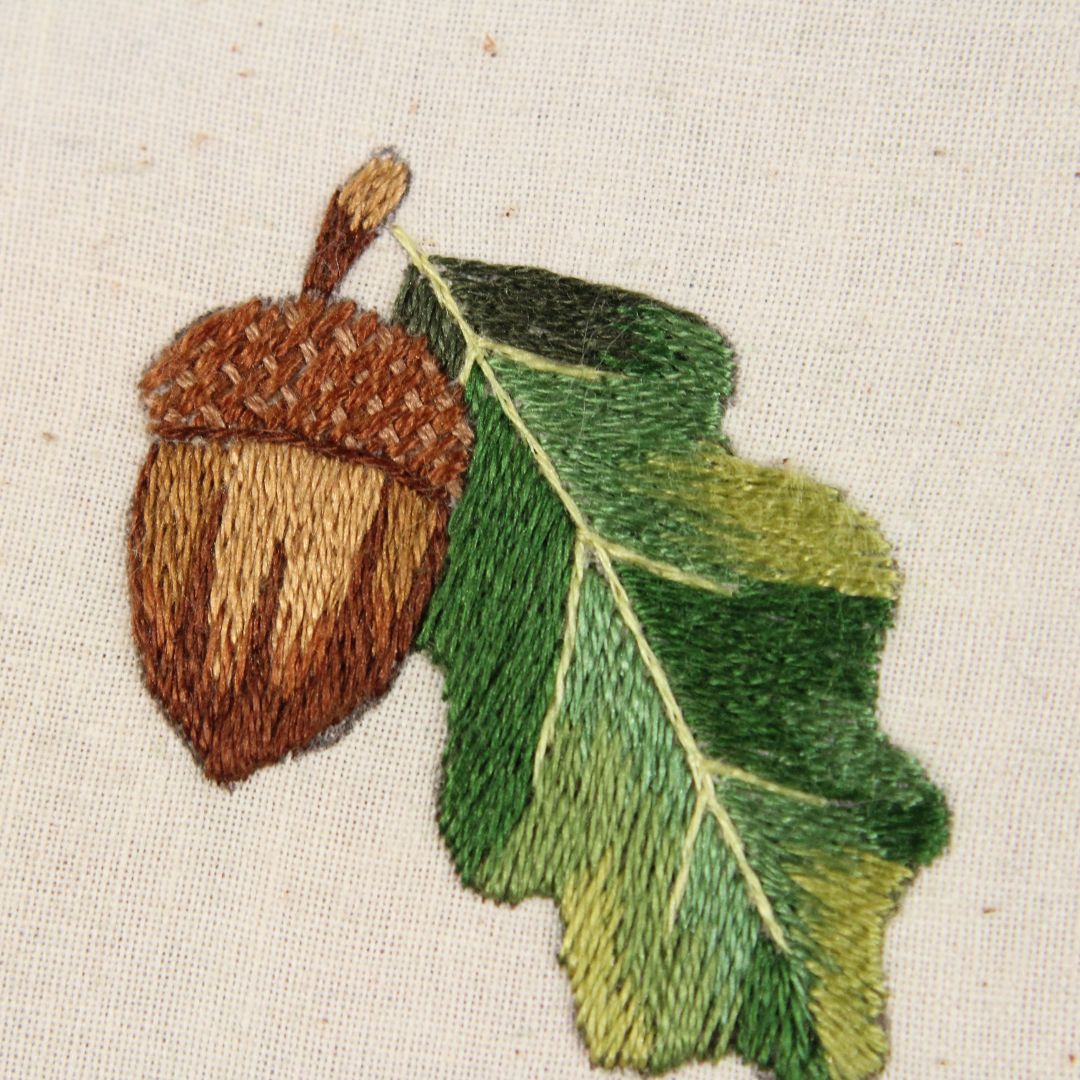
In the last large area, use color 986.
Finally, add a shadow to the leaf. Along the right edge of the acorn, add long and short stitches using color 935.