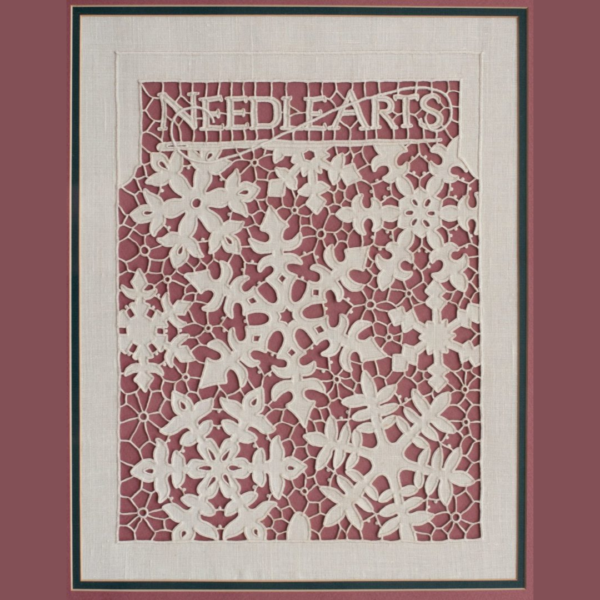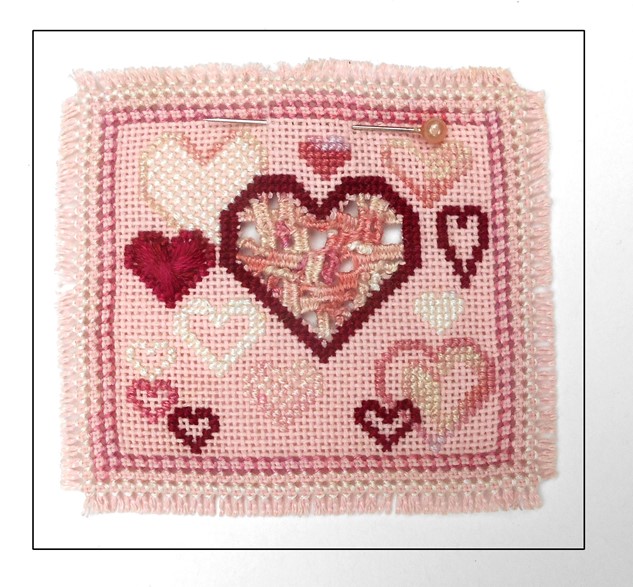
I am hoping to inspire everyone to Take Heart with this lovely contemporary canvas work pin project! If you take heart from something, you are encouraged and feel optimistic – so cheer up and perk up while exploring the possibilities of opening your canvas.
Traditional open work uses weaving and wrapping so that the remaining canvas threads lay flat in the same plain. Contemporary open work is characterized by withdrawing specific canvas threads and reweaving them to make layers that intertwine. Sound confusing? Let’s get going and it will all be clear very soon.
Materials Needed
-
- • Canvas (your choice of color and count) 6″ x 6″
- • 4 shades of red/pink/white cotton floss (or another color or thread, if you like)
- • Sewing thread to match your canvas
- • Sharp pointed small scissors
- • Tapestry needle #26 or #24
- •Corsage pin
Instructions
Step 1: Securing the Opening
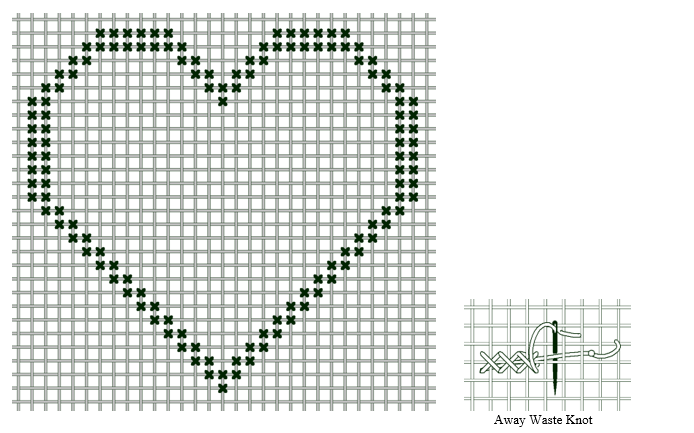
The edge of the open area needs to be secured so that the canvas does not unravel once canvas threads are cut out. Secure the big opening with small cross stitches over 1 canvas intersection.
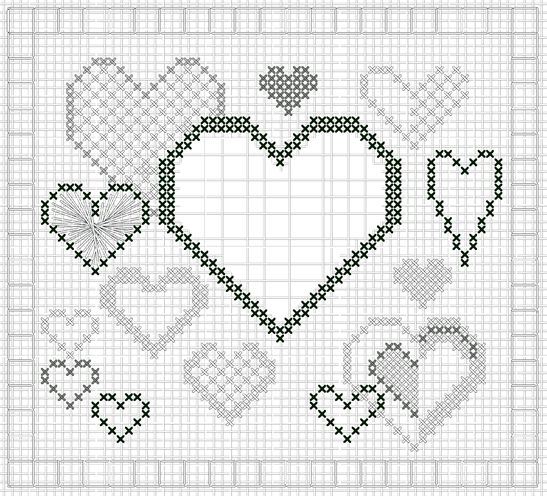
Begin in the middle of the canvas and work a double row of cross stitches around the area that is going to be opened following the graph below. Use 2 plies of the darkest red thread in your palette working 1 complete cross stitch at a time before moving to the next stitch. I like to start with an away waste knot to begin each thread.
Step 2: Opening the Matrix
Using a small pair of sharp scissors, cut the canvas threads out as shown. Do not cut too close to the securing cross stitches; leave a small amount of canvas thread poking into the opening as shown.
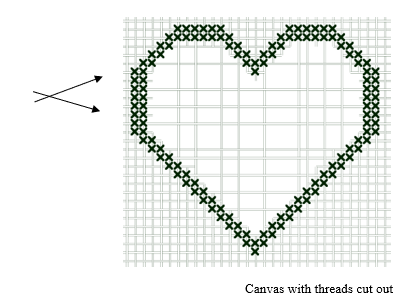
After you have cut out the canvas threads as shown, notice how the remaining threads weave over and under each other.
You are going to enhance the intertwining by wrapping pairs of threads that lay on the same plane together to emphasize the layering.
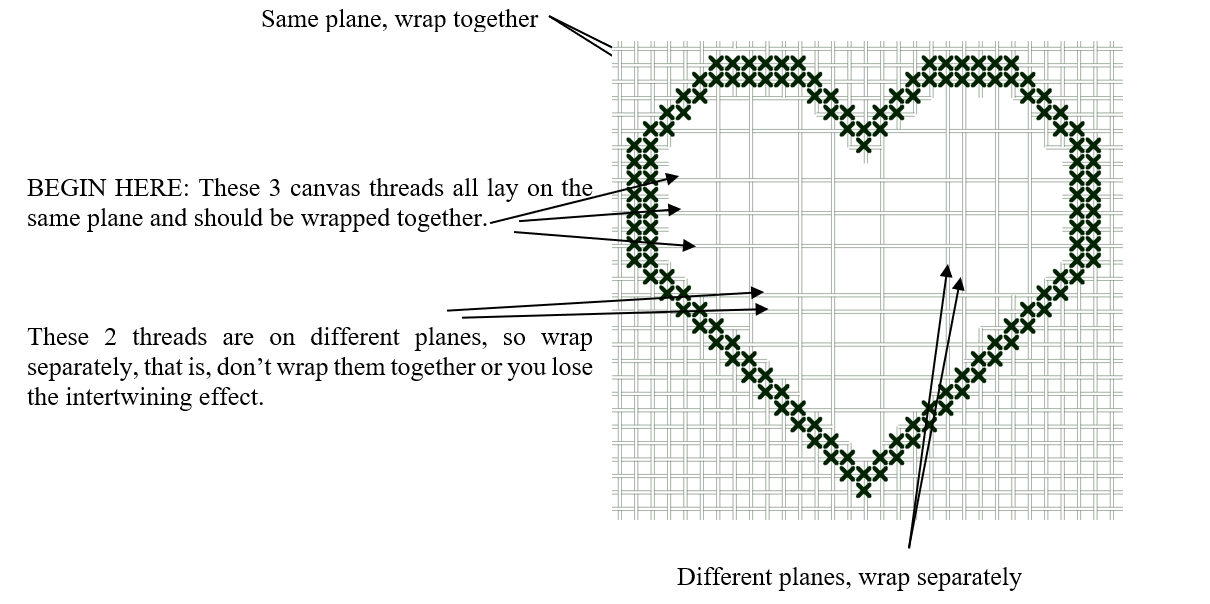
Hints: If you are feeling confused, think about this. On even weave fabric (canvas), threads that are next to each other lay on opposite planes which makes the canvas woven.
Every other thread lays on the same plane. If you were to number the threads 1, 2, 3, … the odd numbered threads would be on one plane and the even numbered threads would be on the opposite plane.
So if you cut out every other thread, the remaining threads lay on the same plane. Still a bit confusing? Move on to the actual weaving and you will see as you pull same-planed groups together, the intertwining magically happens!
Step 3: Weaving and Wrapping
Use 2 plies in your choice of colors. There is no right or wrong way to wrap or specific threads to wrap together
Begin and end threads invisibly on the edges where the cross stitches are securing the edges.
Your tension should be gentle enough so that the threads are just slightly pulled together.
Be careful to wrap only elements that lie on the same plane; do not wrap separate layers back together.
You will need to turn your work over and work from the back at times.
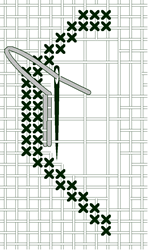
Wrapping threads
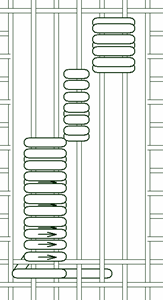
Wrap 1, 2 or 3 threads together, securing the ends in the cross stitch border. Keep wrapping threads on the same plane until all ground threads are covered.
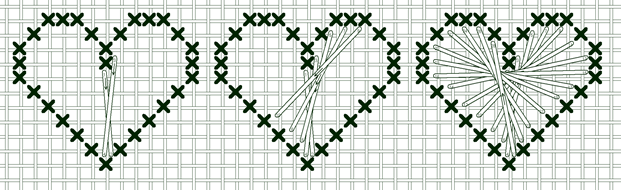
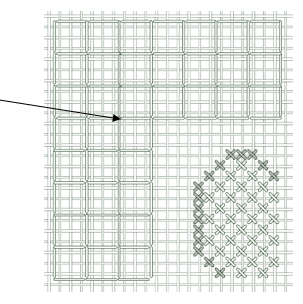
Step 4: Finishing the Design
Once you have finished filling the layered matrix, cross stitch the remaining hearts following the diagram below using 2 plies of floss.
Color Key
Color on chart | Floss Color
-
- • Black | Red
- • Dark Gray | Dark Pink
- • Gray | Light Pink
- • White | White
Finishing the Edges
Four-Sided Stitch Fringed Edging
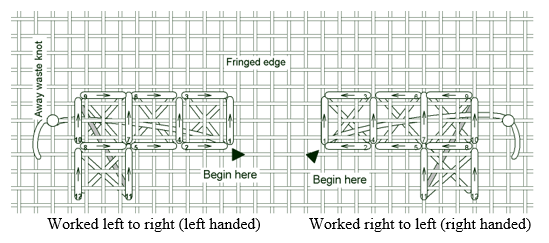
Use a single ply of sewing thread or 2 plies of floss to work each row, working over 3 threads of canvas. Begin the first row with the darker pink floss.
Tips for making the Four-Sided Stitch Edging
- • Stitches on top of the canvas(or on right side of canvas) are always vertical or horizontal.
- • Stitches on the back side of canvas are always diagonal.
- • Pull stitches tightly to secure.
- • When you turn the corner and complete the first stitch, turn your work 90 degrees clockwise and continue.
- • Use a fine (thin) strong thread that matches the linen to work the pulled edging; do not “snap” the thread with each stitch, rather pull gently until the linen threads come together and lay side-by-side, but are not bunched up or overlapping.
Tips for Starting and Ending Threads
Be sure to start or end the thread so that the tail pulls the last stitch in the same direction it would have gone, had it not ended. This will tighten the stitch, rather than pull it out of shape.
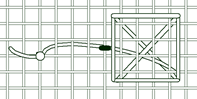
Threads may be started with an away waste knot in the line of stitching, but care must be taken to ensure they are caught securely before being cut off. A small back stitch will ensure the tail does not come out OR a longer away waste knot can be used and later woven into the completed stitches on the back. Note that the away waste knot pierces the linen thread, so that it does not pull out when you make the first stitch.
Changing Threads
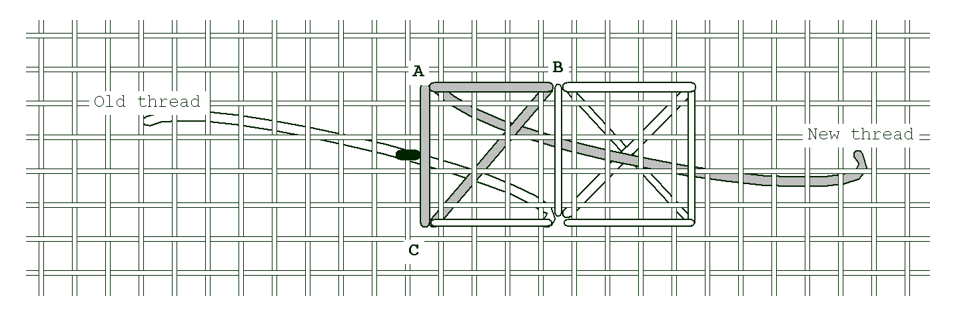
Finish the bottom leg of the box with the old thread and secure it with a tiny back stitch, leaving a long tail in the line of stitching that can be caught with the new thread.
Secure the new thread through the diagonal crosses on the back and come up at A; go down at B to make the top leg of the box and come up at C to begin the new box. This will make an invisible join.
Multiple Rows
Work a second and third row of four-sided stitch on the outside of the first row. The second row will share holes with the first row and the third row will share holes with the second row. Begin with any color you choose and work each row in a lighter color for a gradient effect.
Fringing
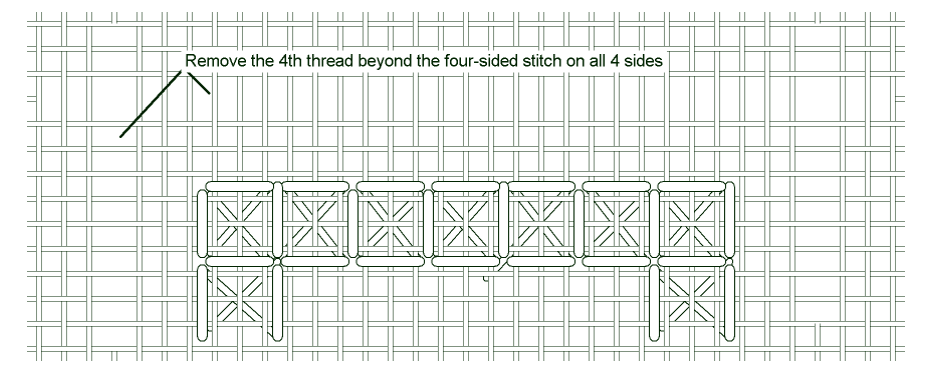
Remove the 4th thread beyond the four-sided stitches all around the four sides. This will make a “ditch” to cut off the excess canvas in a straight line.
Cut in the “ditch,” remove the excess canvas and unravel the remaining threads to make the fringe. The fringe will be 3 threads wide; unravel all the threads up to the four-sided stitch edging.
We’d love to see your projects, make sure to share your photos with us on social media and use #EGAstitchers in your post!
Click here to Download this project as a PDF
Many thanks to Catherine Jordan for sharing this wonderful project and her expertise with our blog readers! You can view more of Catherine’s work at catherinesdesigns.net.