Our latest project for EGA’s Free Projects library comes courtesy of Amy Frazer, also known as Keller Design Co. Through Keller Design Co., Amy has created an expansive crafting universe that includes embroidery, greeting cards, stickers, stationery, and other small gifts, and she’s also fostered a community of independent makers via Keller & Friends. Her December Holly embroidery has been adapted from her newest book, Birth Flower Embroidery, now available from Quarto Publishing.
Embroidery Level
Advanced Beginner to Intermediate

Materials and Instruments
- Holly Ornament Pattern template – register for the EGA newsletter to receive it in your inbox! (EGA members can download this pattern from the Publications page here.)
- Pattern Transfer Guide
- Holly Ornament Stitch Guide
- Linen or Cotton: White or cream
- Lightweight cotton fabric for backing (optional)
- Transfer method of choice
- DMC 6 strand floss (color list below)
- Embroidery Needles
- 4” hoop
For Framing:
- 5” Square of white quilt batting
- 5” Square of red felt, or color of your choice
- About 33” of patterned cotton material (to wrap a 4” hoop)
- 10” of 1” wide ribbon or patterned fabric
- Sewing Thread, white
- Glue Stick
- 2 Clover Brand Wonder Clips (or small bulldog clips)
Thread Guide – DMC Colors
- 986 Boxwood
- 700 Meadow Green
- 702 Spring Lawn
- 166 Wormwood Green
- 606 Bright Red
- 869 Coffee
Stitches Used
- Back Stitch (BS)
- Whipped Back Stitch (WBS)
- Detached Chain Stitch (DCS)
- French Knot (FK)
- Star Stitch (STR)
- Satin Stitch (SAT)
- Stem Stitch (STM)
Download a stitch guide courtesy of Keller Design Co.!
Notes
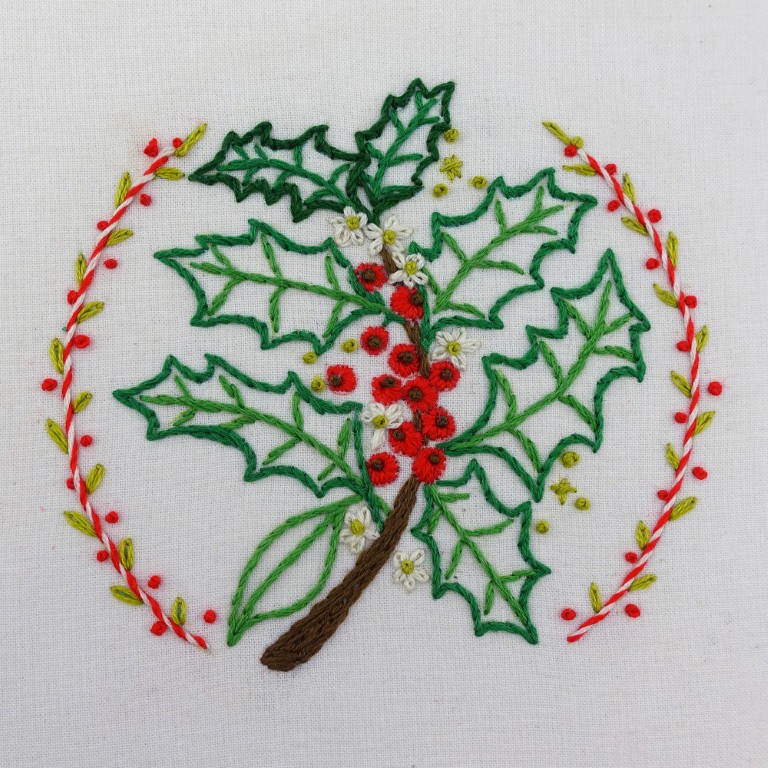
This small embroidery is a pattern adapted from my newest book, Birth Flower Embroidery. In the book each month has 2-3 flowers highlighted that represent that month’s birth flowers. The final 2 birth flowers of December, holly and paperwhites, bring a freshness to the winter season with their bright green foliage, red berries, and white flowers.

Holly is native to North America and their berries are an important source of winter food and shelter for birds and wildlife. The Latin name, Ilex aquifolium, means ‘with pointed leaves’ and many species have glossy green leaves with serrated edges. It’s because of these spiny leaves that the ancient Celts thought holly symbolized protection from evil, and would bring the evergreens into their homes at the winter solstice. Holly also symbolized the renewal of life and light.
Fun fact: in 1939, American holly was named the state tree of Delaware.
In the Victorian era, holly was a flower that represented foresight and was used in many European pagan traditions. Holly branches were hung in homes to protect against misfortune. The ancient Romans gave holly during Saturnalia, a popular winter solstice celebration. It was believed to be the sacred plant of Saturn, the god of agriculture, so they wore it as crowns and decorated their homes with it to protect against evil spirits. It is also a popular Christmas decoration, having been a symbol of Christmas since Medieval times. Holly jolly!
To indigenous peoples in the Americas, holly represented something quite different. They saw the thorns and hard wood of holly as a symbol of strength, and its ability to survive winters a sign of resilience. They would wear a sprig of holly in battle to show their bravery.
When stitching Holly for December, the bright crisp colors and humble embroideries will bring a freshness to the season and make wonderful gifts for holiday parties or birthdays.
Instructions
After transferring the design and placing the fabric in the hoop, get started stitching. You can download my Transfer Guide, Stitch Guide, and Holly Pattern (all linked above).
A great method of transfer for this design is to print it out onto water soluble stabilizer. You can stitch it, then wash it away!
Most stitches use 3 strands of thread, except for a few as noted. Refer to the illustration for stitches used and number of threads. (3) means 3 strands of floss and (2) means 2 strands.
Stem and Leaves
Stitches used: Satin Stitch, Stem Stitch
Colors used:
869 Coffee
986 Boxwood
700 Meadow Green
702 Spring Lawn
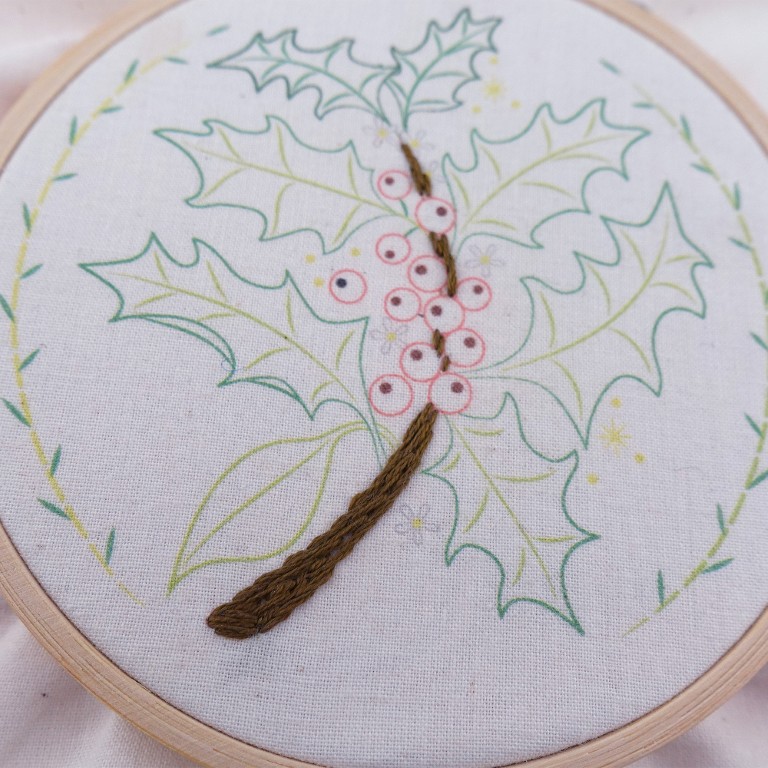
Stitch the main branch using rows of stem stitch. Stitch rows of stem stitch using 869 starting at the bottom and working your way up. The bottom of the branch has about 4 rows of stem stitch. The stitches at the top of the branch will be overlapped with berries and mini flowers later, so don’t worry too much if they look out of place right now.
Using small satin stitches, stitch the base of the branch using horizontal stitches in 869.
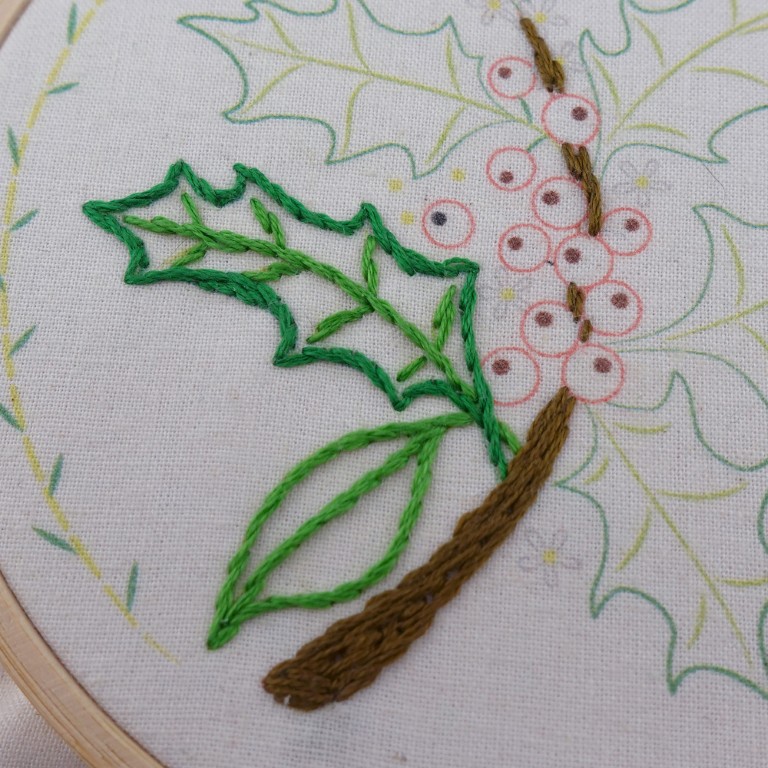
Stitch the leaves working your way around the branch as indicated on the diagram using 3 strands of 986, 700, and 702. If you want an extra challenge, fill the leaves with satin stitch or long and short stitches to add more color to your piece.
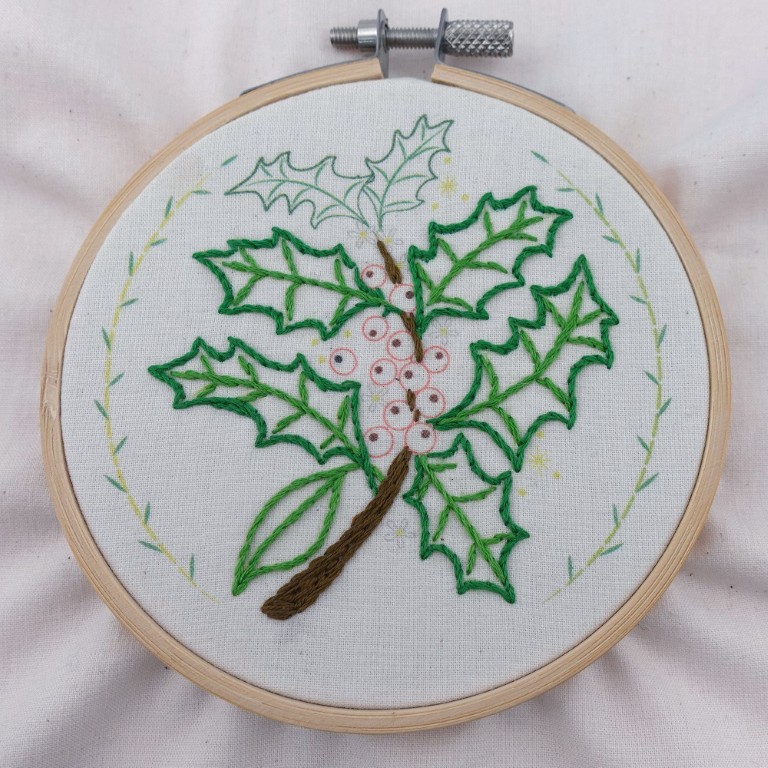

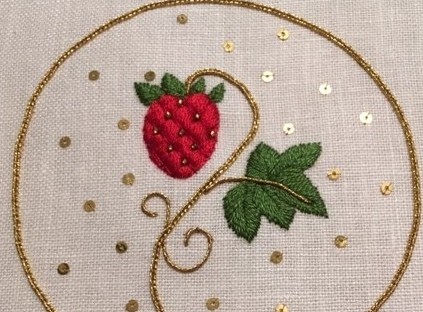
Berries and Mini Flowers
Stitches used: Satin Stitch, French Knot, Detached Chain Stitch
Colors used:
166 Wormwood Green
606 Bright Red
321 Carmine Red
869 Coffee
Ecru
Berries: (see detail) Starting with 2 strands of 606, stitch a berry using satin stitch radiating out from the small dark circle. Add a French Knot using 869 to finish the berry. Continue stitching all the berries using this same method.
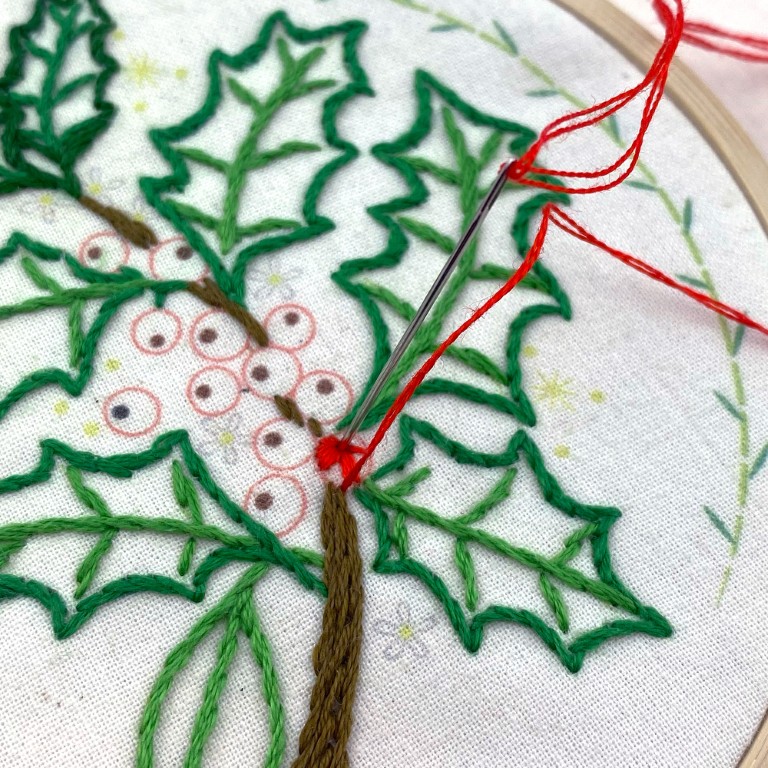
A few tips about stitching the berries. I suggest making a few practice berries on your warmup stitch fabric. These are small and the backside can get messy quickly, causing the thread to tangle. You may want to use a thimble to help push the needle through. Don’t start stitching on the small brown circle, start your first stitch on the outside of the berry so your needle doesn’t get stuck in the knot on the backside.
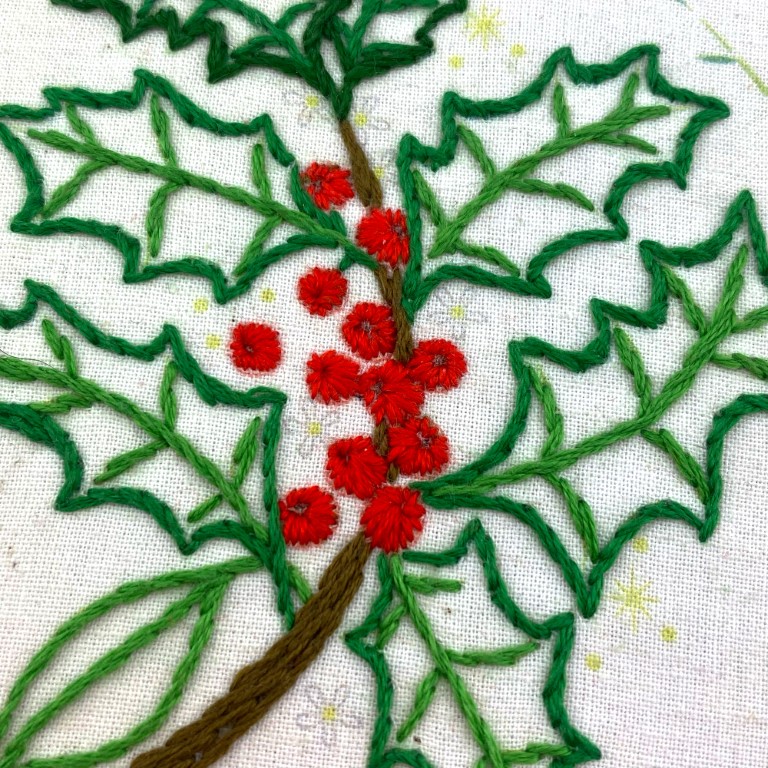
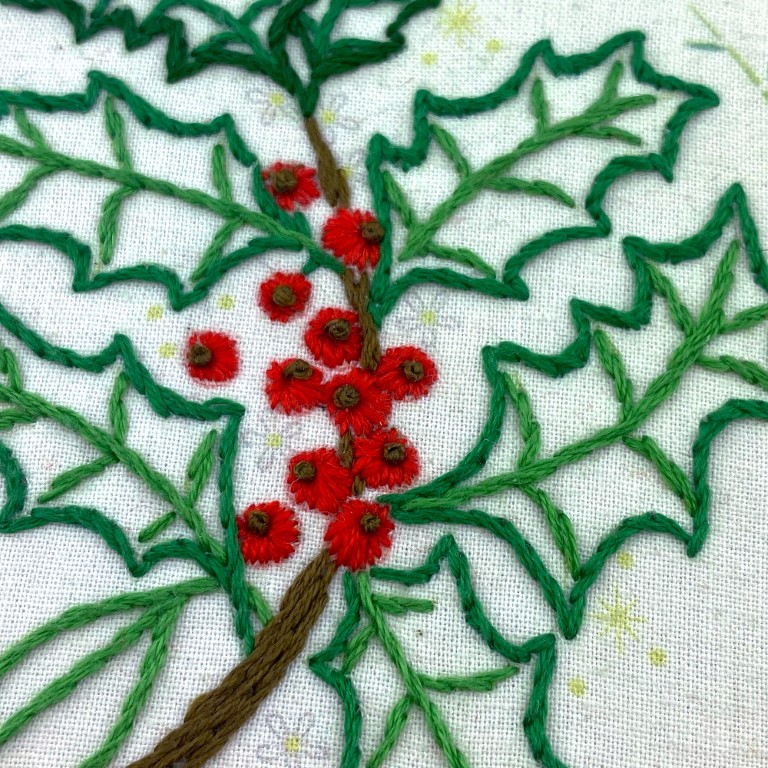
Mini Flowers: Using 3 strands of Ecru, stitch a mini flower using detached chain stitches to form the flower. Add a single French knot to the center using 166. Continue stitching the mini flowers using the same technique.
Stars and French Knots
Stitched used: Star Stitch, French Knot
Colors used: 166 Wormwood Green
Add extra floral flourishes around the holly leaves, stitching Star Stitch and French Knots with 166. Add beads for extra sparkle if you have them.

Greenery Frame
Stitches used: Whipped Back Stitch, Detached Chain Stitch, French Knots
Colors used:
166 Wormwood Green
606 Bright Red
Ecru
This frame is a fun and easy way to finish small embroideries. Start by stitching a line of backstitch with 3 strands of Ecru on the left side of the design.

Add the whipped stitch using 606. This will create a cute candy cane effect. Add the detached chain stitches that look like little leaves.
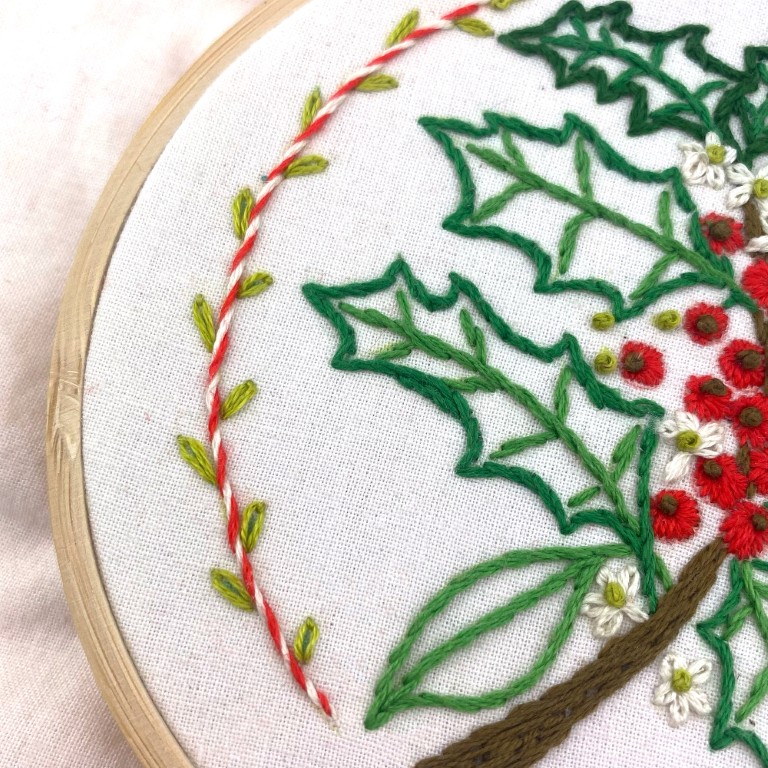
Finally, add French knot “berries” using French knots in 606.
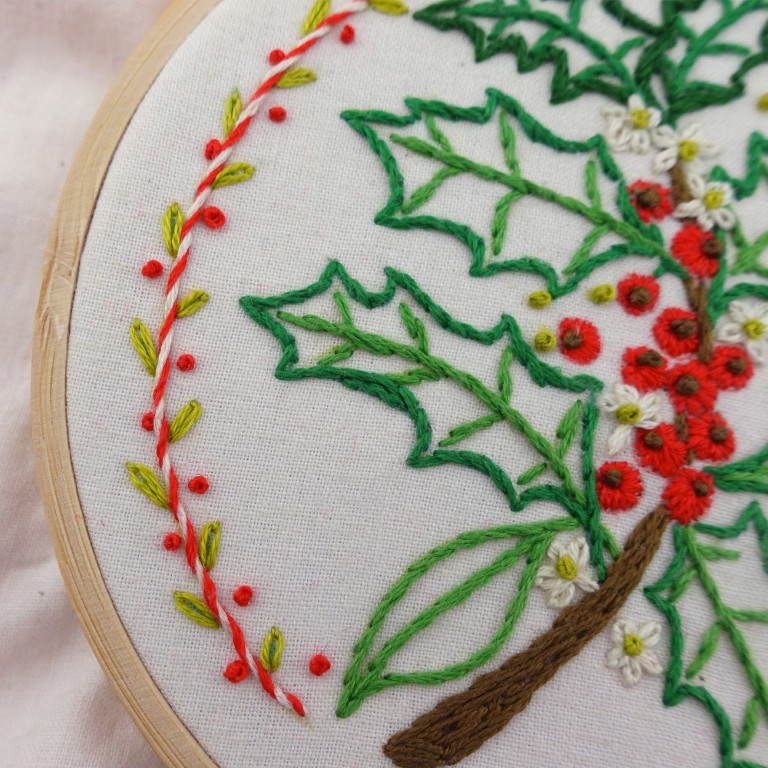
Repeat this process on the right side of the pattern.
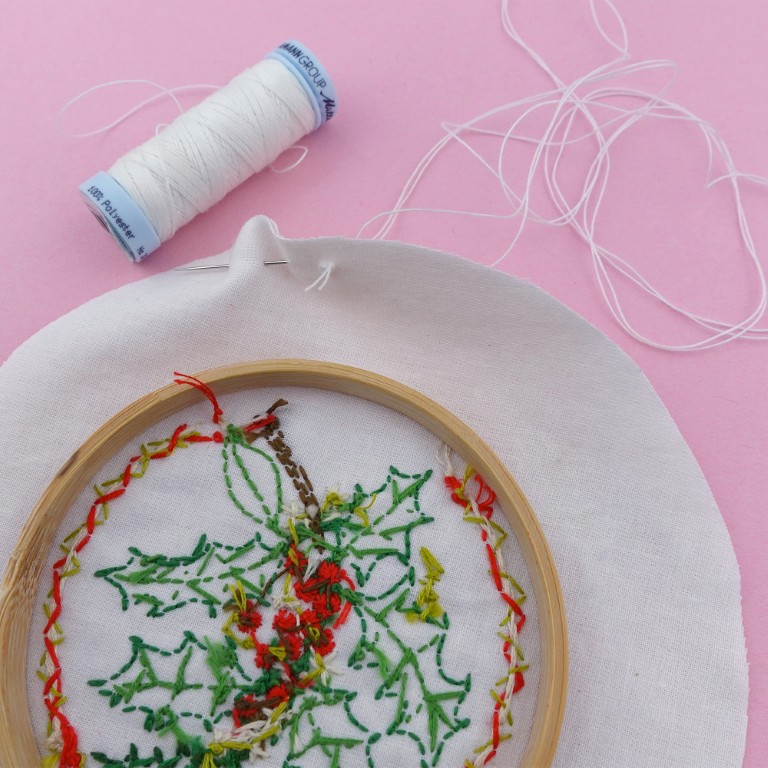
Depending on your transfer method, you may need to wash out the stabilizer and let the fabric dry or remove any traced marks from a water-soluble pen or heat erasable pen.
After you finish stitching, snip any loose threads on the back of the piece and give it a quick iron. I put mine on top of a clean towel and lay a piece of cotton fabric on top to iron with steam. I try not to iron the stitches, so they don’t flatten.
Framing the Holly Embroidery
There are several options for framing this small embroidery, but the one that I love that is very easy and inexpensive to do is an in-the-hoop frame wrapped with fabric.
Preparing the Fabrics
There are a few things that need to be prepped before starting to frame the finished piece.
Backing Felt
Using the red (or color of choice) felt, trace around the outside of the inner hoop. Cut out the circle. You will use this later to stitch onto the back of the hoop.
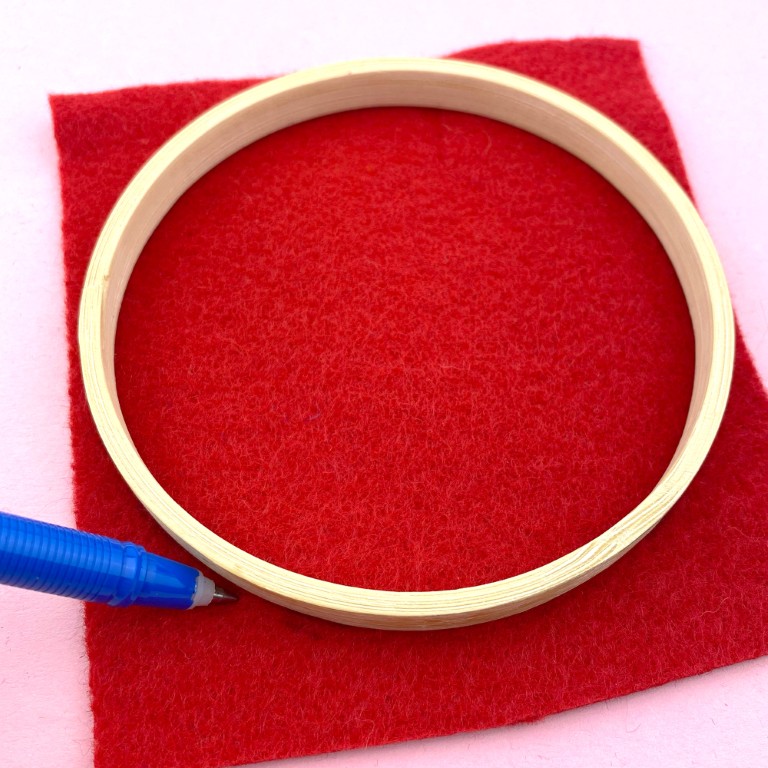
Quilt Batting Backing
Using the white batting, trace around the inside of the inner hoop and cut out the circle. You will place this on the backside of the embroidery.

Fabric Wrap for Hoop
Using the printed fabric of choice, make a small cut in the edge of the fabric. This should be about ¾”-1” in width. Rip a strip of fabric about 33” long—longer is ok. You want to rip with the grain. Just make sure it’s long enough to wrap around the outer hoop.

To wrap the hoop, place a small amount of glue from the stick to the end of the fabric strip and place it on the inside of the outer hoop. Clamp to secure it in place.

Wrap the strip of fabric around the hoop, overlapping each wrap by about ¼”, enough to cover the hoop. Wrap all the way around to the other end of the hoop.
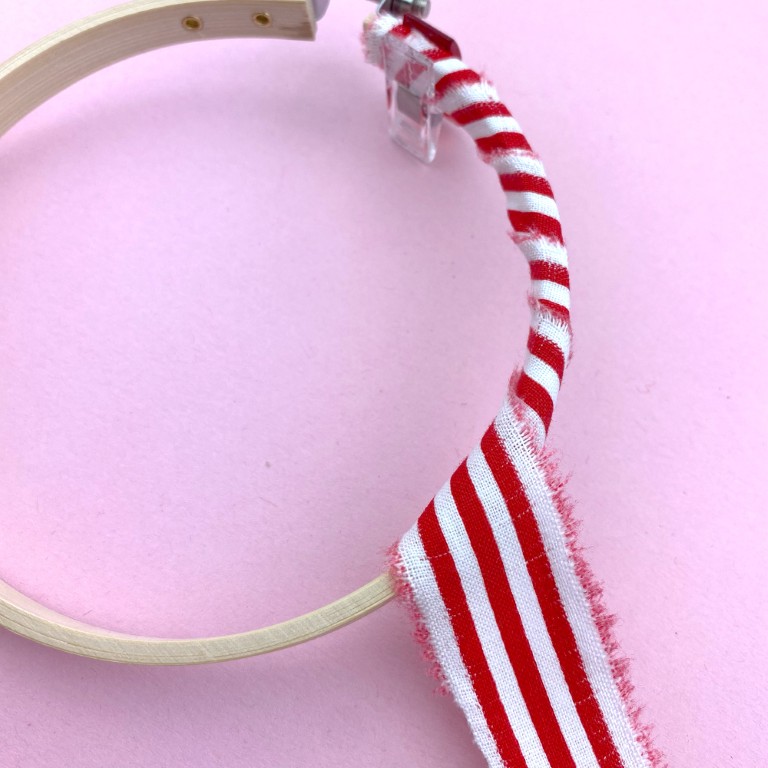
Secure the fabric in place using a bit of glue from the stick on the inner part of the hoop. Add a bit to the end of the fabric strip too if you need it. Trim the fabric strip and clamp it to dry in place.
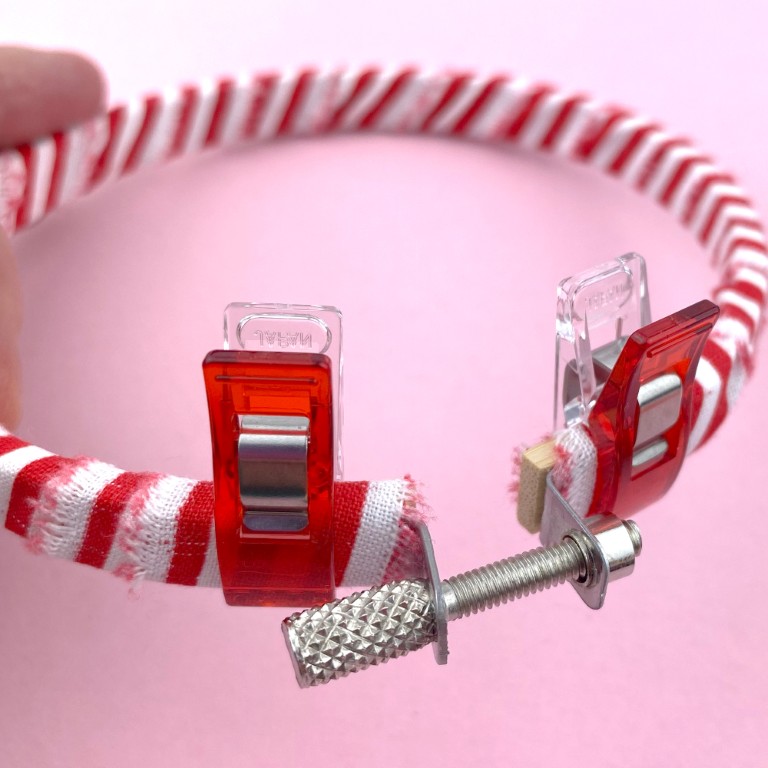
Prep for Framing
Trim around the finished embroidery. You want to leave about 1.5” excess fabric around the outer edge of the hoop. You can always cut more off if you need to, so don’t cut it too close to the hoop.

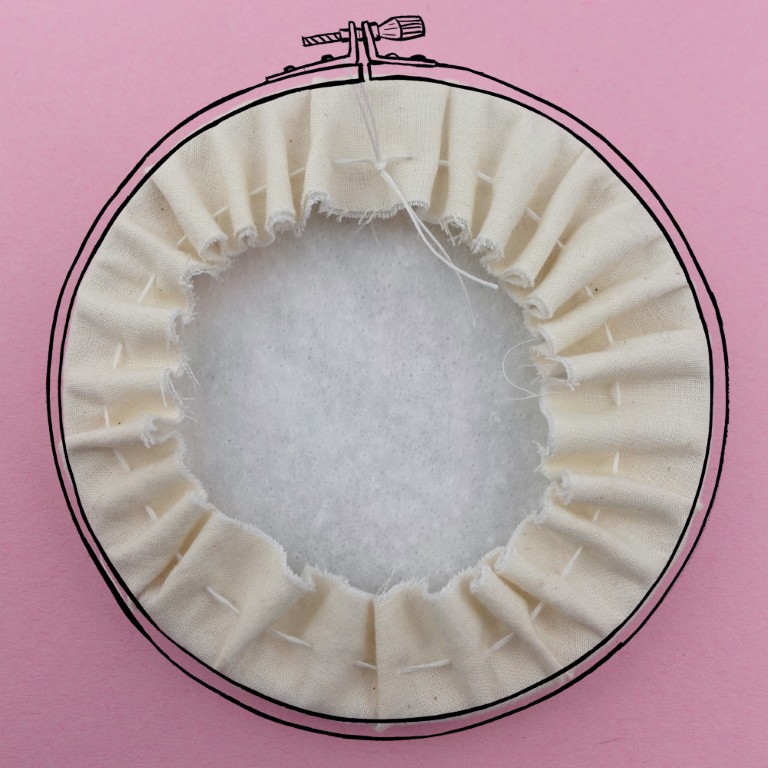
Place the embroidery and the quilt batting circle in the hoop. Make sure everything is centered. Tighten the hoop making sure your embroidery is centered where you want it to be. Pull and adjust, tighten the screw as needed.
Cut a long piece of the sewing thread, making sure it’s long enough plus enough to tie a knot. I like to double it up instead of using a single strand to stitch this part. Sew around the edge of the fabric, about ½” from the edge using a running stitch.

Pull both ends of the thread to gather and tie in a knot securely.
Backing
Using the red felt circle, place it centered on the backside of the hoop. Use a whip stitch or more decorative blanket stitch to secure the felt to the back side. You will sew this onto the base cotton fabric all the way around the hoop.

To personalize this ornament, you can stitch a message, a name or date on the felt before stitching this down.
Tie a ribbon or piece of fabric around the metal screw at the top. You can add a hanger using a few pieces of the DMC threads too!
Your ornament is ready to gift or enjoy yourself!
Download these instructions as a PDF