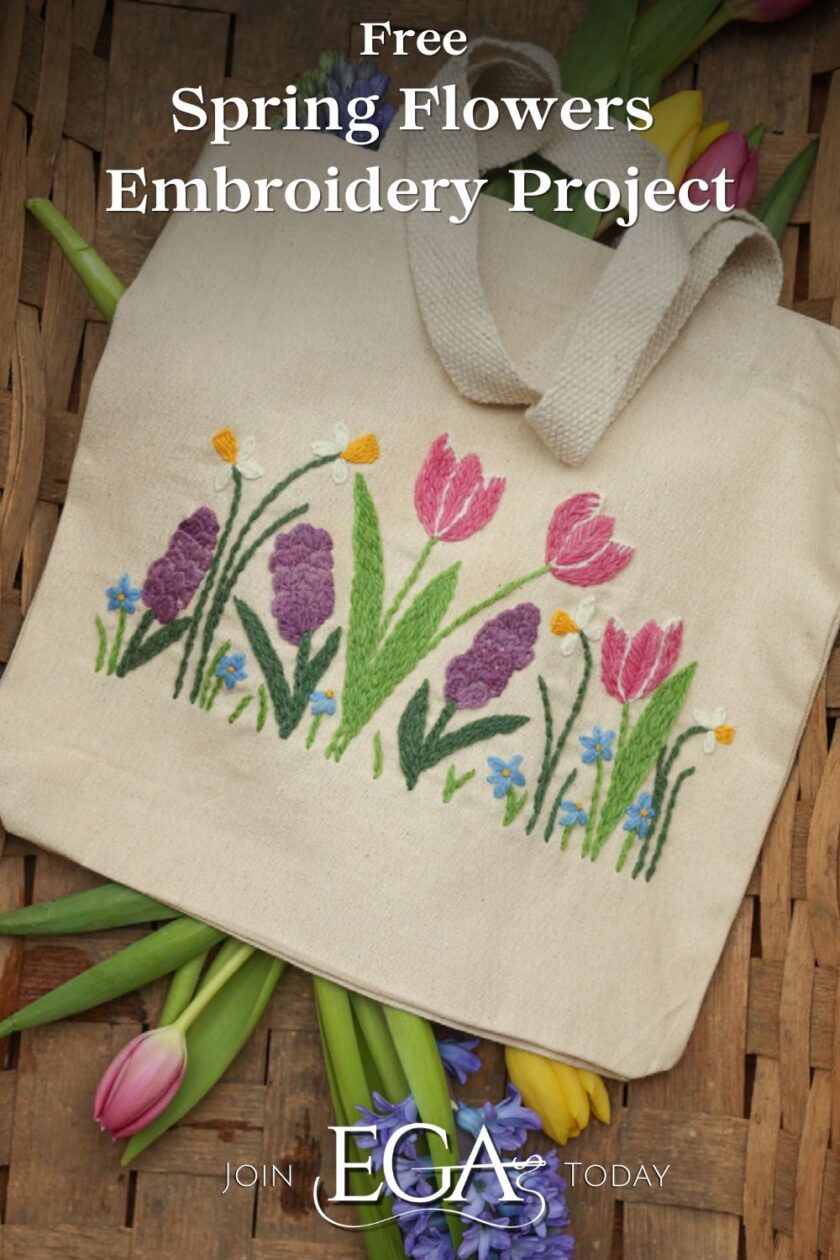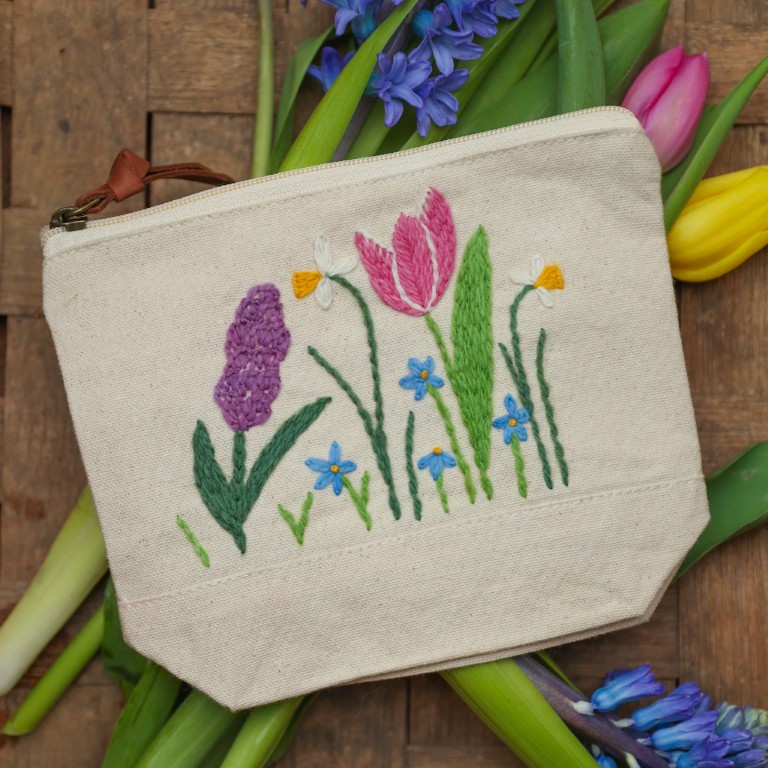
EGA is delighted to welcome back Meaghan Monroe of Subito Farm Designs! You may remember Meaghan from her perfect autumnal project, the free Outside the Hoop: Autumn Flowers Boot Embroidery. Now that spring is here, Meaghan is back to share the beautiful Spring Flowers, a quick surface embroidery project that can be stitched on a zipper pouch or tote bag. Meaghan has generously provided pattern templates for both!
Embroidery Level
Beginner
Materials and Instruments
- Spring Flowers Zipper Pouch and Tote Bag embroidery patterns – register for the EGA newsletter to receive it in your inbox! (EGA members can also download this pattern from the Publications page here.)
- Size 20 Chenille needle
- Fabric or zipper pouch. Pattern as shown uses a cotton canvas zipper pouch (8”x6.3” with a 2.4” gusset). The area of the embroidery should be approximately 4”x6”.
- Embroidery hoop. Pattern as shown used a 5” hoop, which was moved around to stitch the design because a larger hoop does not fit over the pouch. If stitching on fabric, a 7” hoop will fit the entire design.
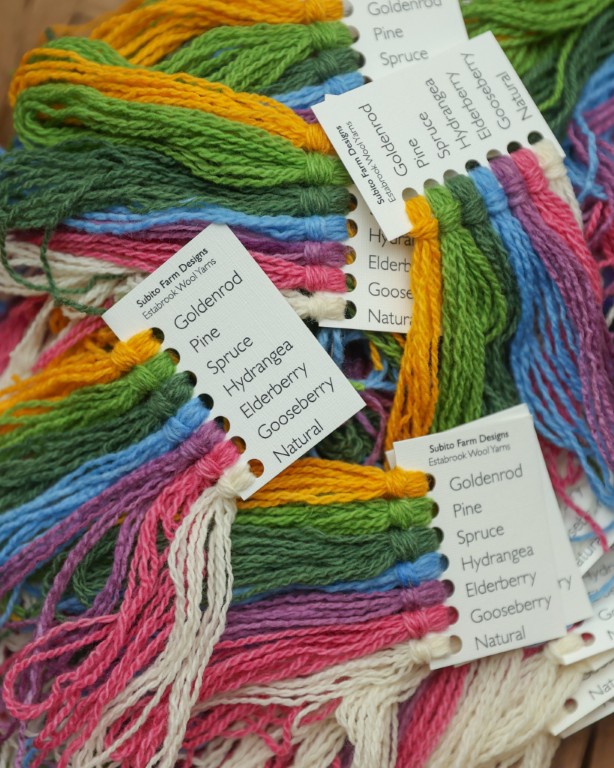
- Subito Farm Estabrook wool yarns in colors:
- Natural – 5 feet
- Goldenrod – 5 feet
- Pine – 8 feet
- Spruce – 9 feet
- Hydrangea – 5 feet
- Elderberry – 5 feet
- Gooseberry – 5 feet
- Scissors
- Fabric marker, or your choice of method to transfer design.
Yarn sets to stitch both the zipper pouch and tote are available on the Subito Farm Designs website.
Stitches Used
- Stem Stitch
- Buttonhole Stitch
- Fishbone Stitch
- Split Stitch
- Lazy Daisy Stitch
- Satin Stitch
- French Knots
- Chain Stitch
Stitch guide available at subitofarm.com/stitch-guide/
A Note About the Yarn
The yarn used in this project is Subito Farm Estabrook, a sport weight merino yarn. This yarn is just that – a yarn, rather than more traditional embroidery threads. This design works up very quickly in the yarn and is a great scrappy project for leftover yarns!
If you choose to stitch these designs in more traditional crewel threads or even in cotton threads they will stitch up just as nicely, but be aware you may need to add extra stitches in any sections that are filled in.
Transferring the Design
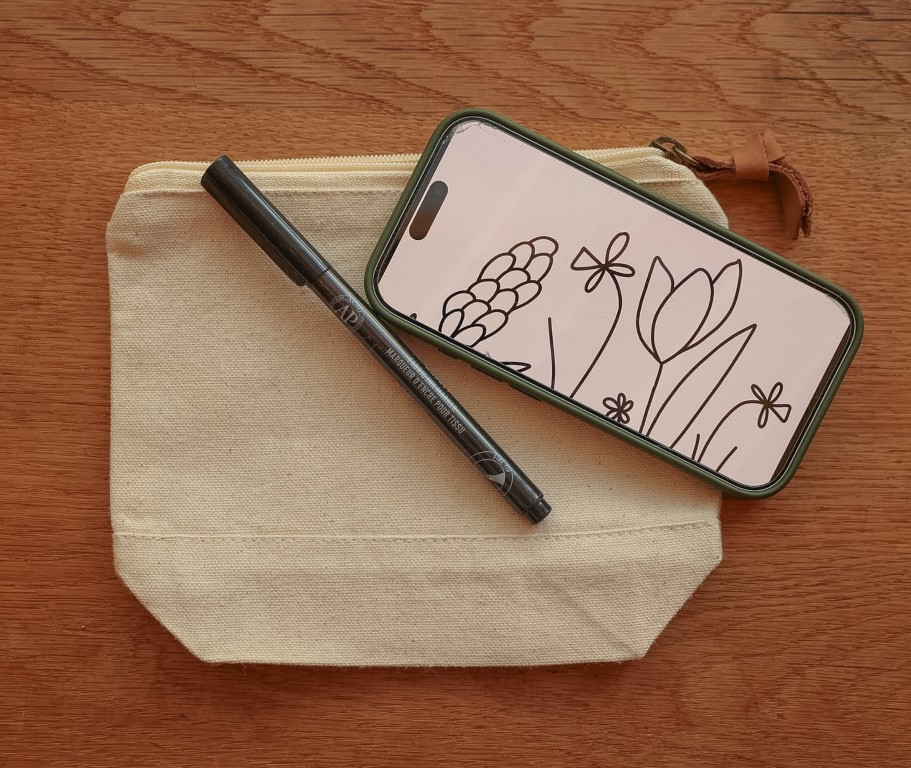
The easiest way to transfer the design is to use your phone or a tablet like a light box. With the design brought up to the correct size, you can trace the design onto the fabric using a permanent fabric marker. This technique works best in a darker room.
Another option is to use water soluble stabilizer with the design printed onto it and dissolve the stabilizer once you finish stitching.
In my sample you will see that I have screen printed the design onto the pouch. You can find the full kit for this project including the zipper pouch with screen printed design on my website.
Instructions

If you are using a 5” hoop place the hoop over the design so that the tulip and daffodils are within the stitching area.
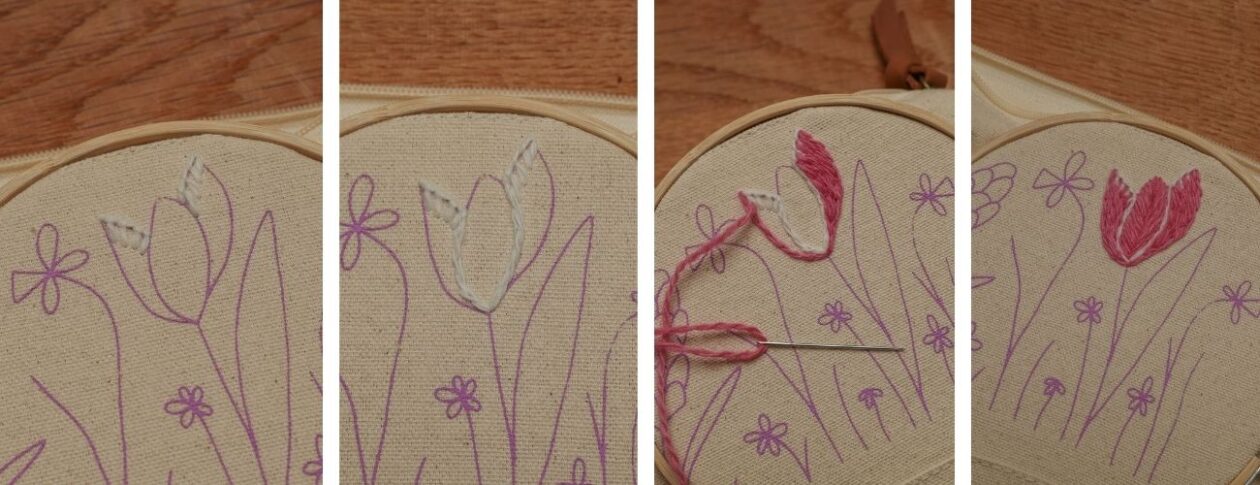
Stitch the tulip flower. Stitch the top edge of the outer two petals in Natural using Buttonhole stitch. Line the inside edge of the same petals in Natural using Split stitch. Fill and line the outer two petals with Split stitch in Gooseberry. Fill the center petal with Fishbone stitch in Gooseberry.
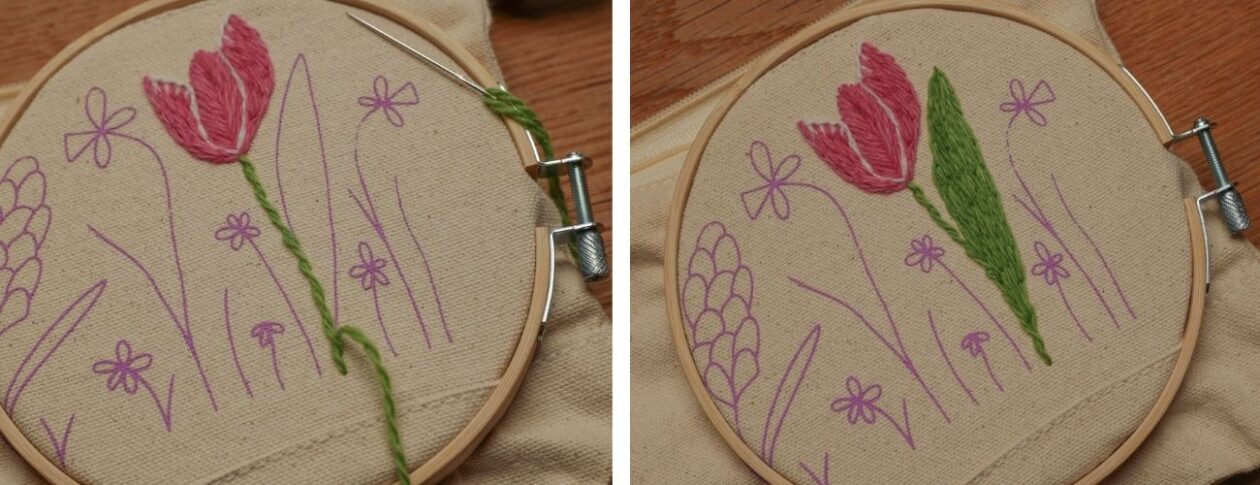
Stitch the stem of the tulip in Pine using stem stitch. Outline and fill the leaf of the tulip in Pine using Split stitch.
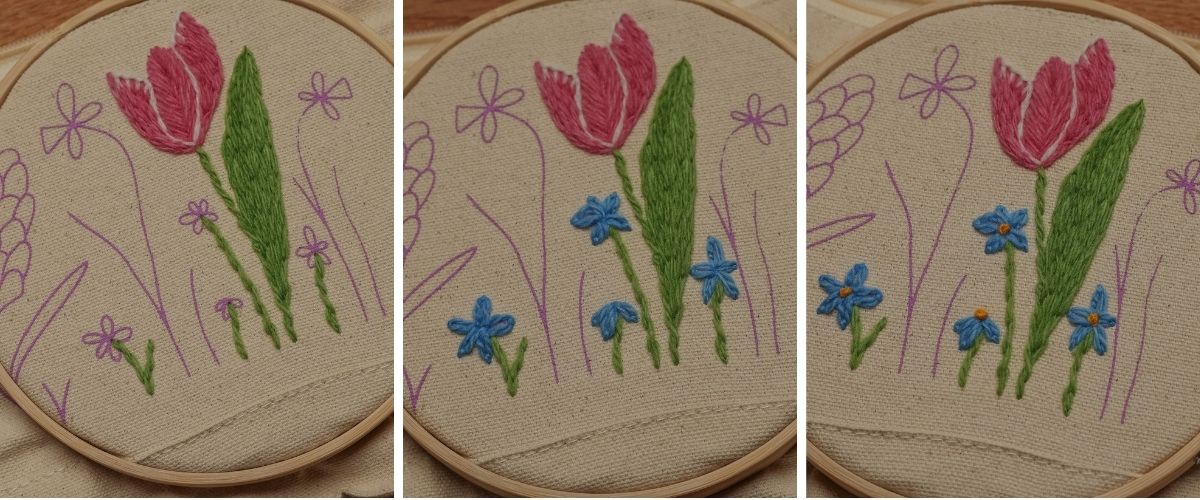
Stitch the stems of the forget-me-nots in Pine using Stem stitch. Stitch the forget-me-not flowers using Lazy Daisy stitches in Hydrangea. Finish the flowers with a single wrap French Knot in Goldenrod.

Stitch the stems and nearby foliage of the daffodils in Spruce using Stem stitch.
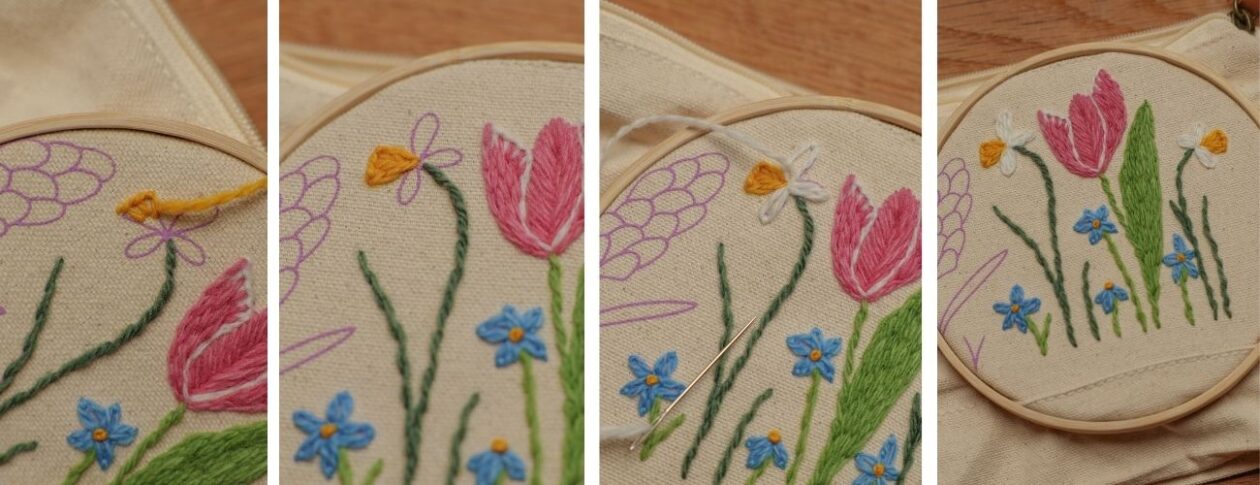
Stitch the daffodil flowers. Stitch the cup of the daffodils using Goldenrod in Buttonhole stitch to line the outer edge of the cup. Fill the remainder of the cup with Split stitch in Goldenrod. Stitch the petals of the flowers using Lazy Daisy stitch in Natural. Fill each petal with a few Satin stitches in Natural.
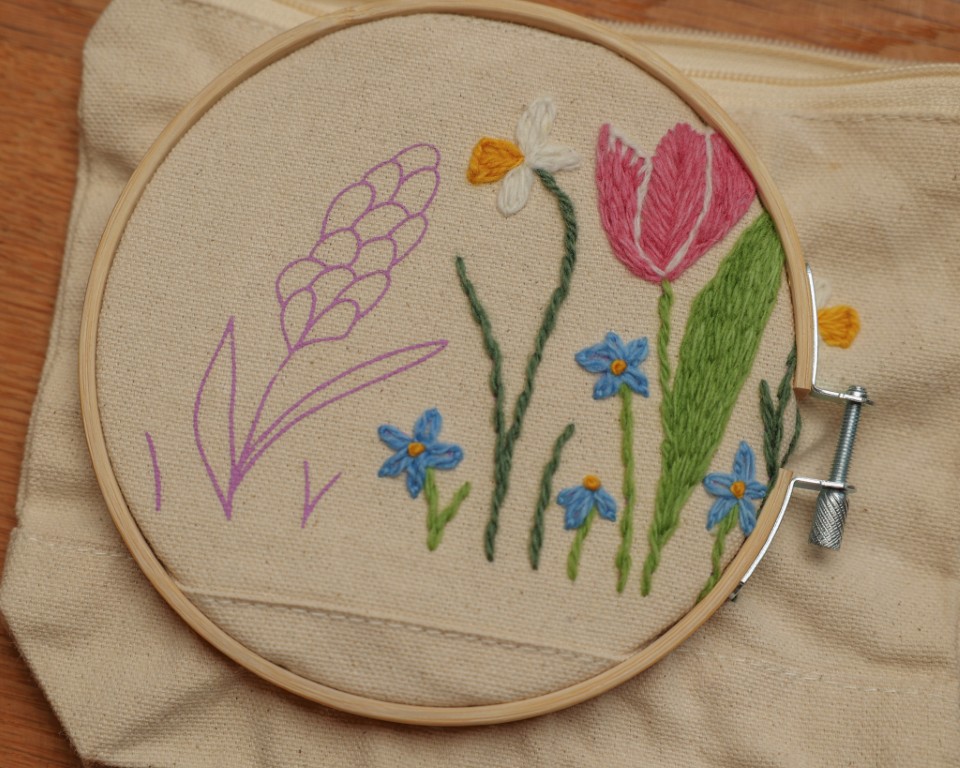
Now that we have stitched all of the sections within the hoop as it is currently positioned, we will move the hoop so that the hyacinth and the remaining grasses are in the hoop.
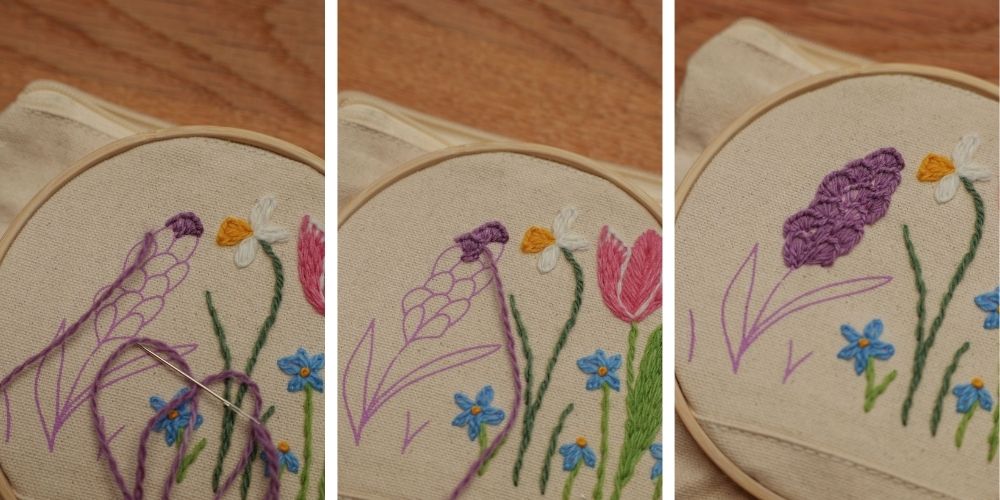
Stitch the hyacinth flower. Starting at the top and working left to right in each row, outline each floret with Buttonhole stitch in Elderberry. The tails of the Buttonhole stitch are the fill for each floret.
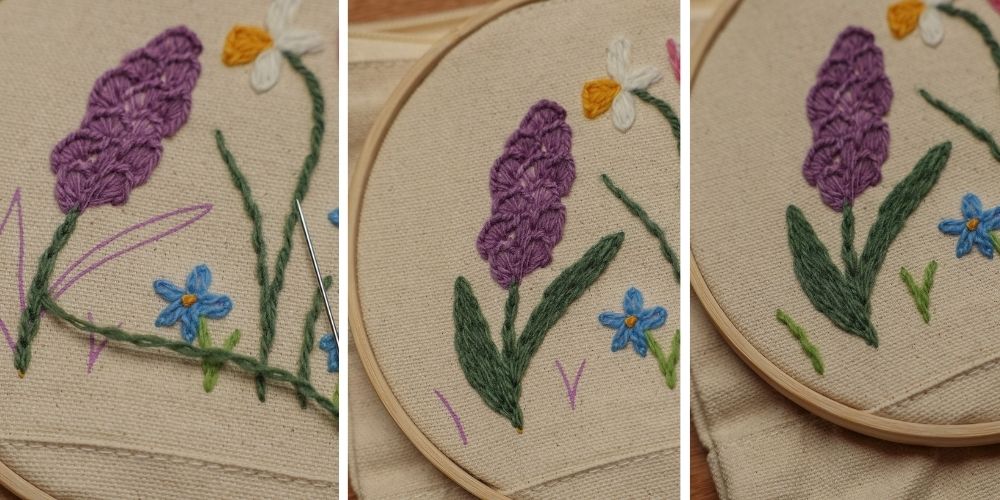
Stitch the stem of the hyacinth using Chain stitch in Spruce. The leaves of the hyacinth are lined and filled with Spruce using Split stitch. Finish by stitching any remaining grasses using Stem Stitch in Pine.
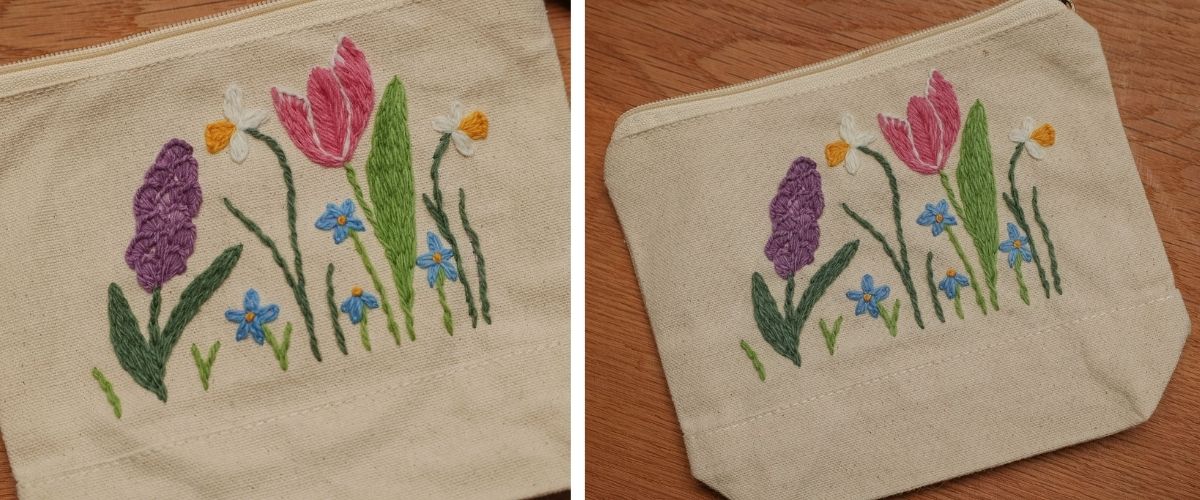
Now that you have finished stitching your project a quick iron with steam will remove any creases left by the embroidery hoop and your zipper pouch is ready to use!
BONUS – Spring Flowers Tote Project

Also Included is the pattern for the Spring Flowers tote bag. This pattern is a larger version of the one for the zipper pouch and uses all the same stitches for each flower. To stitch this design, follow all the same stitches for each flower.
The tote bag version of this design measures approximately 10”x6.6” and was stitched on a 12”x12” tote bag.
You will need the following yarn to stitch the tote bag:
- Goldenrod – 6 feet
- Hydrangea – 6 feet
- Elderberry – 15 feet
- Gooseberry – 12 feet
- Natural – 8 feet
- Spruce – 17 feet
- Pine – 21 feet
Click here to Download a PDF of these instructions